


 Introduction
One can create the own custom themes in OpenCart, OpenCart have really a neat and clean directory structure when dealing with the organization of the framework. Following are the major concepts covered in this chapter
- Structure of OpenCart
- Structure Of The Default Theme
- Custom theme
Description
OpenCart is developed using MVC design pattern. The MVC permits separation of concerns between the data and also the presentation. As a theme developer, one should not worry about tweaking the files all the time that contains the application logic and template code together. OpenCart have really a neat and clean directory structure when dealing with the organization of the framework.
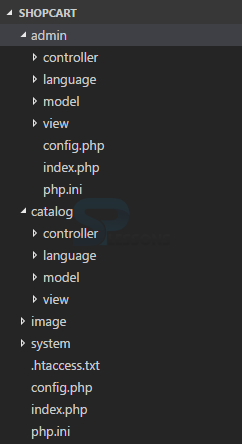 The files related to the backend interface are located in the admin directory of OpenCart and the files related to the front-end interface are placed in the catalog directory.
Description
The OpenCart default theme is located in the view directory under the catalog directory, along with the theme directory the view directory have another directory called javascript.
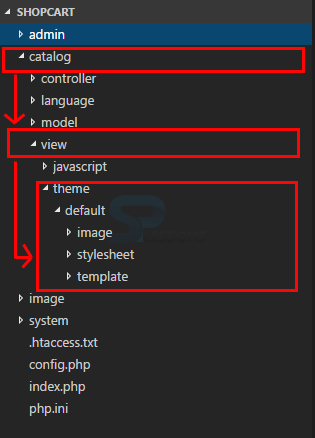 Under the theme directory there is another directory called default which is the only built-in theme available in OpenCart. The default theme structure would look like as follows.
Image -
All the theme images are stored in the image folder
Stylesheet -
The code related to style, design are located in this folder.
Template -
All the front-end template are located in this folder and are arranged in a neat and clean way.
Description
The default theme can serve as the base for creating a custom theme, one can build a custom theme in OpenCart in two different ways.
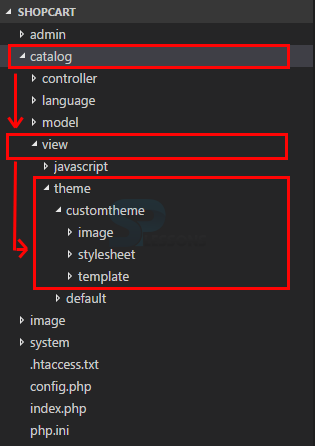 Now just copy few file like header.tpl and home.tpl from the template directory of default theme and open the header.tpl file located under the path template/common/header.tpl, the code in this file is the main reason for displaying the header part throughout the store site, there are some styleheet references hard coded to default theme so change the reference to the newly created theme directory.
Change the below line in the code as.
[c]<link rel="stylesheet" type="text/css" href="catalog/view/theme/default/stylesheet/stylesheet.css" />[/c]
Replace
[c]<link rel="stylesheet" type="text/css" href="catalog/view/theme/customtheme/stylesheet/stylesheet.css" />[/c]
Now in order to activate the created theme follow the steps below.
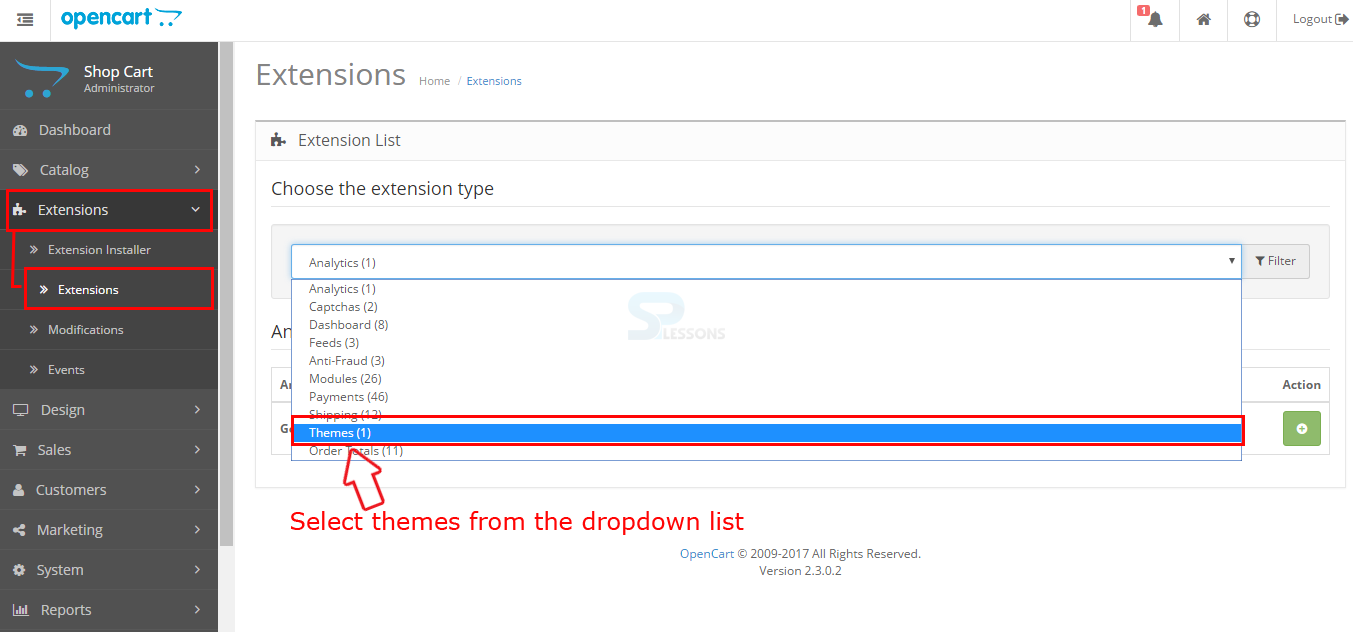
Step 1 -
Open the admin dashboard, go to Extension in the side menu bar. Select the Themes from the dropdown menu from the Extension List as shown in the image below.
Now just copy few file like header.tpl and home.tpl from the template directory of default theme and open the header.tpl file located under the path template/common/header.tpl, the code in this file is the main reason for displaying the header part throughout the store site, there are some styleheet references hard coded to default theme so change the reference to the newly created theme directory.
Change the below line in the code as.
[c]<link rel="stylesheet" type="text/css" href="catalog/view/theme/default/stylesheet/stylesheet.css" />[/c]
Replace
[c]<link rel="stylesheet" type="text/css" href="catalog/view/theme/customtheme/stylesheet/stylesheet.css" />[/c]
Now in order to activate the created theme follow the steps below.
Step 1 -
Open the admin dashboard, go to Extension in the side menu bar. Select the Themes from the dropdown menu from the Extension List as shown in the image below.
 Step 2 -
Now the themes for the store get displayed click on the Edit button as shown in the image below.
Step 2 -
Now the themes for the store get displayed click on the Edit button as shown in the image below.
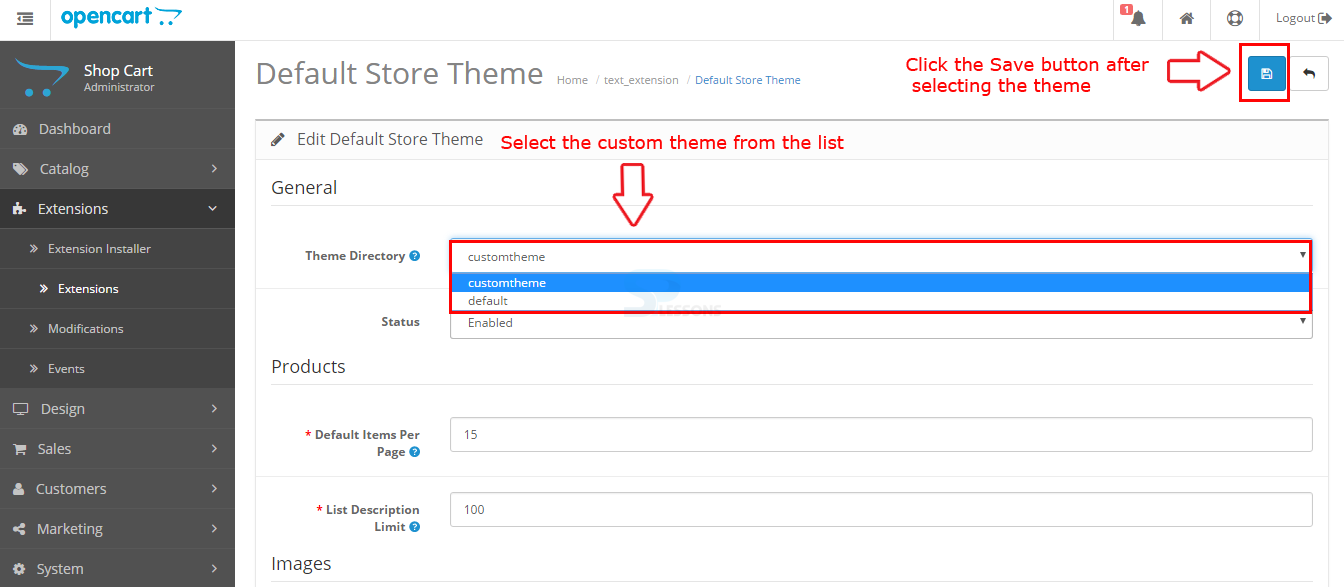
 Step 3 -
The page now redirect to another page, now select the built theme using the drop down box under the Theme Directory and then click the Save button on the top as shown in the image below.
Step 3 -
The page now redirect to another page, now select the built theme using the drop down box under the Theme Directory and then click the Save button on the top as shown in the image below.
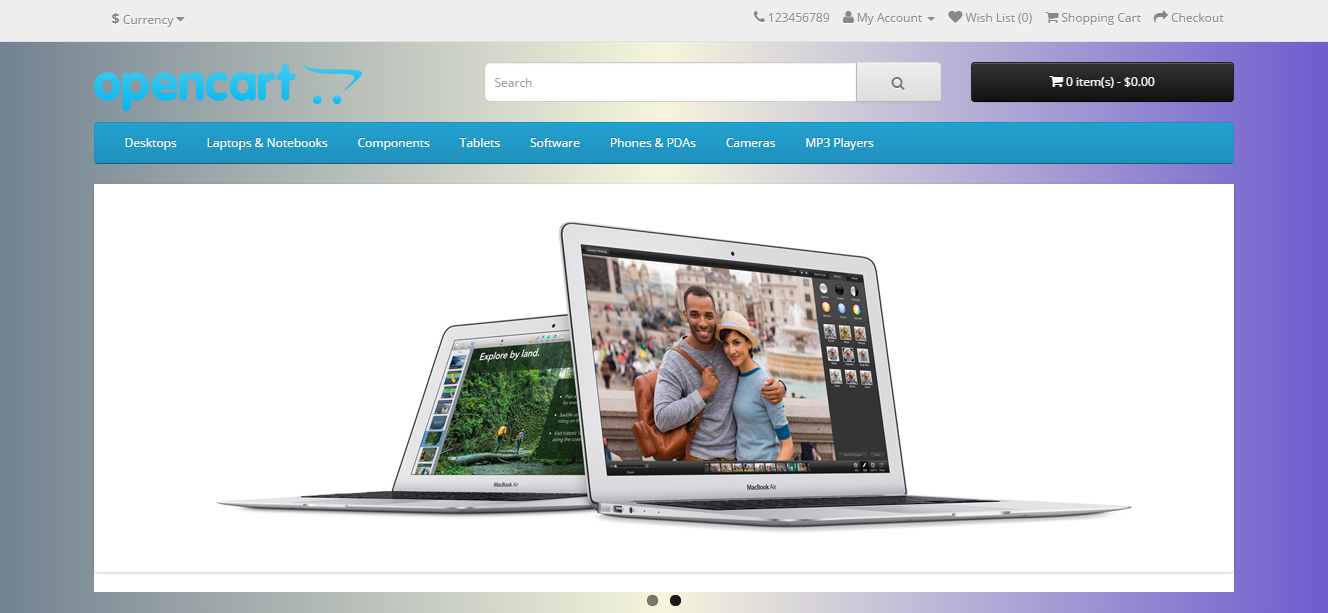
 Step 4 -
Now go to the store home page and check the output, the theme get replaced with the new built theme.
Step 4 -
Now go to the store home page and check the output, the theme get replaced with the new built theme.
- One can completely replace the front-end files with the new files [OR]
- Change the few things such as layouts color combinations.
Key Points
- The basic theme structure of the OpenCart have a neat and clear directory.
- OpenCart is based on the MVC design pattern.
- The default them can be the base for creating a new theme in OpenCart.