


 Introduction
The product categories determine organizing the products in store. This is where users should spend quite a bit of time for setting up the store from scratch. The categories are listed according to their Sort Order number that users can assign manually so that the list is more structured and easy to work with. Following are the major concepts covered in this chapter.
- Categories Overview
- Creating a new category
Description
The store font default theme of OpenCart contain the categories on the top menu of the home page and also on the left side of the product pages. The customers can view the similar products with in the same category which is done with the help of navigation feature. Customers can also compare the similarities between the products with in the category before purchasing. When user add any product to the store, OpenCart ask the user to create a product category to sort them in. If adding product without defining a category the product will not show up under any category of the store font. So, in order to create the product accessible for the customer creating category is mandatory for the product.
On the OpenCart dashboard click "Catalog" button and then click on the "Category" section in the dropdown menu to get access the categories page of the store. The page contain the list of all the categories in the store as shown in the image below.
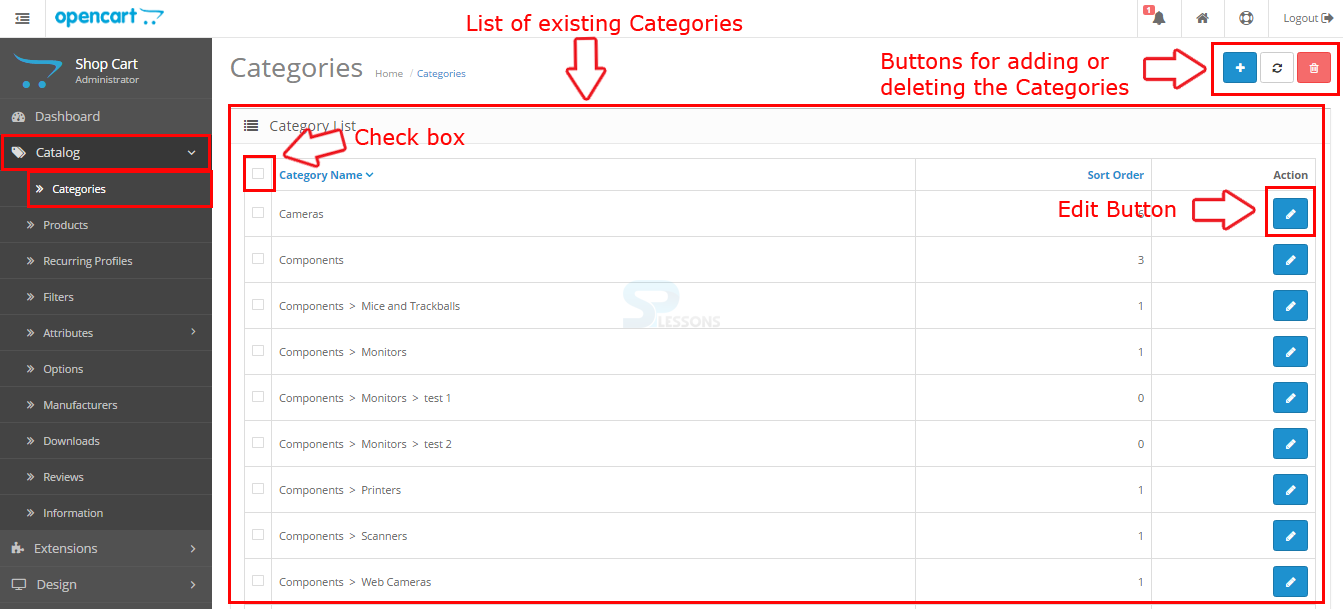 The categories in the above image are included with the default products after installing the OpenCart. One can delete the default product categories or replace with the own product categories. Click on the check box on the required category and click "Delete" button provided on the upper right corner for deleting the category completely. Click on "Edit" button to update or replace the category. In order to add the new category click on the "+" button on the upper right corner indicated in the above image.
Description
In order to create a new category for adding a product to the store login to administration first and follow the steps below.
Step 1
Click on the "Catalog" from the side menu bar on the dashboard and then click on the "Category" section in the dropdown menu, now the page get redirected to the Categories list available in the store, to add the new category click on the Add button available on the upper right corner with “+” symbol as shown in the image below.

Step 2
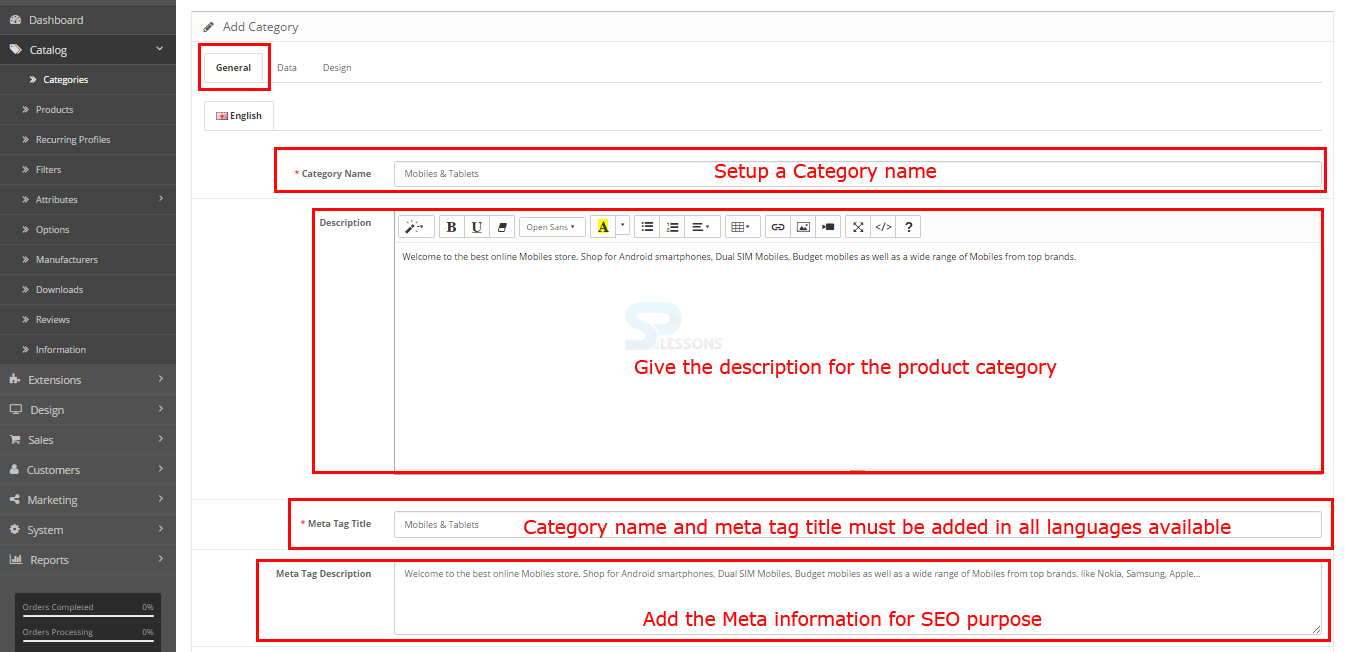
In Catalog -> General tab, one should set the name for the category and give the description for the category. Add the Meta information for SEO purpose, using these information the search engines like Yahoo and Google index the product category better and also associate with the products. Note that category name and Meta tag title must be added in all the available languages.
Step 3
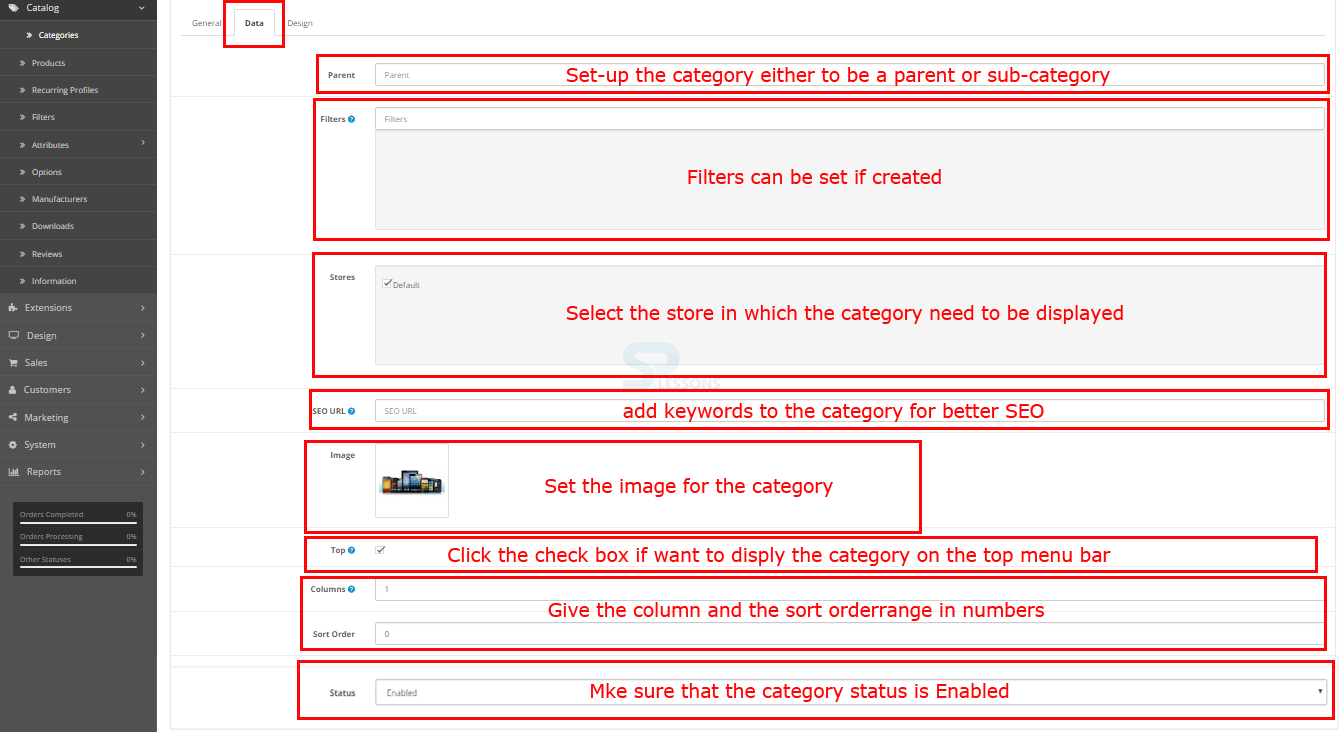
Now under Category -> Data tab, choose the parent category only if the new category is the sub-category. Filters can be set if created using the “Filter” section. In "Stores" section, select the store in which the category to be appeared, initially the store is set to default. Select the image for the category in the "Image" section, the option “Top” is used to display the category on the top menu bar, the option “Sort order” is used to sort the category in an alphabetical order and range from “0”. Make sure that the Category Status is "Enabled" before proceeding to the third tab in order to complete the category setup.
Step 4
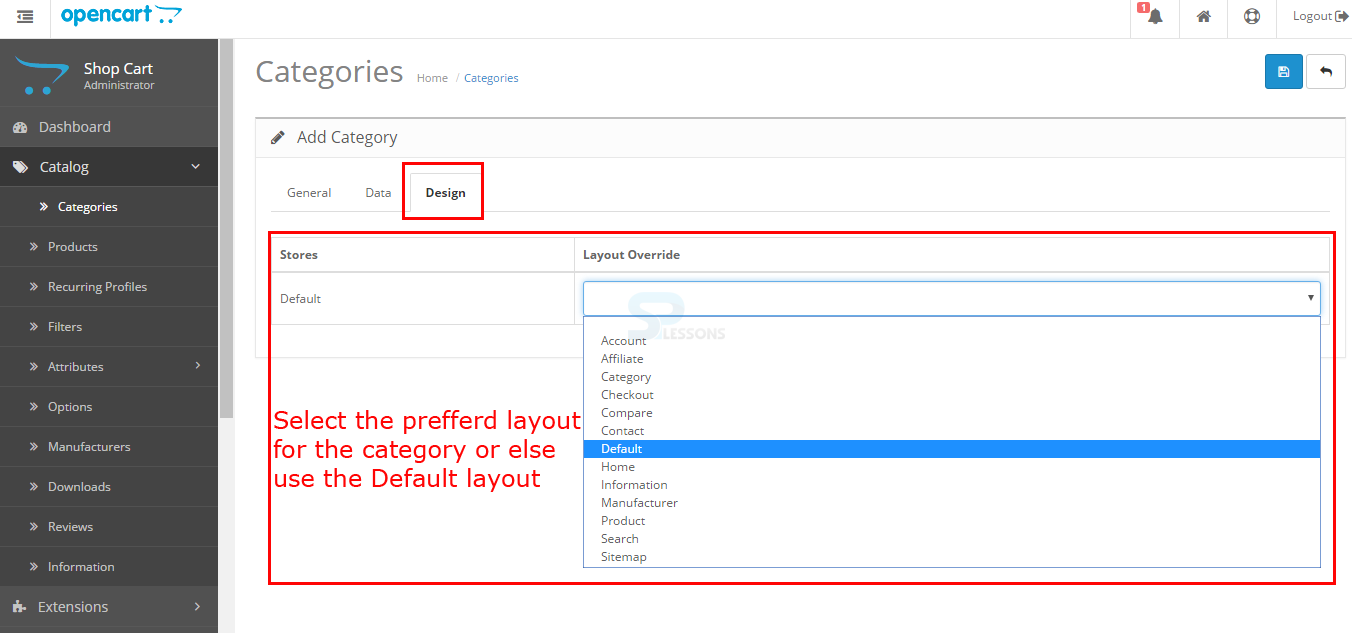
Under the Category -> Design tab, the desired Layout for the category can be selected, if one have a custom theme select the preferred layout using the dropdown box, or else leave the layout to be Default.
Step 5
In order to apply the changes, click on the “Save icon” provided on the upper right corner of the page on the top as shown in the image below.

Step 6
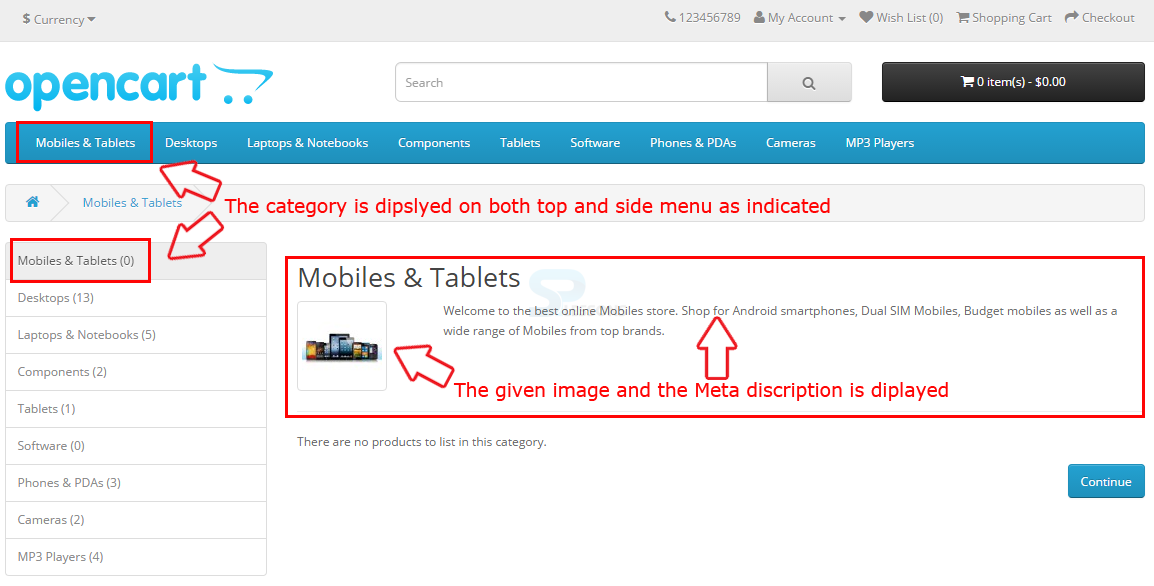
Now, check the store font, the new category is displayed on the top of the menu bar and as well as on the side menu bar indicated in the image below.
Key Points
- The products are organized in the store using the categories.
- The categories are displayed on the top menu bar of the store font.
- Categories help customers to view the similar products related to the same category.
- A category is mandatory in order to display a product in a store.