 Introduction
The categories in Magento can be used for better and easy sorting of the store products. Using categories will improve the user experience, a specific product can be easily identify by a customer with the help of categories. Following are the major concepts covered in this chapter.
- Categories
- Creating a new Category
 Description
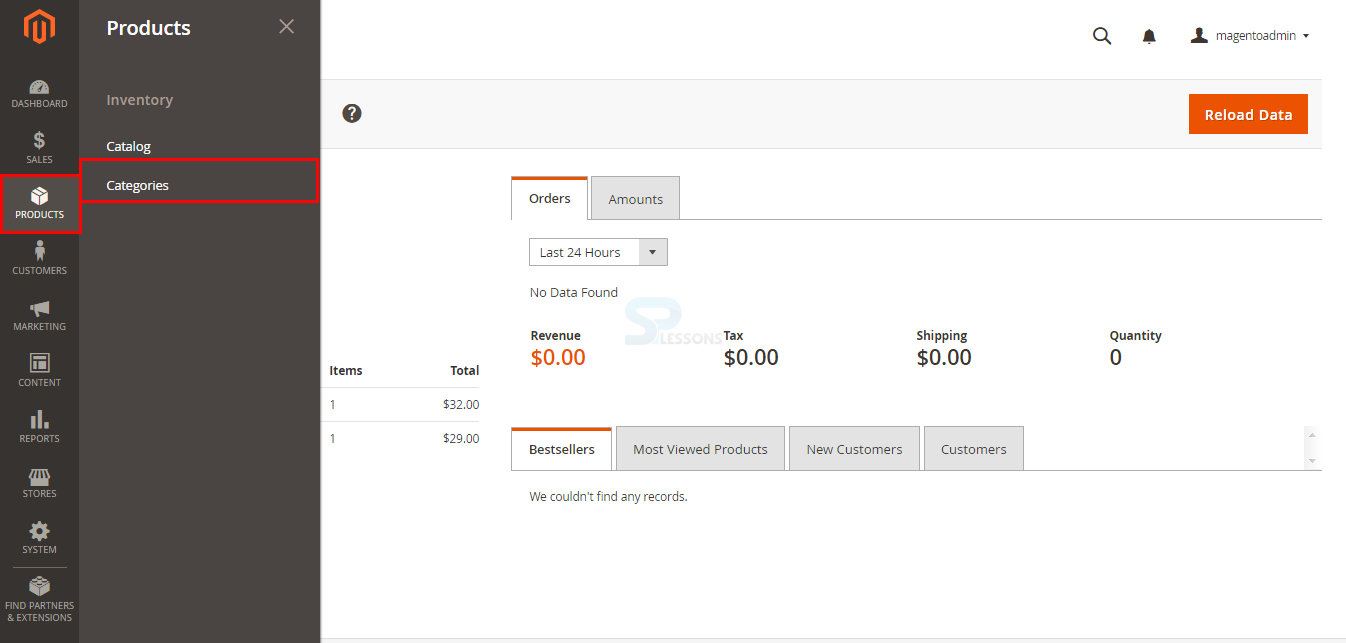
Magento depends on categories to hold all the products together in order. Magento comes with a default root category after installation, one can create a new category or can replace the existing default category with the own name. In order to create or edit a category, login to the admin panel and go to the path Products -> Categories.
 Description
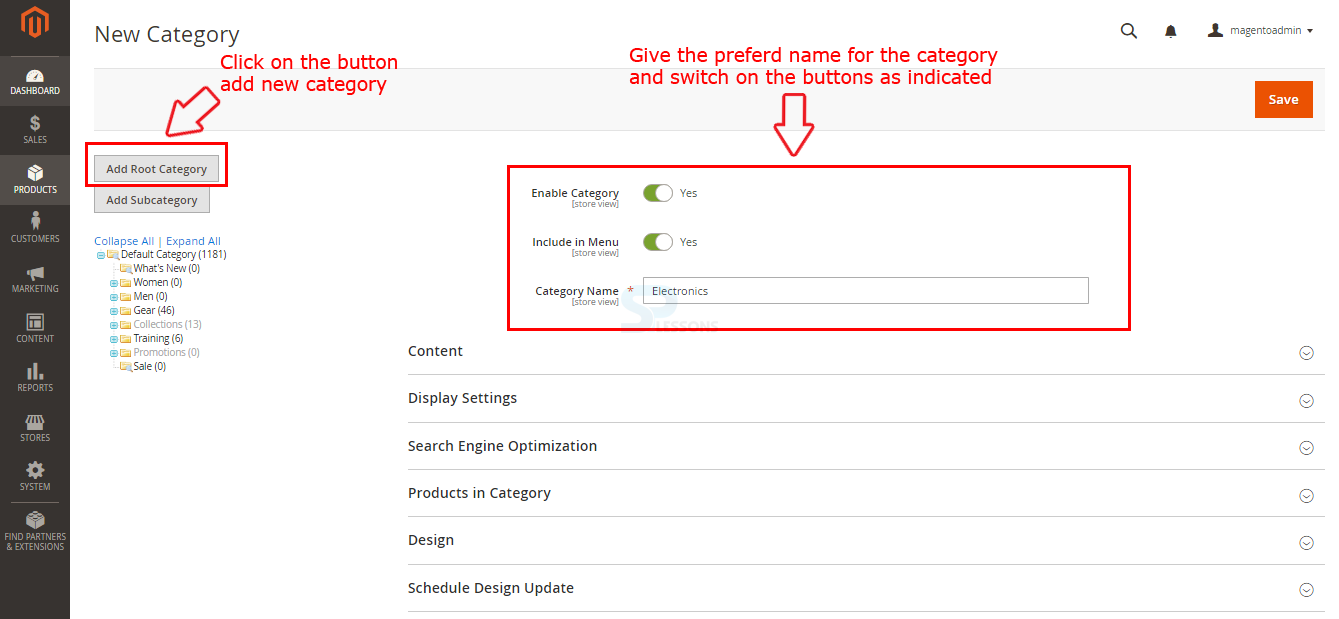
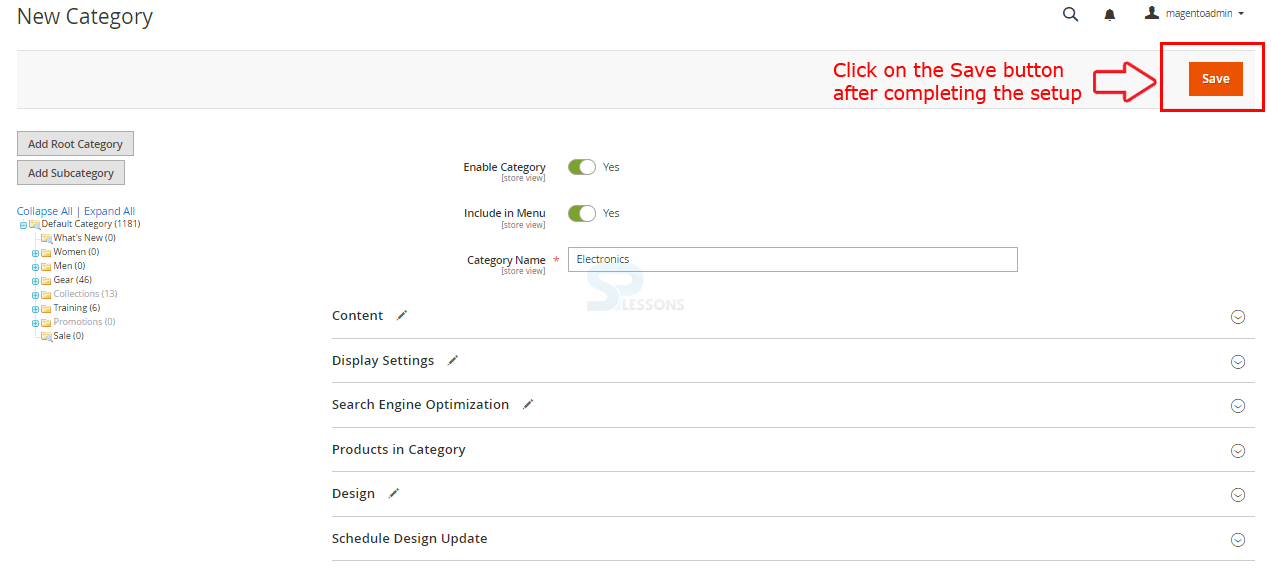
Magento already contain a default category, so create a new root category and suppose the name as Electronics. One can add a new category under the selected root category by clicking the Add Root Category button or a new category can be added as a sub-category to the existing category by using the Add Subcategory button, enable the category and add the category to the menu by switching on the Enable Category and Include in Menu buttons as shown in the image below.
Now, setup all the required information for the category in the following tabs
Content tab -
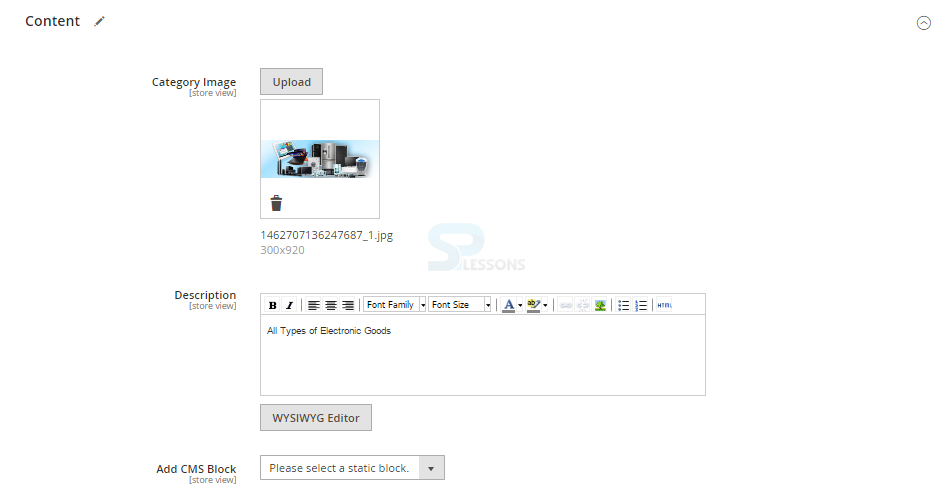
In the content tab one need to setup the following information for creating a category.
Category Image -
Upload an image for the category using the Upload button.
Descriptions -
Give the preferred description for the category.
Add CMS Block -
Choose the CMS block from the dropdown list.
Display Settings -
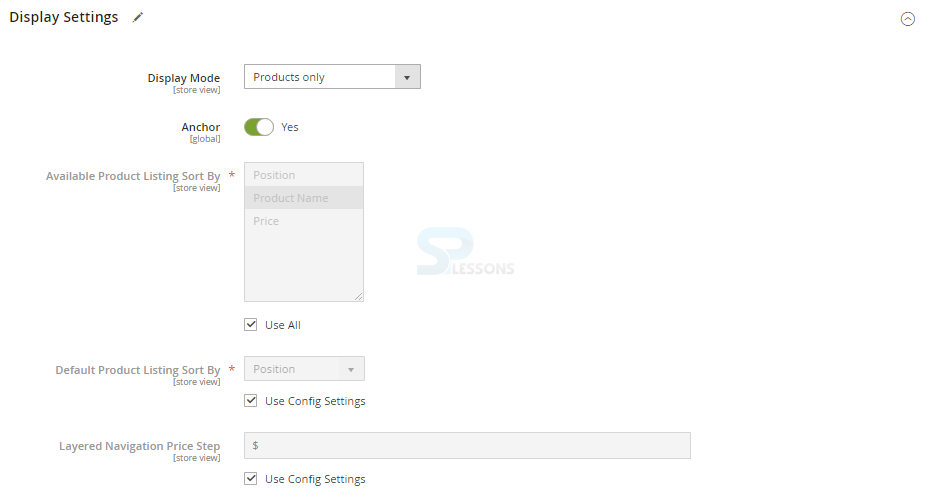
In the Display Settings tab one need to set up the following information.
Display Mode -
If one want to show the static block content to customers select the Static Block Only from the drop down list or can also select the Static Block or Product Only.
Anchor -
Switch to Yes or No by dragging the button.
Available Product Listing Sort by -
Uncheck the check box and select the preferred options.
Default Product Listing Sort By -
Uncheck the check box and select the preferred options.
Layered Navigation Price Step -
Enter the Price step.
Search Engine Optimization -
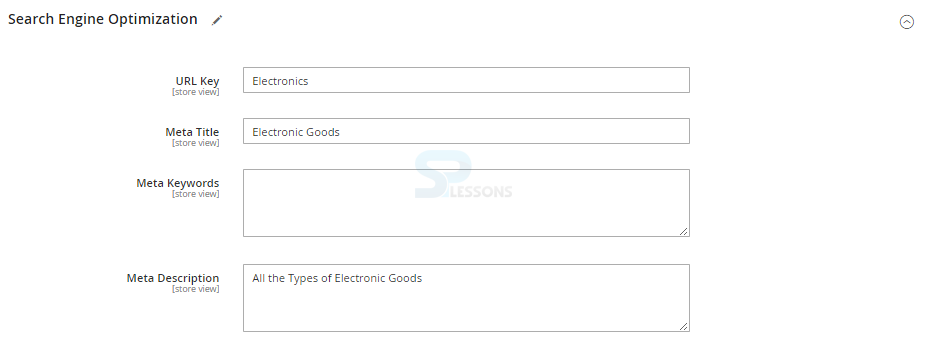
In the Search Engine Optimization tab one need to set up the following information.
URL Key -
One can fill the own URL key or it will automatically generate based on the category name.
Meta Title -
Give the SEO title for the category.
Meta Keywords -
Add the key Words for the category.
Meta Description -
Give the preferred description for the category
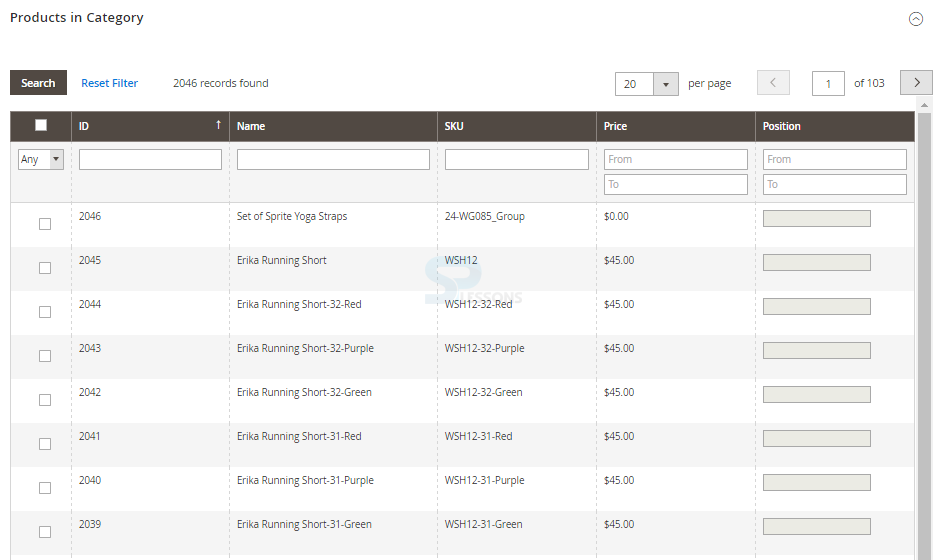
Products in Category -
The tab gives the list of products that are to be displayed in the created category.
Design -
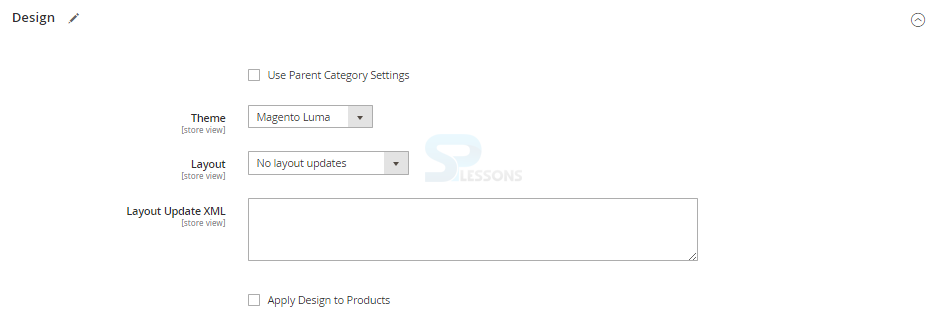
In the Design tab, one need to set up the following information.
Theme -
Chose the preferred theme from the drop down list
Layout -
Select the layout such as 1 column, 2 columns with left bar or empty.
Layout Update XML -
One can skip this if the Page Layout is not selected.
Schedule Design Update -
The tab contains the option for choosing the update time frame from and to date as shown in the image below.
After completing all the set up requirement for category click on the Save button available on the top right corner as indicated in the image below.
 Key Points
- Categories help customers to find a specific product easily.
- Magento comes with a default root category.
- One can create a new category or can replace the existing default category with the own name.


