


 Introduction
The Magento store admin is the back office protected with password. At the back end one can set up all the admin tasks such as order management, promotions, products list management and more. A day-to-day basis management task can be performed at the back end. Following are the major concepts covered in this chapters.
- Admin Login
- Dashboard
- Admin menu
Description
All the day-to-day management task and the general configuration settings are managed in the Magento admin panel.
In order to login to the admin panel, for the new Magento installation do the following.
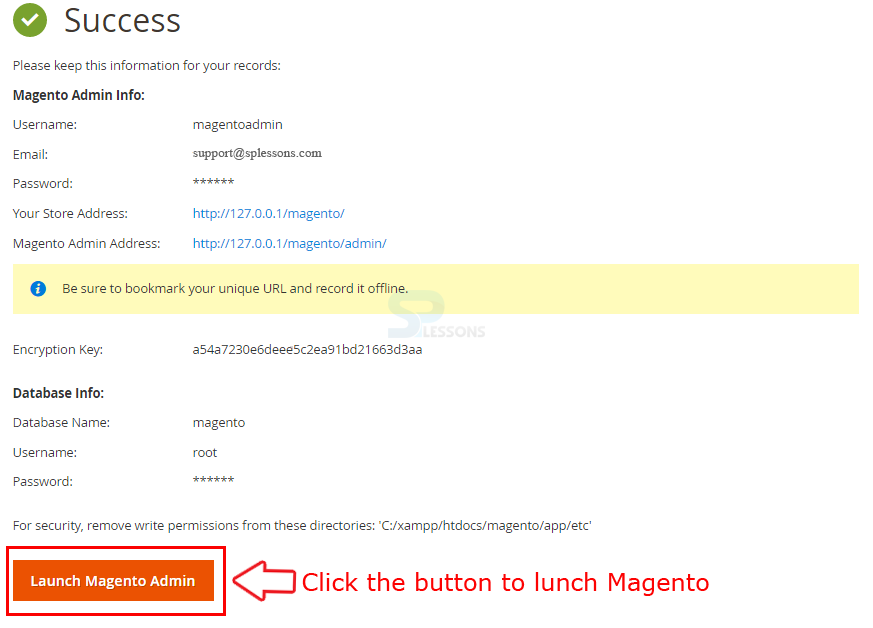
After completing the installation the page display the Success message along with the admin details and click on the button Lunch Magento Admin to lunch the Magento Admin as indicated in the image.
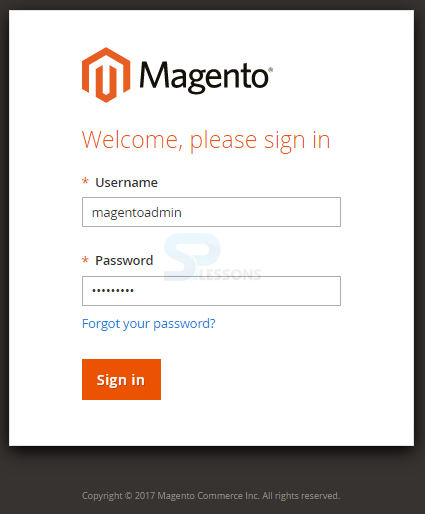
 The page redirect and opens a new tab, give the username and password given while installing the Magento in the username and password fields and click Sign in button for accessing the admin panel.
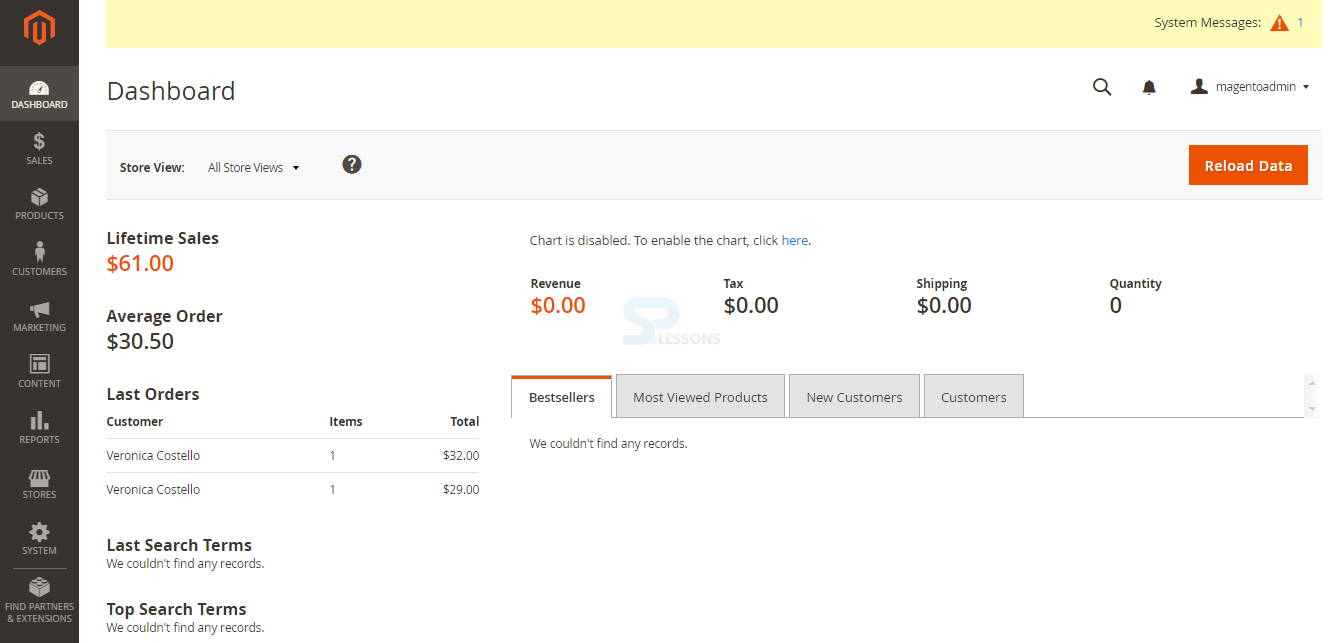
 The page now display the Admin panel as shown in the image below.
 Notifications -
Every Magento store has a Notifications, earlier it was called as Message Inbox, here one receives messages from Magento and are rated by priority and related to latest updates, scheduled maintenance, upcoming event and more.
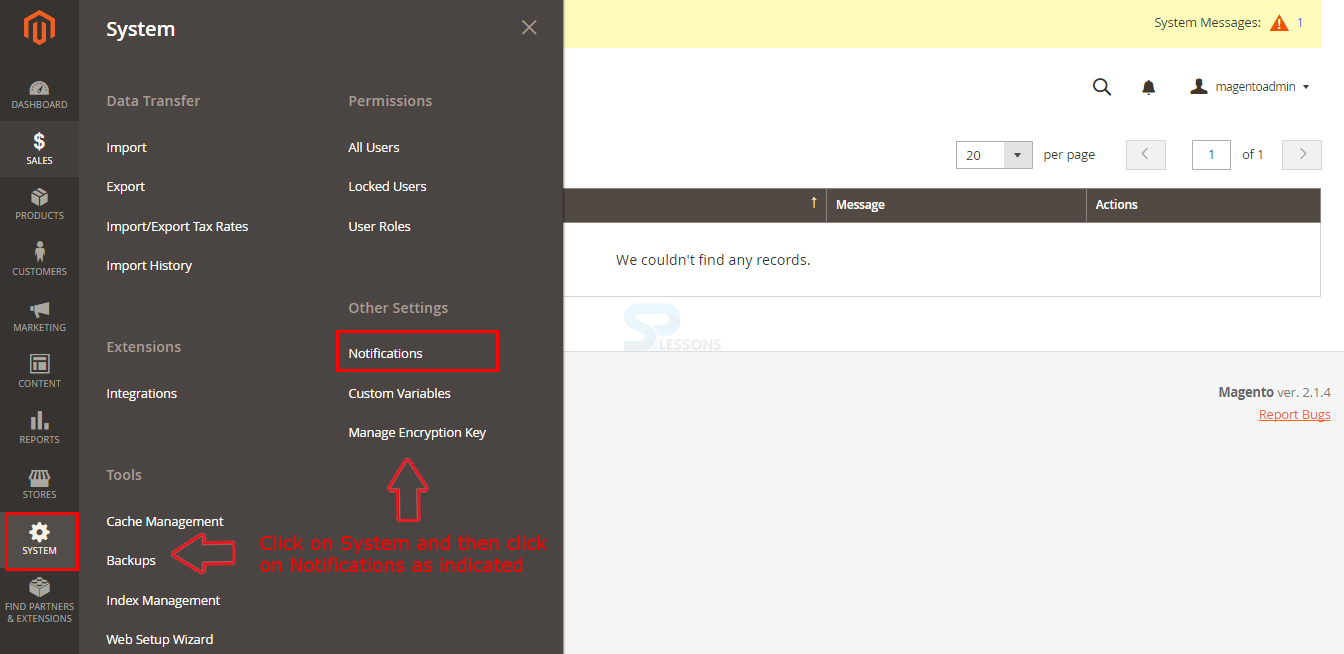
In order to check the message inbox go to path system -> Notifications as indicated in the image below.
Notifications -
Every Magento store has a Notifications, earlier it was called as Message Inbox, here one receives messages from Magento and are rated by priority and related to latest updates, scheduled maintenance, upcoming event and more.
In order to check the message inbox go to path system -> Notifications as indicated in the image below.
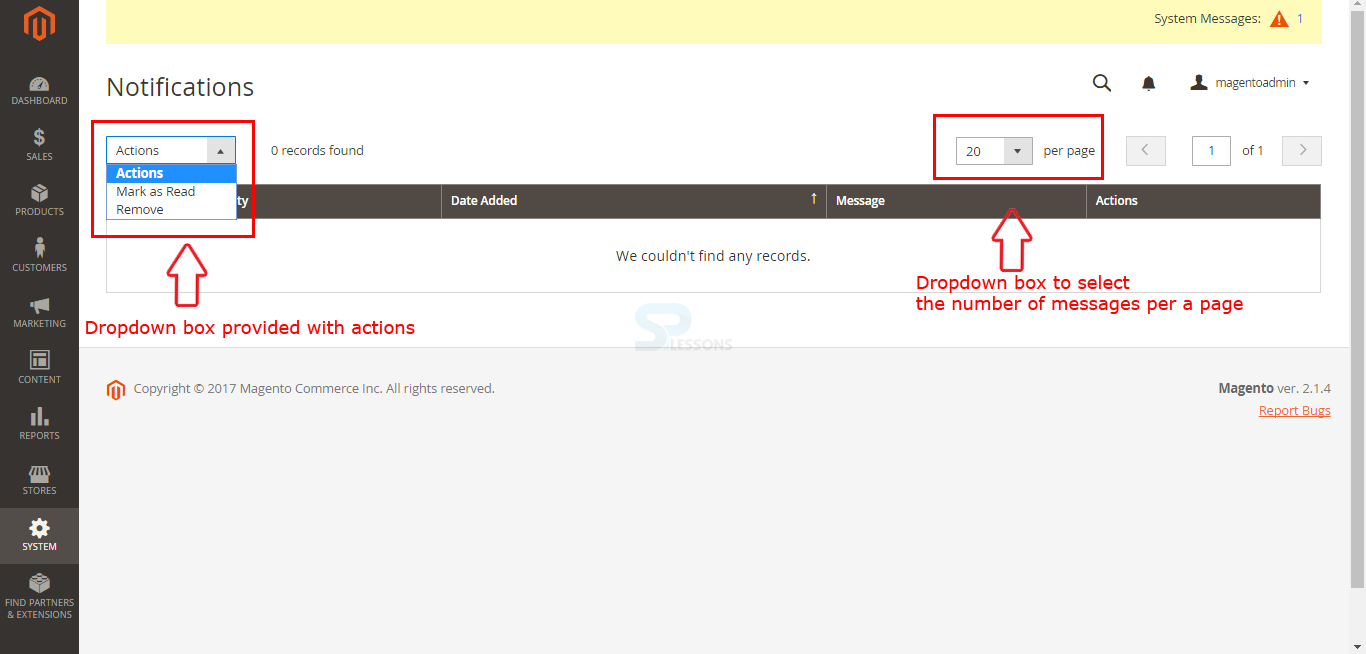
 a page get displayed with few options for performing some actions like removing or selecting number of messages per a page as shown in the image below.
Description
The Dashboard is the main page that shows up when signed into the Admin. It's a center point of critical data about the well being of the eCommerce site, and includes snapshots of Lifetime Sales, Average Orders, Top Search Terms, Bestsellers, and Most Viewed Items and on.
The image below is the admin dashboard of Magento 2, on the left side of the screen the complete information about lifetime sales, average orders, last search term and top search terms can be seen.
 The graph shows the requests and sums for the chose date range. One can utilize the tabs over the chart to flip between the two perspectives. The tabs at the base provide fast reports about best-selling and most saw items, new clients and the individuals who have obtained the most. The dashboard is the default startup page for the Admin, although you can change the design to show an alternate page when sign in. One can also set the starting dates used in dashboard reports and can deliver Dashboard preview reports for each store see. The tabs at the bottom of the page outline.
Configuring the chart in Magento 2 -
In order to configure the chart in Magento. Go to the path Store -> Configuration under the settings mode.
The graph shows the requests and sums for the chose date range. One can utilize the tabs over the chart to flip between the two perspectives. The tabs at the base provide fast reports about best-selling and most saw items, new clients and the individuals who have obtained the most. The dashboard is the default startup page for the Admin, although you can change the design to show an alternate page when sign in. One can also set the starting dates used in dashboard reports and can deliver Dashboard preview reports for each store see. The tabs at the bottom of the page outline.
Configuring the chart in Magento 2 -
In order to configure the chart in Magento. Go to the path Store -> Configuration under the settings mode.
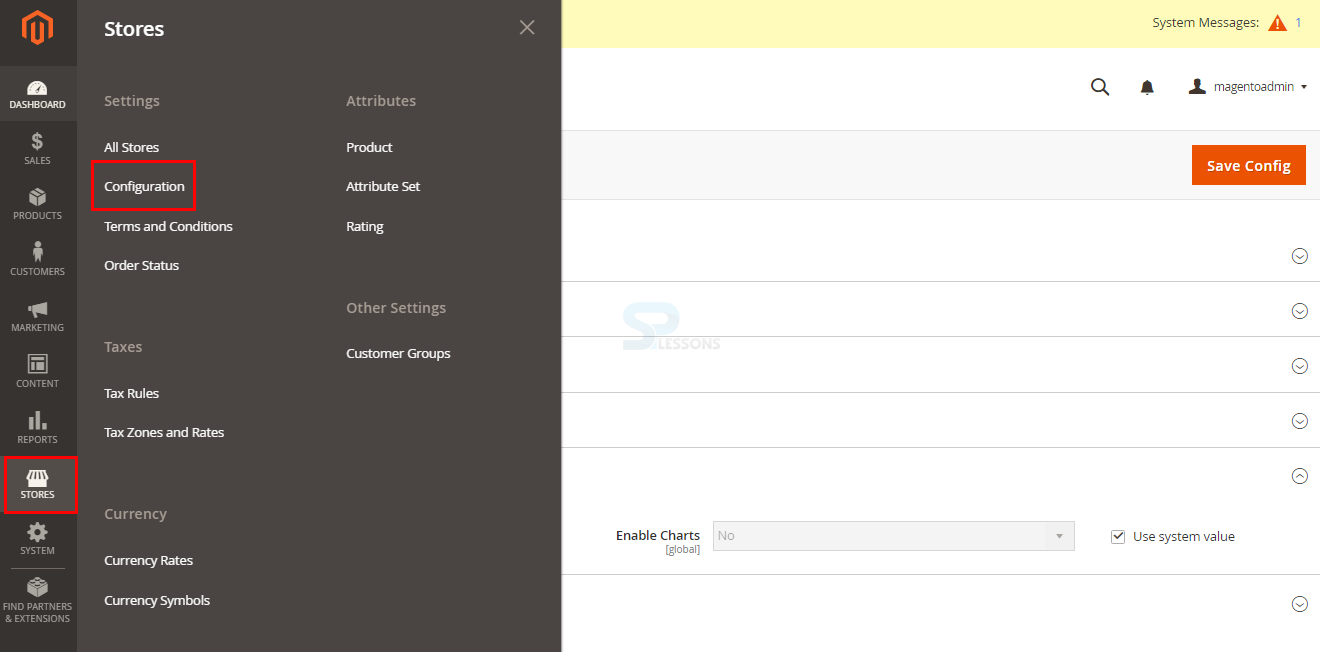 Now under Advance option, in the Dashboard section, set Enable Chart to yes as shown in the image below.

Description
Sales -
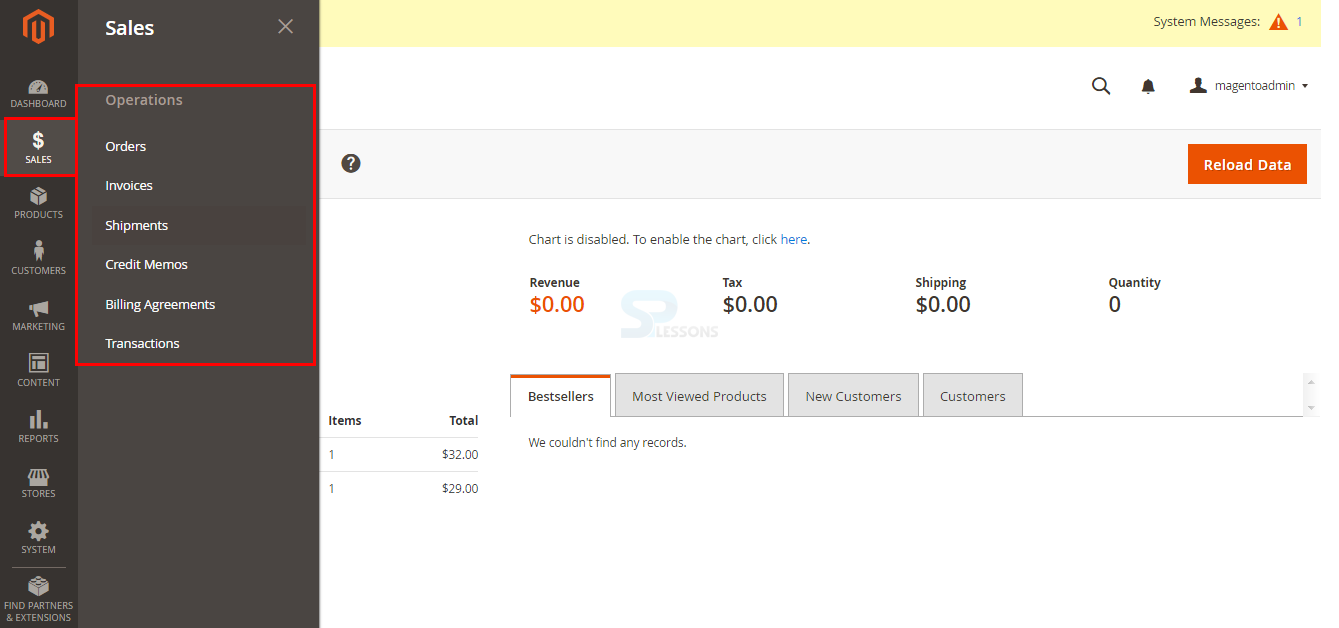
The Sales menu is the place where one can discover everything for handling a request, including past and present orders, invoices, shipments, credit memos, billing agreements, and transactions.
The Sale menu is located under the dashboard in the admin panel, as shown in the image below.
 Products -
The product menu controls everything related to products such as the product catalog, including products categories, the product menu can be found under the Sales menu in the admin panel as shown in the image below.
Products -
The product menu controls everything related to products such as the product catalog, including products categories, the product menu can be found under the Sales menu in the admin panel as shown in the image below.
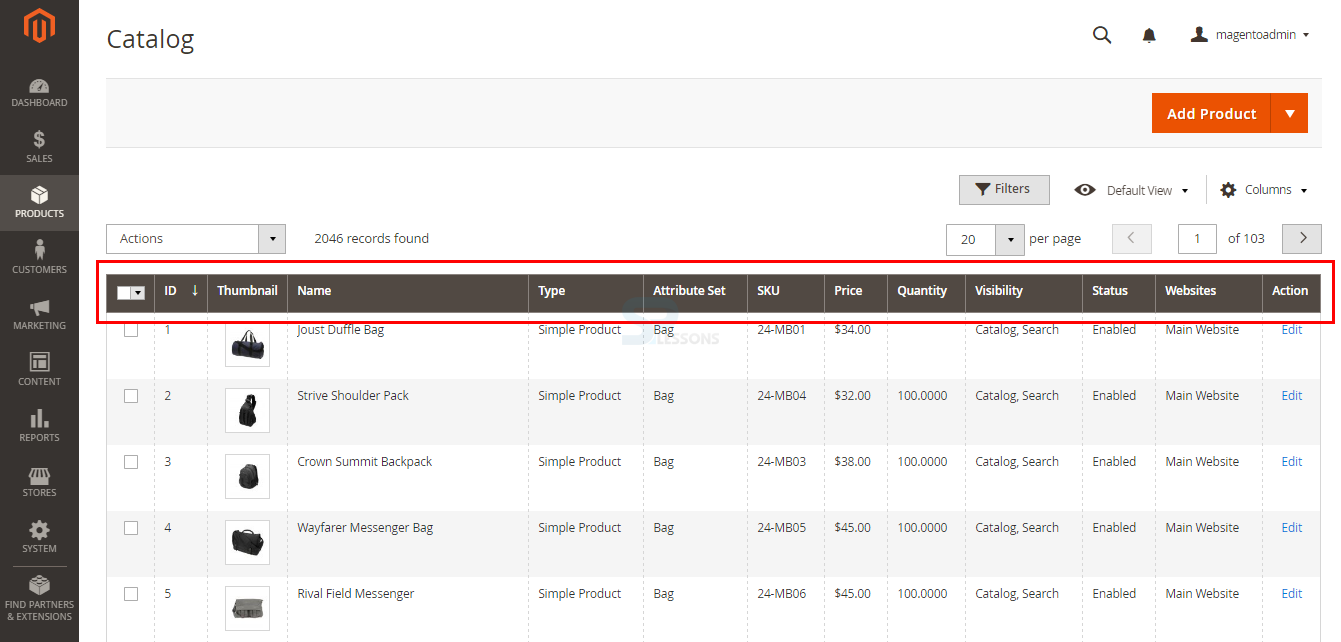
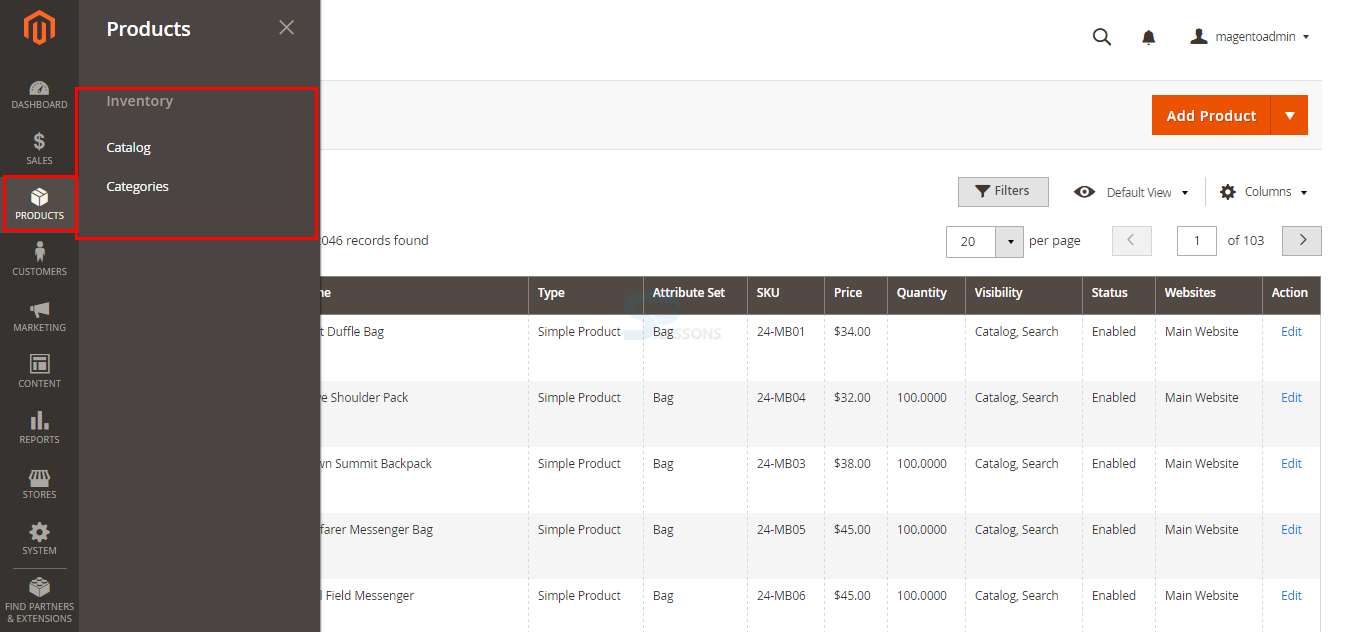 Clicking on catalog will give the list of all the products along with few details like ID, Thumbnail, Name, Type, Attribute Set, Price, Quantity, SKU, Visibility, Status, Website and Action.
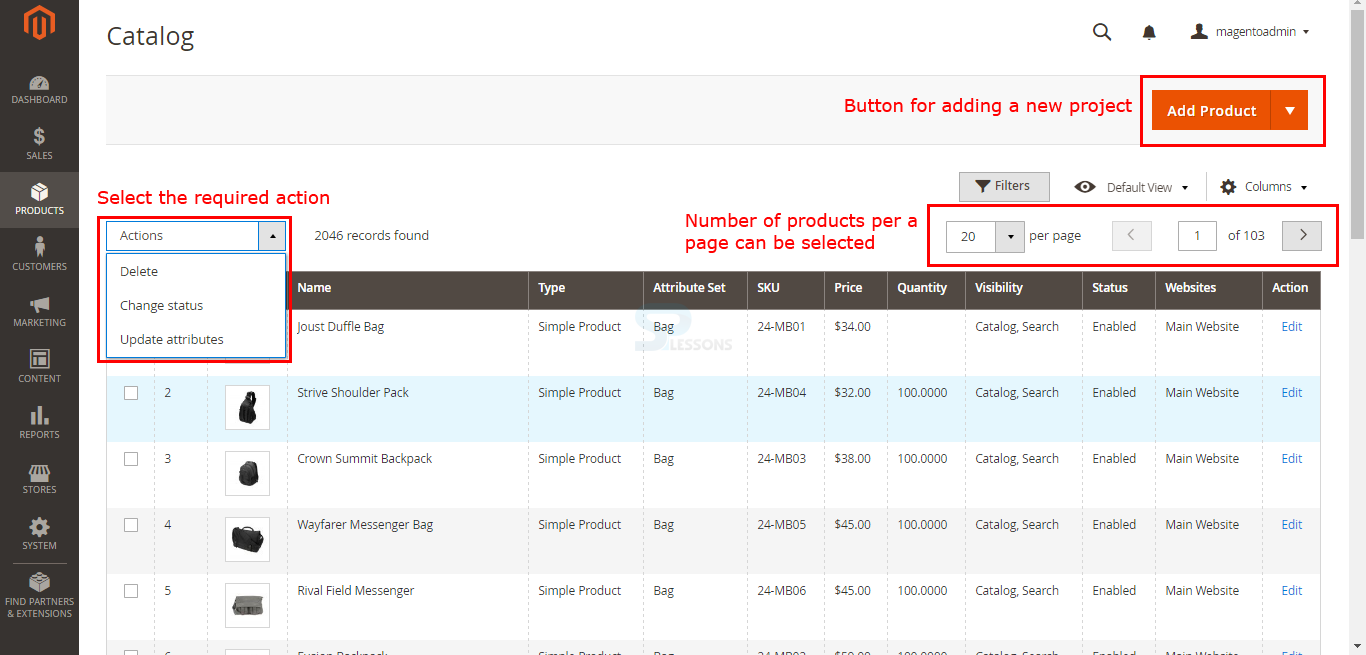
 One can Delete, Change Status or Update attribute using the Action drop down box and can also select the number of products to be displayed per a page, new products can be added using the Add Product button as shown in the image below.
 Clicking on category will give the options for adding a product for Root or Sub category along with few options such as category name, enabling category and few other settings as shown in the image below.
 Customers -
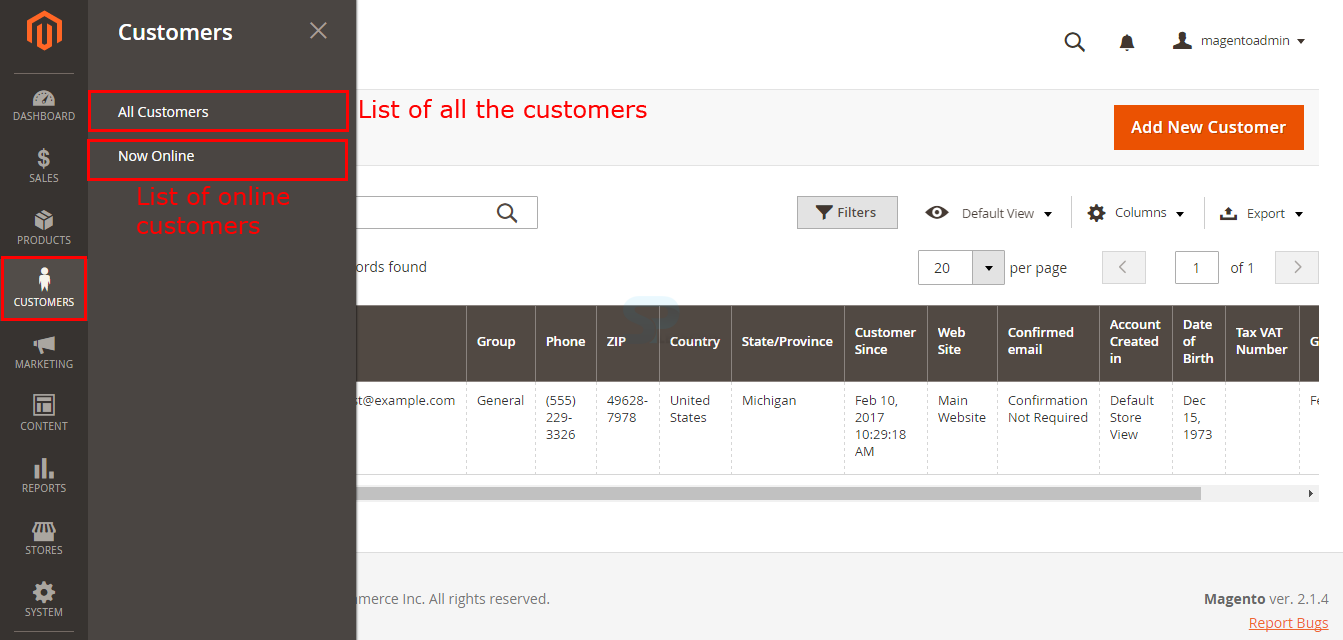
In the customers menu, admin can see the list of all the registered customers by clicking the All Customers option and can also see the online customers by clicking the Now Online option as shown in the image below.
Customers -
In the customers menu, admin can see the list of all the registered customers by clicking the All Customers option and can also see the online customers by clicking the Now Online option as shown in the image below.
 Marketing -
Inside the Marketing menu, admin can manage some marketing tools such as Promotions, SEO & Search, Communications and User Content as shown in the image below.
Marketing -
Inside the Marketing menu, admin can manage some marketing tools such as Promotions, SEO & Search, Communications and User Content as shown in the image below.
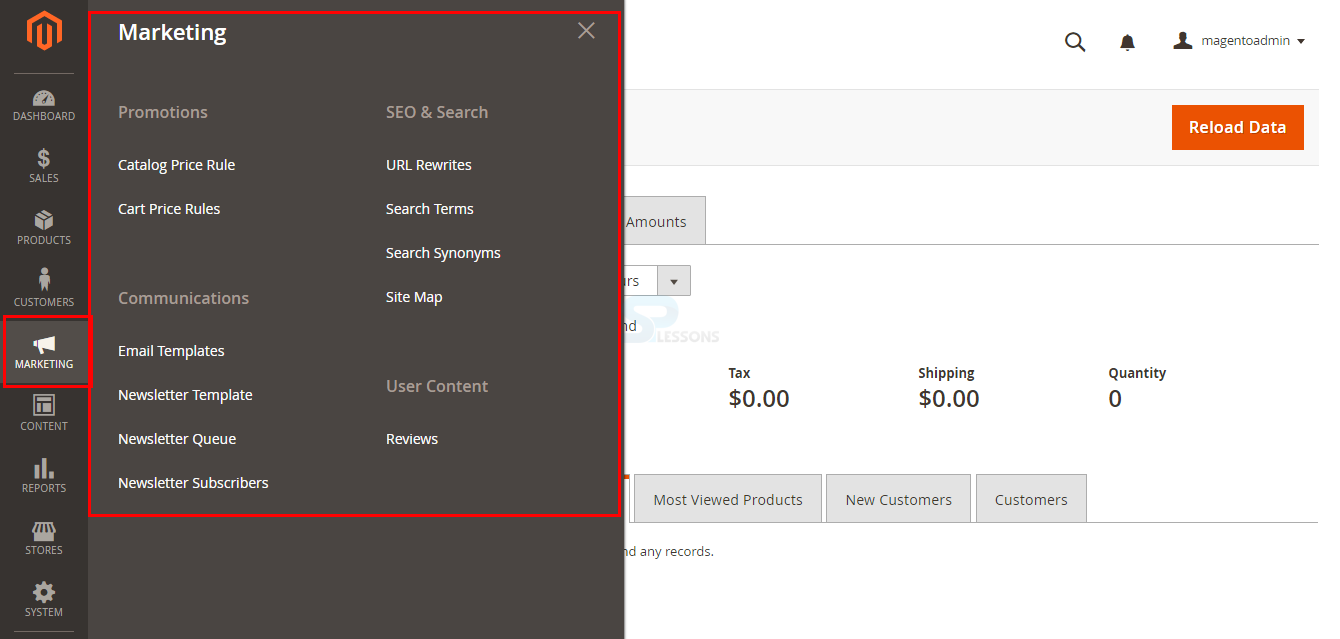 All the rules for price, URL’s, emails, reviews and more can be managed under each of this sections in marketing menu.
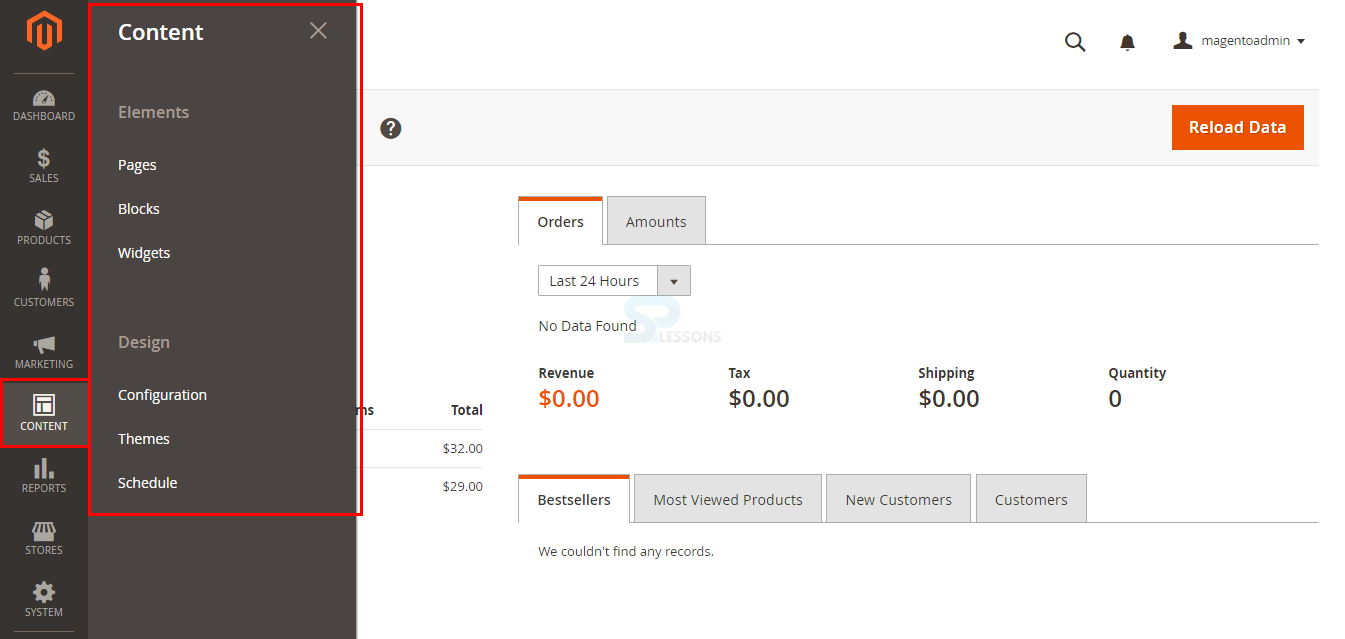
Content -
Inside the Content menu, one can deal with two section called Elements and Design. Under Elements admin can manage the Pages, Blocks and Widget related to the store by adding or editing and under Design section one can deal with the store themes, themes can be configured and can be used as the main website store theme.
All the rules for price, URL’s, emails, reviews and more can be managed under each of this sections in marketing menu.
Content -
Inside the Content menu, one can deal with two section called Elements and Design. Under Elements admin can manage the Pages, Blocks and Widget related to the store by adding or editing and under Design section one can deal with the store themes, themes can be configured and can be used as the main website store theme.
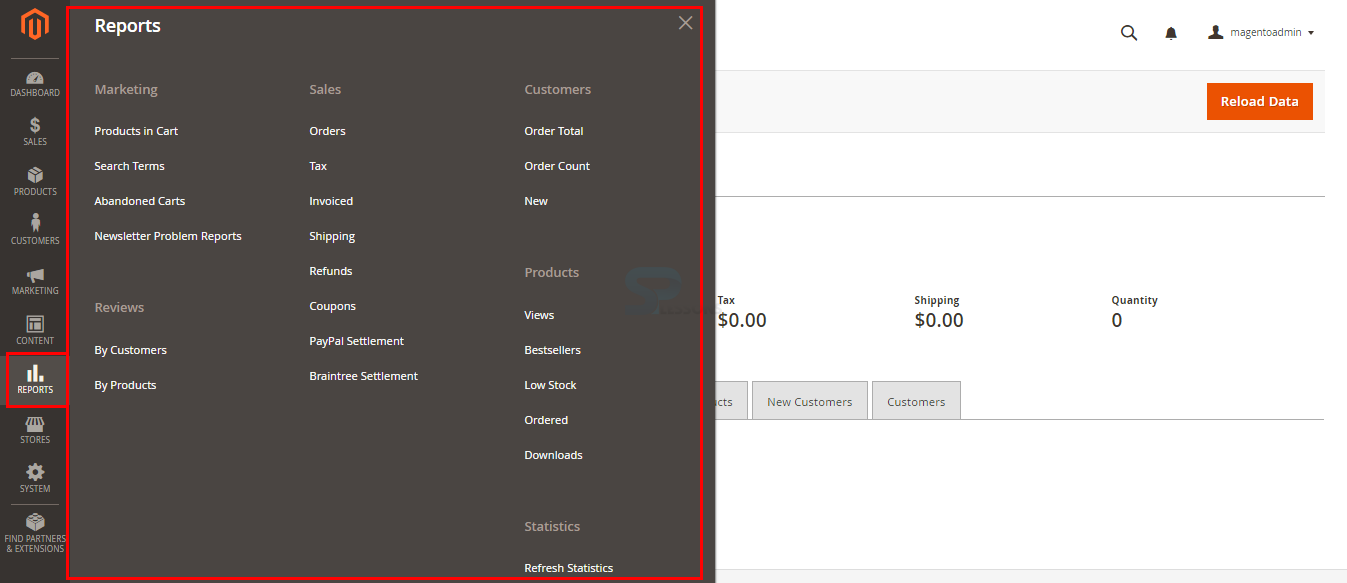
 Reports -
Inside the Reports menu, admin can see complete report of the store such as related to products, customers, product sales, customer orders, product reviews, product stock and complete statistics of the store as shown in the image below.
Reports -
Inside the Reports menu, admin can see complete report of the store such as related to products, customers, product sales, customer orders, product reviews, product stock and complete statistics of the store as shown in the image below.
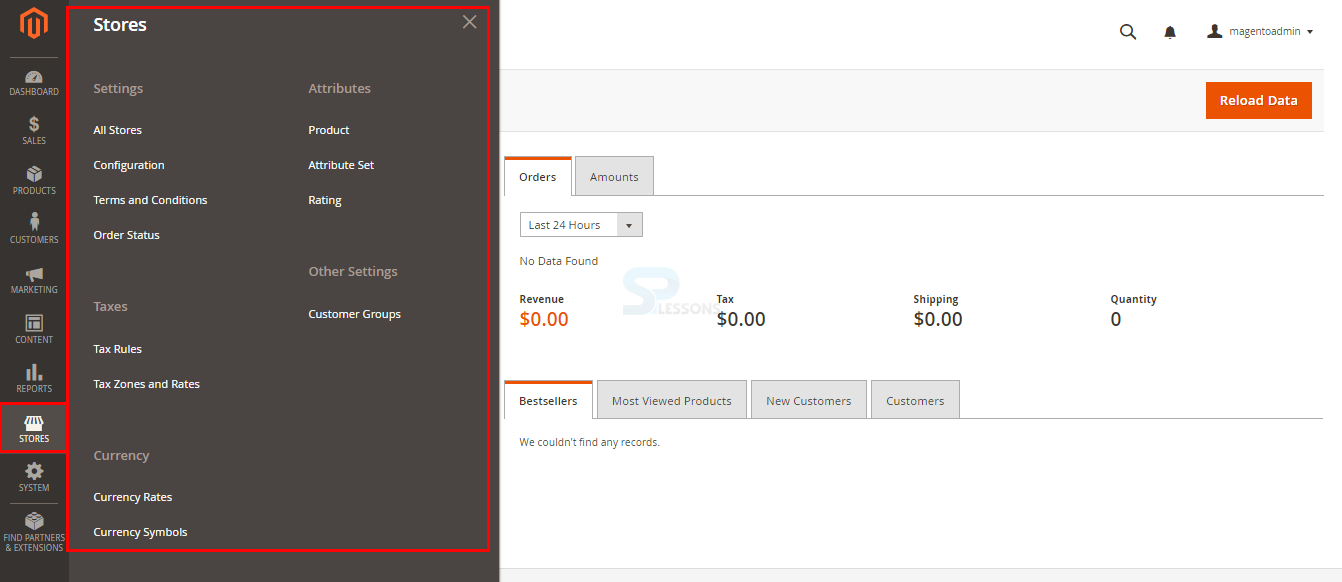
 Stores -
Inside the Stores menu, the setting related to the store can be configured along with few other settings related to Currency, Attributes, Tax and more. All stores websites, stores and store views can be created or managed in the store section.
Stores -
Inside the Stores menu, the setting related to the store can be configured along with few other settings related to Currency, Attributes, Tax and more. All stores websites, stores and store views can be created or managed in the store section.
 System -
Inside the System menu, there are 5 sections namely Data Transfer, Permissions, Extensions, Tools and Other settings.
System -
Inside the System menu, there are 5 sections namely Data Transfer, Permissions, Extensions, Tools and Other settings.
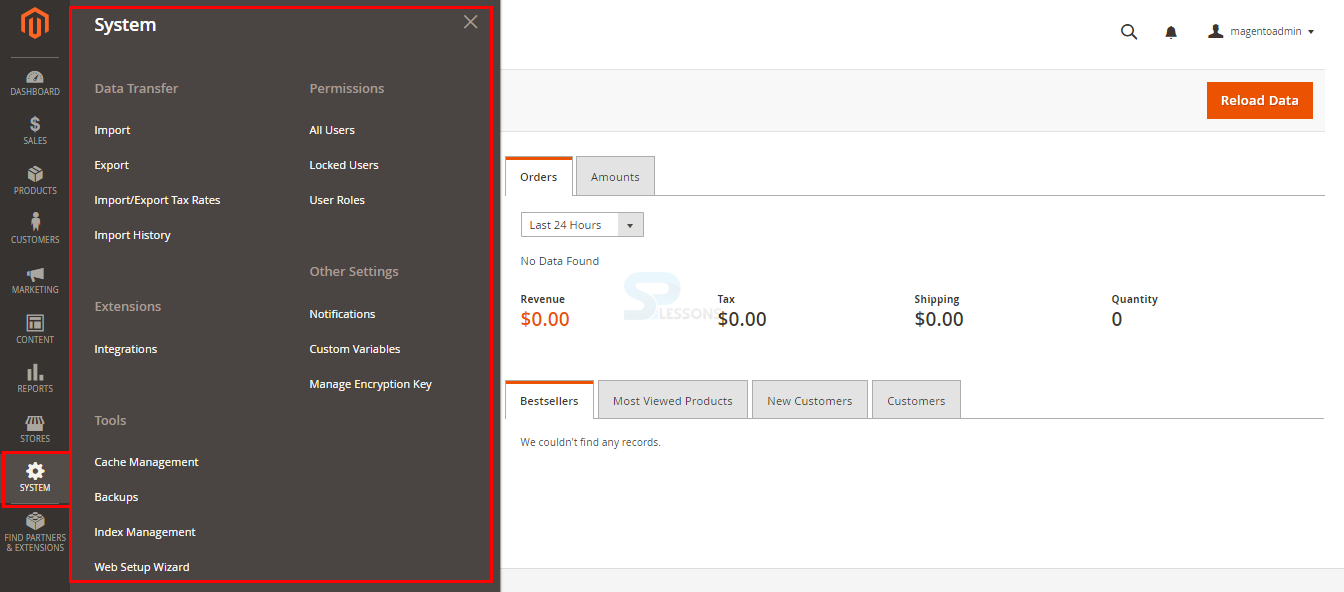 Under Data Transfer the important files can be imported and exported to the store, in permissions section the user roles and access for different users can be managed, other settings like store backup, notifications can be managed in systems menu.
Key Points
- All the day-to-day management task can be performed at the back-end in the Magneto admin panel.
- Dashboard is the center point for the critical data of the store.
- All the products, customer groups can be managed using the options in the admin panel.