


 Introduction
This chapter gives an overview about WordPress Theme Customization. Depending on the theme, there are different set of changes that can be done from within the admin panel. WordPress themes are used to design the front end style of the website or blog. Following concepts are covered in this chapter:
- Themes
- Premium Themes
- Free Themes
- Themes Customization
Description
Themes are used to style the WordPress sites visually and also provide different functionality or otherwise alter the overall representation of the site and content.
The Themes page displays a visual list of all themes that are currently installed and provides a number of different options for each theme. Users can activate any theme, get a live preview of the theme. Customization can be done and the details of the theme can be displayed in the theme description from the style.CSS or delete the theme from site.
Following are some of the key features of the themes.
- Themes are used to change the entire design of the site.
- Preferred colors can be used.
- Widget locations can be rearranged.
- Provides different page layouts and templates.
- Different font styles can be given to the content.
Description
Similar to other commercial products, Premium themes experience the level headed discussion with respect to price estimation.
Advantages
Disadvantages
- The main advantage of using premium themes is that these themes are supported with A+ grade by which client can have an excellent grade support while using.
- Premium themes are updated regularly and provides some extension or lifetime support for the users.
- Premium themes provides detailed view of each aspect and have some better updates for settings.
- Premium themes have some special offers and provides different forms to match the user requirements.
- Usually spending money on Premium themes for a blog may not work for everyone.
- Premium themes may or may not have standard complaints of License like Free themes.
Description
There are a few Free themes for WordPress from various service providers. Regularly, numerous clients grow Free themes to construct their portfolio or for entertainment. Then again, a number of Premium theme providers and in addition WP-related online blogs might release free themes for their guests.
Advantages
Disadvantages
- Free themes are free of cost, users can easily download and use these themes by installing.
- Free themes have no personalize support. Many people can comment through which users can get benefit from some official forums for making site more attractive.
- No assurance or warranty will be given for Free themes.
- The Update feature is not as good as Premium themes.
- Majority of themes look similar and this would be the drawback because users may not get the unique look for the site or blog.
- Free themes cannot provide high quality personalize support like Premium themes.
Description
WordPress theme Customization depends on the type of theme selected i.e. each theme has different types of settings. The main purpose of customization is to re-structure the site to bring a new look.
The page provides different options like Colors, Widgets, Background images, and General Settings.
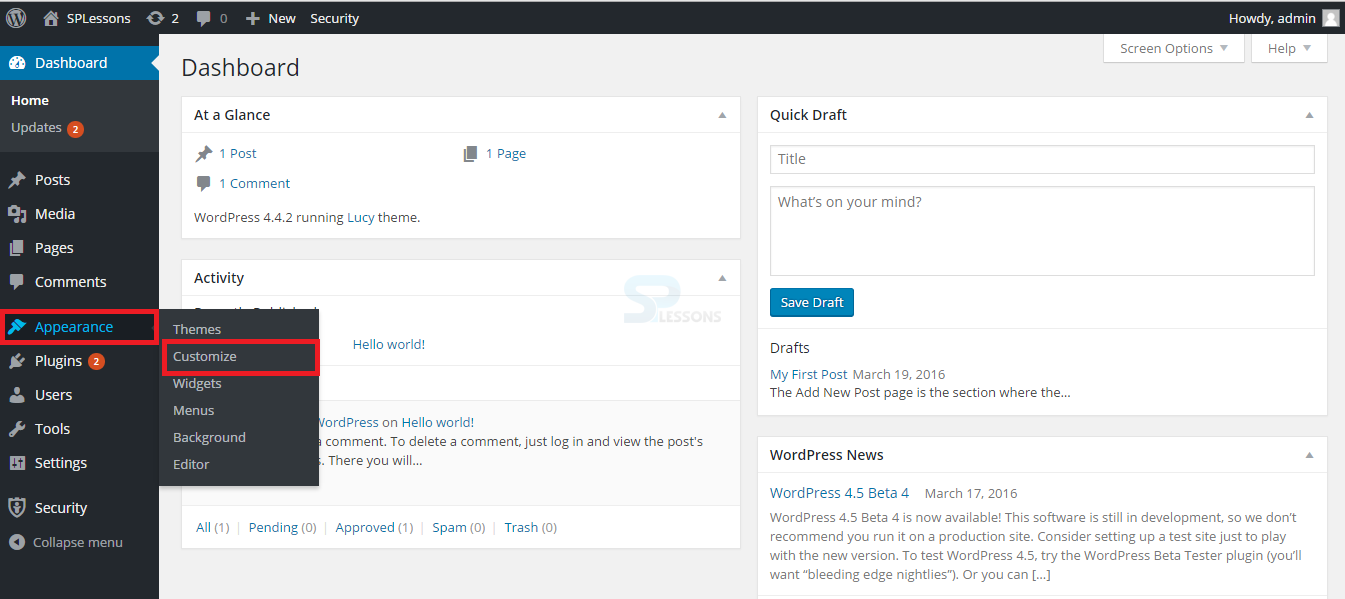
In order to customize the page, go to Appearance window -> select Customization as shown in the image below:
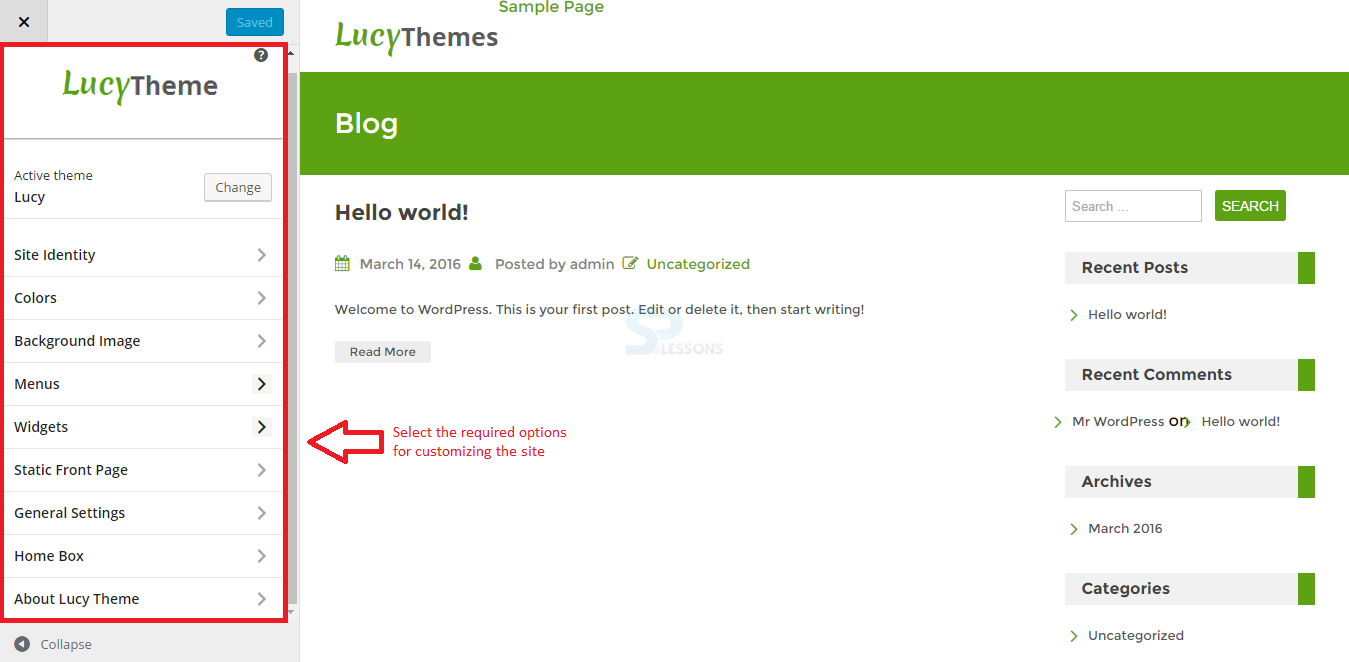
 Now, a page with some options for customizing the site structure will appear as shown in the image below:
Description
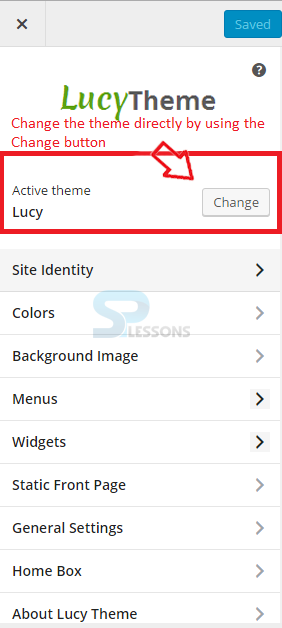
Current theme can be changed using the Change button in the Active theme section as shown in the image below:
Description
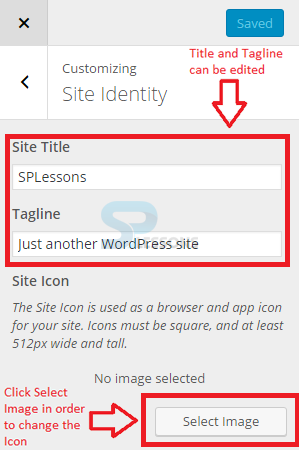
The Site Identity is used to edit the main Site Title and the Tagline. The site icon can be changed in this section by using the Select Image button as shown in the image below:
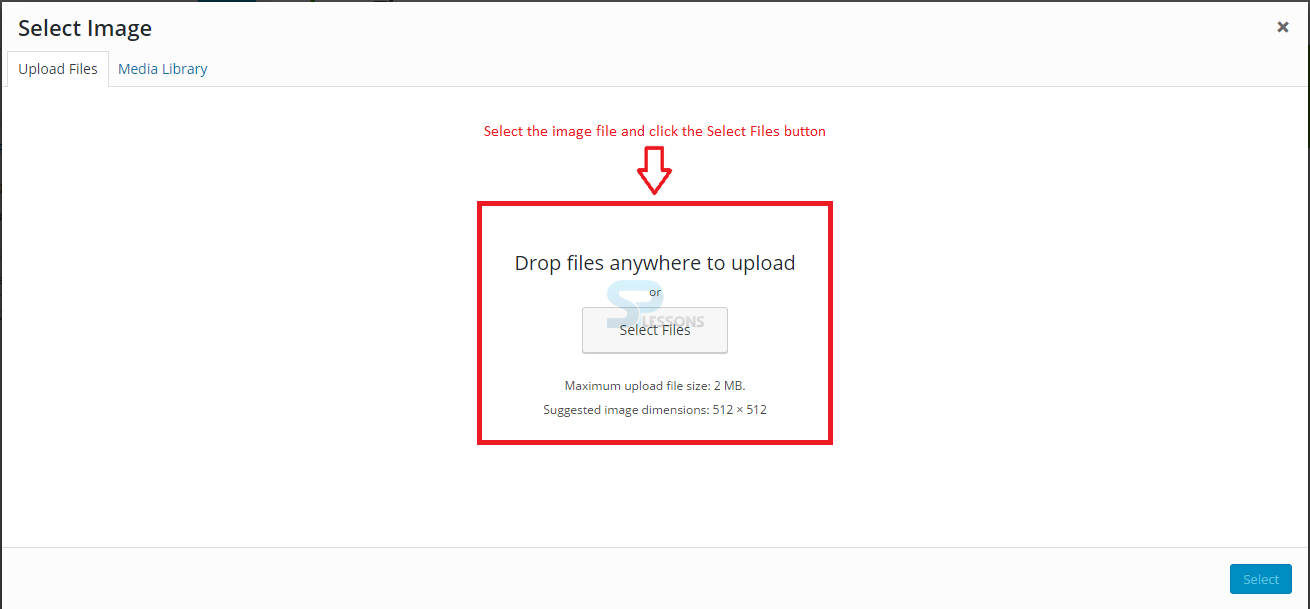
 Now, a page providing an option to select a image from the local drive will appear. Click the Select File button as shown in the image below:
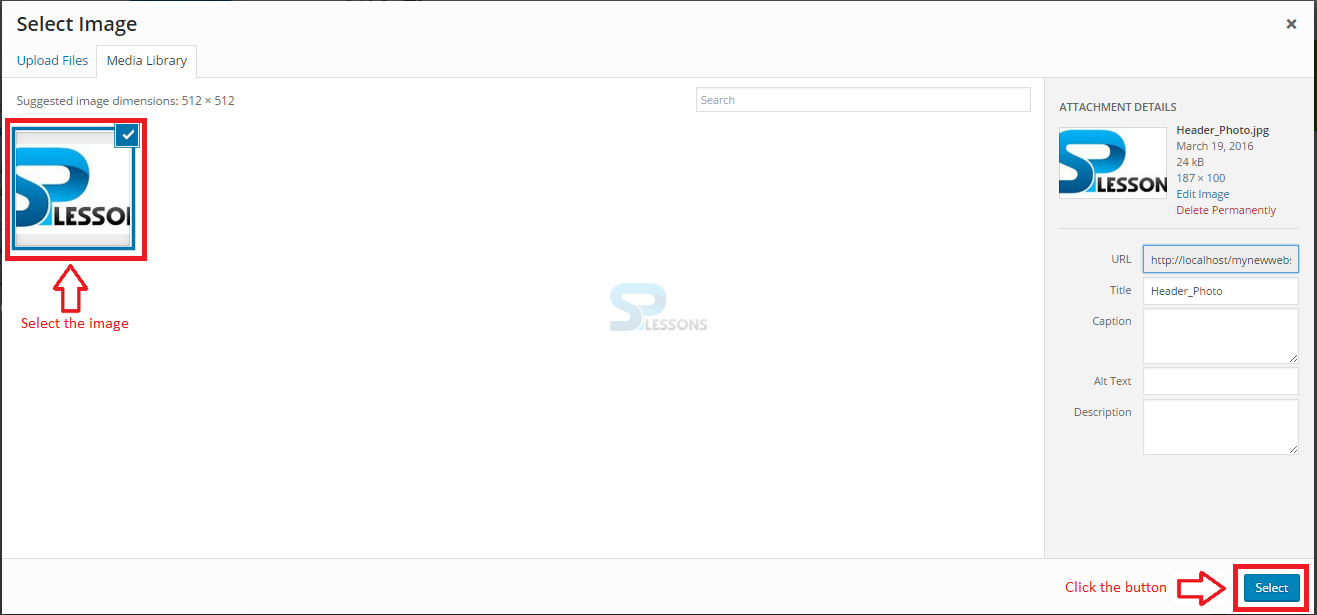
 Upload the image file. Select the image and proceed by clicking the Select button in Media Library section as shown in the image below:
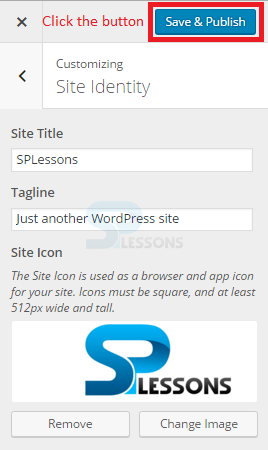
 Now, the page with a cropping option will appear. Crop the image, then the page will redirect to the Site Identity. Proceed by clicking the Save & Publish button as shown in the image below:
Description
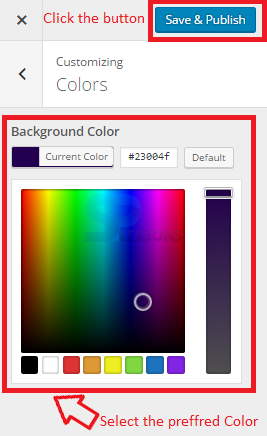
Colors can be customized depending on the themes. Each theme contains different set of options in WordPress. In order to change the theme color, go to the Color section in the Customization section and select the preferred color & proceed by clicking the Save & Publish.
Description
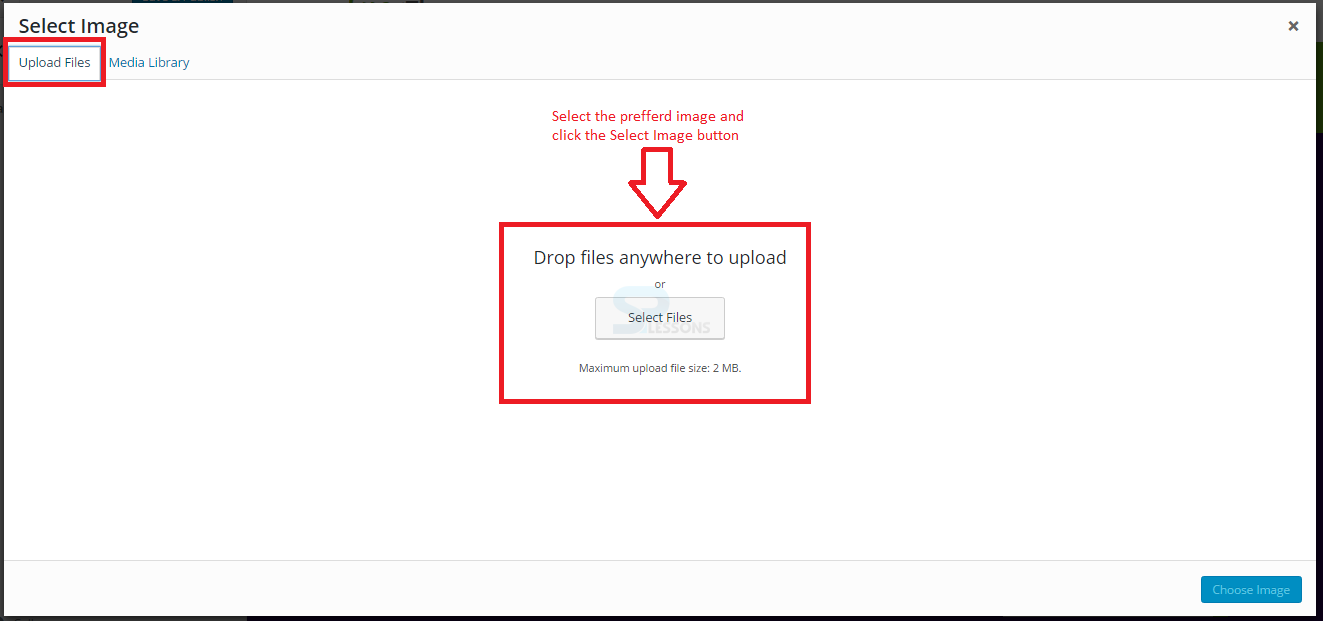
A background image for the site can be given using the Background Image section. Select the image by clicking the Select Image button as shown in the image below:
 By clicking the Select Image button, a page providing an option for selecting the image file will appear as shown in the image below:
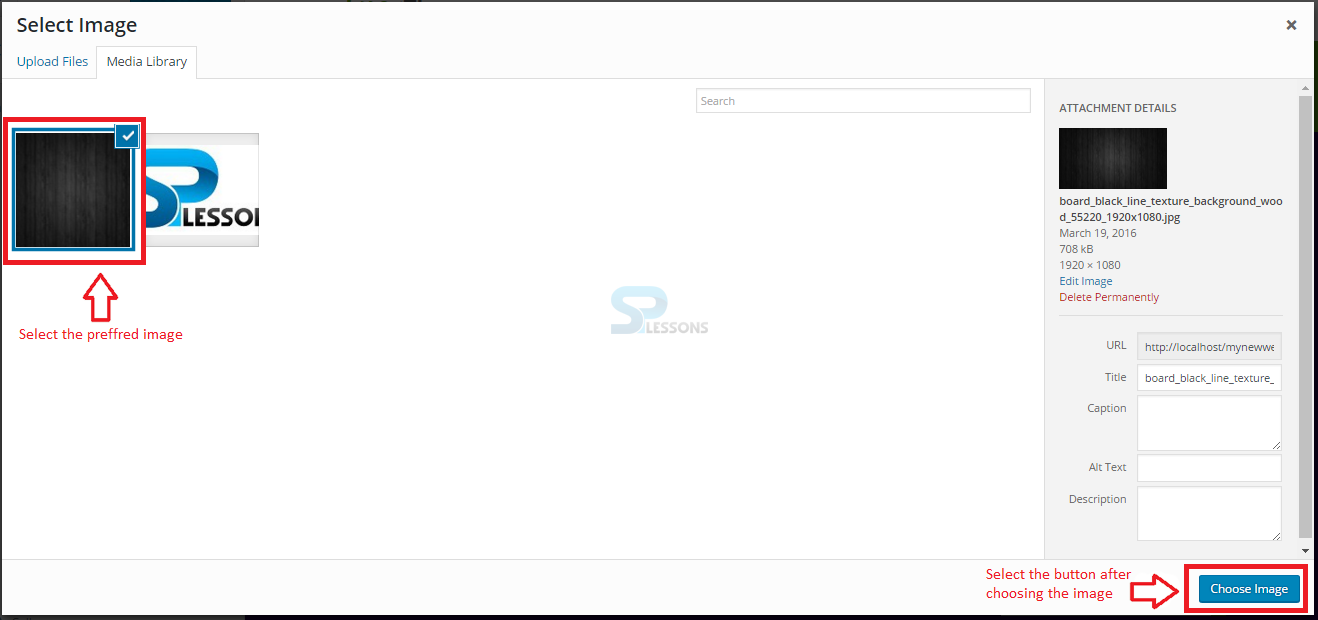
 Select uploaded image from the Media Library and proceed by clicking the Choose Image button as shown in the image below:
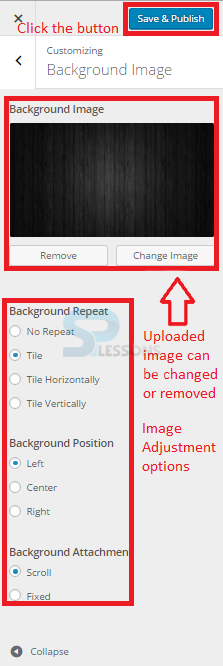
 Now, a Navigation Menu appears on the left hand side of the screen with some options for adjusting the image. After making all the adjustments, click the button Save & Publish as shown in the image below:
Description
Customization Menus were added in WordPress 3.0. Prior to that, menus had to be hard-coded, built into the theme or created using a page list function. Like widgets, custom menus can be built simply. Menus page has several areas where the user can add content of different types. Content can be organized after adding, even nesting menus can be organized into sub-menus.
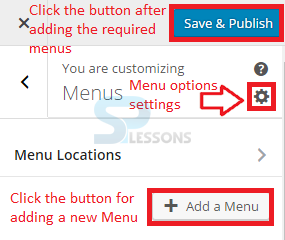
In order to add a new menu, go to Customization section ->. Select Menu tab -> and click Add a Menu button as shown in the below image.
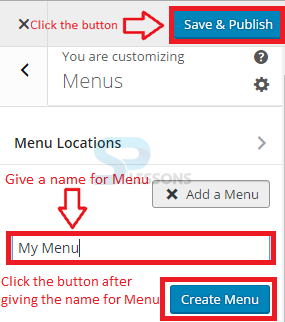
 Now, the navigation menu on the left hand side displays an option and Create Menu button for creating a menu name as shown in the image below.
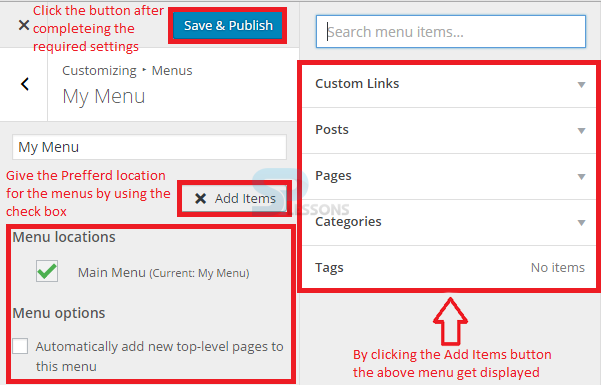
 Custom menus may contain links to pages, categories, custom links, Posts and Tags or other content types and can create as many menus as required. But, the ones that will actively be in use on the site are the ones that needs to be assigned to specific menu areas in the Theme Location section. The image below displays the menu settings for the added menu:
Description
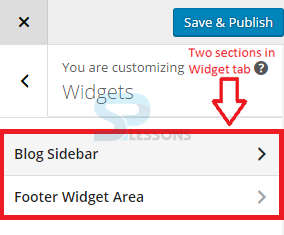
Widgets display things like recent posts, RSS feeds, custom menus or any other things added by plugins like author profiles. Widgets consist of two sections as follows:
The image below displays the Widgets tab in the Customization section.
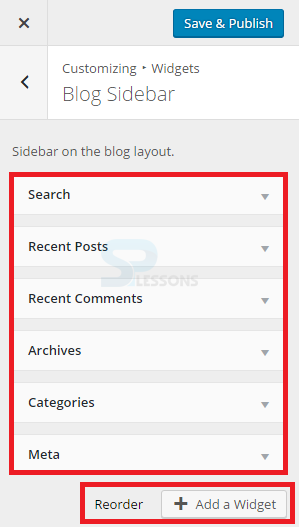
 Blog Sidebar
Clicking the Blog Sidebar gives a list of widgets that are to be displayed at the Footer area of site. The Widgets can be Reordered and a new widget can be added using the ADD a Widget button. The image below displays the Blog Sidebar section in Widgets.
Blog Sidebar
Clicking the Blog Sidebar gives a list of widgets that are to be displayed at the Footer area of site. The Widgets can be Reordered and a new widget can be added using the ADD a Widget button. The image below displays the Blog Sidebar section in Widgets.
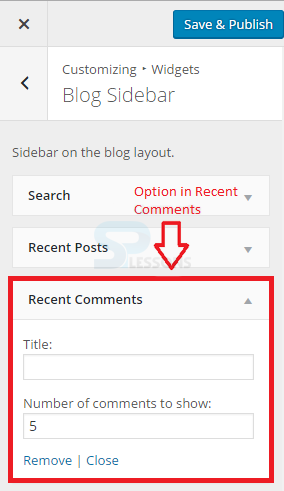
 Each widget in this section contains some options, for example the Recent Comments option contains a Title space and Number of Comments. The added things can be removed using the Remove option as shown in the image below:
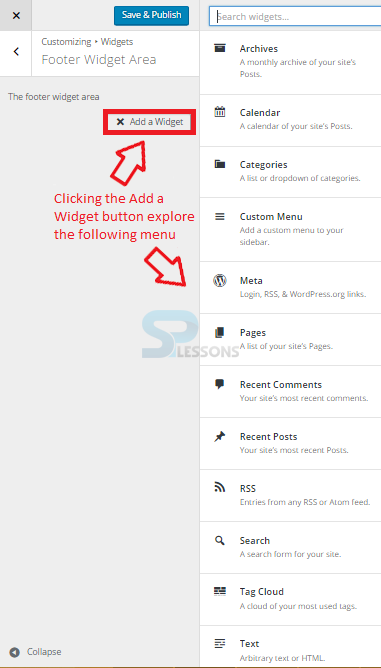
 Footer Widget Area
The Footer Widget Area contains some navigation menu. By clicking the Add a Widget button, the section displays a side navigation menu as shown in the image below.
Footer Widget Area
The Footer Widget Area contains some navigation menu. By clicking the Add a Widget button, the section displays a side navigation menu as shown in the image below.
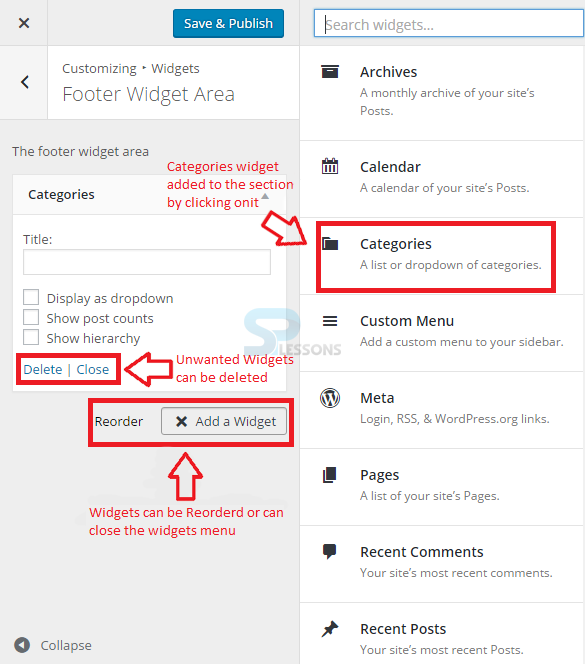
 By clicking on the preferred menu, the Widget gets added to the footer part and can be deleted if required using the Delete option as shown below:
- Blog Sidebar
- Footer Widget Area
Description
Static Front Page section contains two sub sections as follows:
By default the supported page is mentioned above and the user can choose either Your latest post or A static page for the site as shown in the image below:

- Your latest posts
- A static page
Description
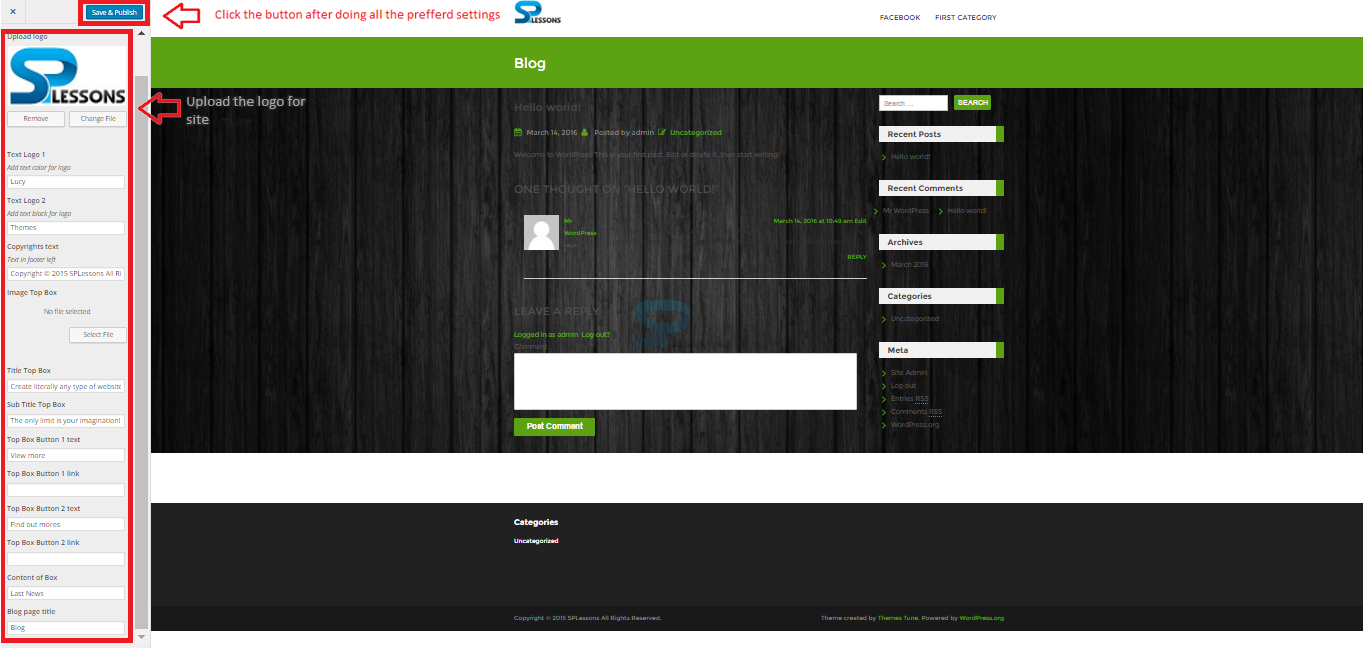
The General Settings are provided with options like setting logo, and upload a logo. By using the Select File button, users can upload or select the image from Media Library.
Users can even make some general settings to the website like changing the Blog page title, providing links to each box and more. After making all the required changes, proceed by clicking the Save and Publish button as shown in the image below:
Description
Using Home Box, users can easily set some icons like Bookmarks, and mobile. Select the preferred icon from the Font Awesome website and simply enter the code in Home Box section.
The image below displays the Home Box section in the Customization widget.

Key Points
- Themes are used to style the WordPress site visually and provides different functionality for presenting the content.
- A number of themes are available in WordPress official website and can be easily installed.
- Free themes have no personalized support like Premium themes.
- Updates are a bit faster in Premium themes compared to Free themes.
- Theme customization depends on the selected theme. Each theme has different customization options.