 Introduction
Maven installation chapter provides the steps to install Maven for Windows Environment. To install Maven, one should have a machine with Java Development Kit (JDK) of atleast 1.7 version or the later.
 Step-1
To download JDK, click on the below tag to view the installation process of JDK.
Download JDK
 Step-2
Then, download Apache Maven by clicking on the below tag.
Download Maven
Then, search for the "Download" button on that page.
 Step-3
After downloading, extract the zip file. Once done with downloading, see the folder-apache-maven-3.3.9.
Now, create a system variable and set the path by following the below instructions.
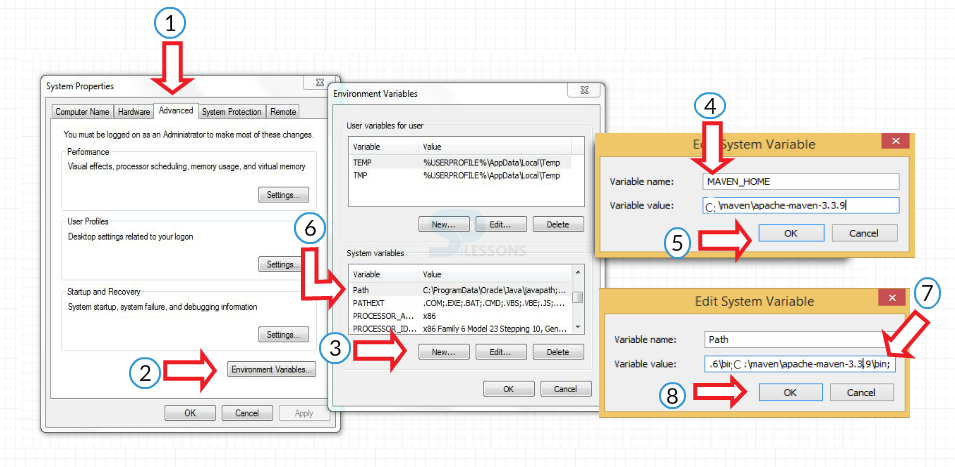
Go to My Computer -> Right click on My Computer -> Properties -> Advance System Settings
Go to
(1)
Advanced
(2) Click on Environment Variables.
(3) In System Variables, Click on New.
(4) Enter the Variable Name: MAVEN_HOME and
Variable Value: C:\apache-maven-3.3.9
(5) Click on OK.
(6) Set the path for Maven by double clicking on Path in System Variable.
(7) Put semicolon(;) before entering the path. This path will be in the Maven bin folder. It looks like C:\apache-maven-3.3.9\bin
(8) Click on OK.
Now, the installation process of Maven is completed.
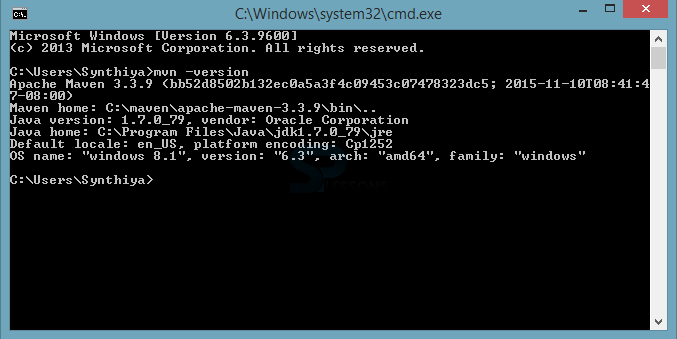
To check whether the installation process is successful or not, go to Command Prompt and enter mvn -version. If the installation is successful, the following output appears. Otherwise, an error will be shown.
 Key Points
- Installing JDK of 1.7 version is important for Maven
- mvn or mvn -version are the two commands that are used to check if Maven installation was successful.
 Programming
Tips
- Setting the path for the Created variable is important.
- Do not forget to add semicolon while setting the path.


