


 Introduction
This chapter demonstrate about the JUnit Test Methods, In order to test the unit test in JUnit, Client needs to create some of the test methods. To create the test methods initially user need to develop the project and generate the JUnit test to that developed project and then create the test methods. Following are the test methods.
- Getting JUnit
- Getting Eclipse
- Project Overview
- Hello JUnit
Description
By default Eclipse comes with JUnit if not download the JUnit as demonstrates in the steps below.
Step 1
Get the JUnit link from the official page JUnit.org by clicking the link will display the image as shown below.
 Now Proceed by clicking on the Download and Install to get the JUnit.
Step 2
Now the page appears with JUnit.jar and hamcrest.jar files click and select appropriate file to download and complete the installation process of JUnit.
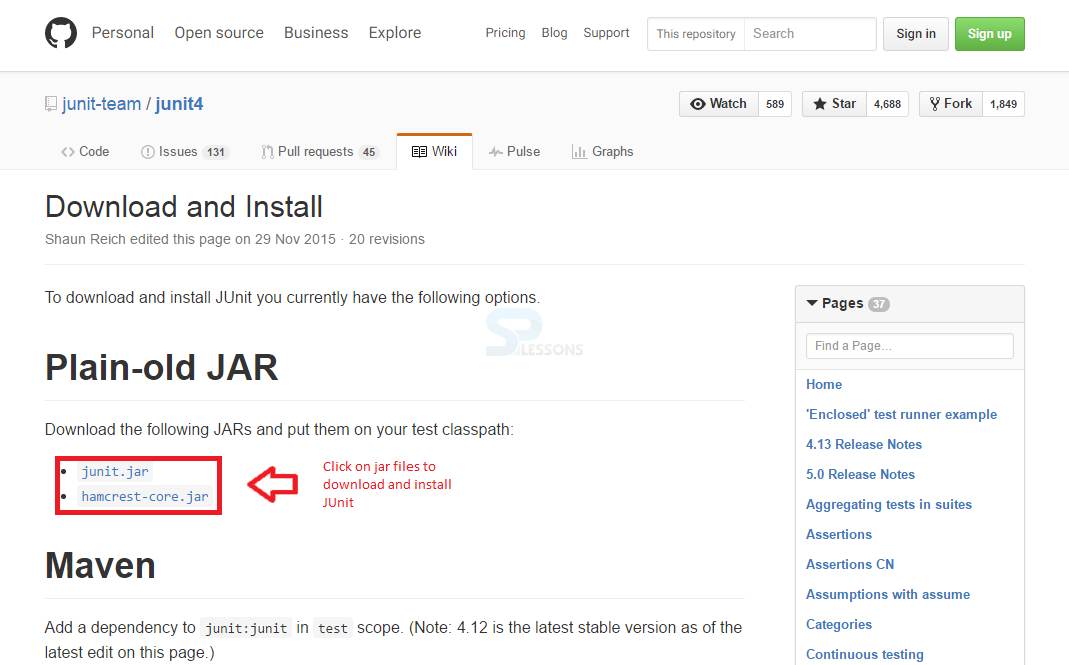 Put these jar files in a test path to complete the test process of the JUnit testing.
Description
Before downloading the Eclipse, pick up the target platform Linux/Mac/ Windows and make sure that the machine has a Java run time environment already installed, use either a 32-bit or a 64-bit versions of Eclipse and must have a JRE/JDK source that matches i.e.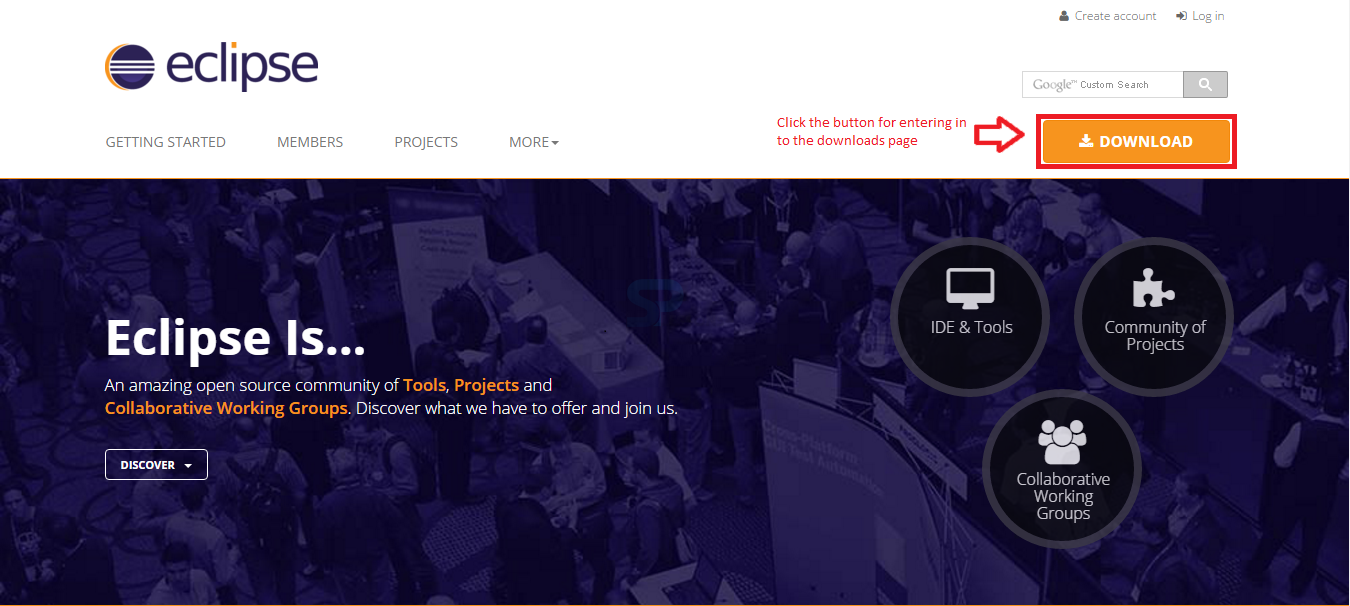 A page appears providing a list of Eclipse versions by clicking the download link button, select the preferred version and download the Eclipse by clicking on it as shown in the image below.
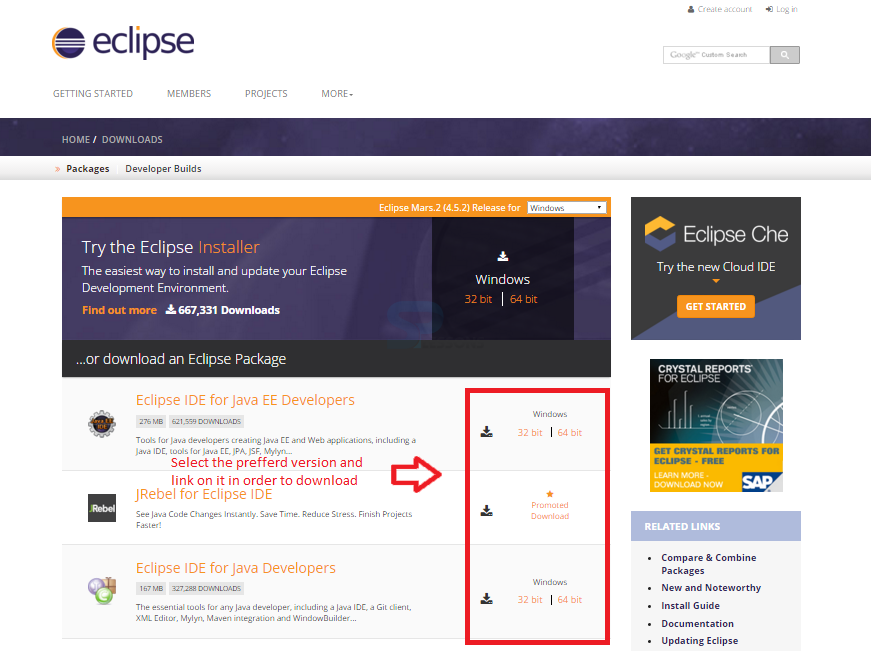 It shows drop down box in the right corner of the download page to set the operating system on which eclipse is to be installed. Choose from drop down box Windows, Linux and Mac. Eclipse is packaged as a zip file, so extract the zip file into preferred drive.
Select the Preferred Eclipse version.
In order to use the Eclipse for JUnit, Download from the official website of eclipse.org.
Now a page appears with a download link for Eclipse as shown in the image below, now click the Download button on the page in order to download the Eclipse for JUnit.
- 32 bit JRE needs the 32 bit version of Eclipse
- 64 bit JRE needs the 64 bit version of Eclipse
- Java
- C++
- Others
- Make your own
- For Java, Download JDK for the selected platform
Description
If the directory have a fairly long path, when the user unzip the downloaded files under Windows can get errors about path names being too long. In order to avoid such errors make sure that the default download directory is fairly deep on the hard drive that and first move this up fairly high on the hard drive before unzipping, and thereafter no errors about path names being exceeded.
In order to install Eclipse, required a tool which can extract the contents of a zip file. The tools like,
Now, Right click on the downloaded Zip file and extract all the files to the preferred directory to be installed by clicking Extract. The image below display the Eclipse files folder extracted to the particular directory given.

- PeaZip
- IZArc
- 7-zip
Description
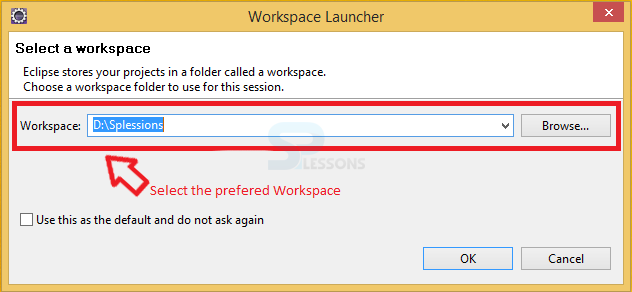
Immediately after lunching Eclipse, a window appears asking the drive to store the Workspace. A workspace is a collection of projects that are to be work with when launching Eclipse. A project can take any number of forms from a desktop executable, a library, a set of web pages, and more. If the client used to working with a product like Visual Studio, a workspace can be a little bit of an adjustment. Not all projects in a workspace have to be related and can take any approach that are like to creating a workspace.
User can create a single workspace and create every programming project under that workspace. Eclipse is actually geared towards this approach. It has some additional tools like working sets, but working sets allow for convenient grouping to make it easy to work with a subset of the projects and can also create any number of workspaces. The work space can be set to default or changed to new folder location using the Workspaces Preference window as shown in the image below.
Description
In order to develop the test methods in JUnit, user need to create Java project in Eclipse environment. Once the project is created then only client able to create the JUnit test methods. The steps below demonstrate to create the Java project.
Step 1
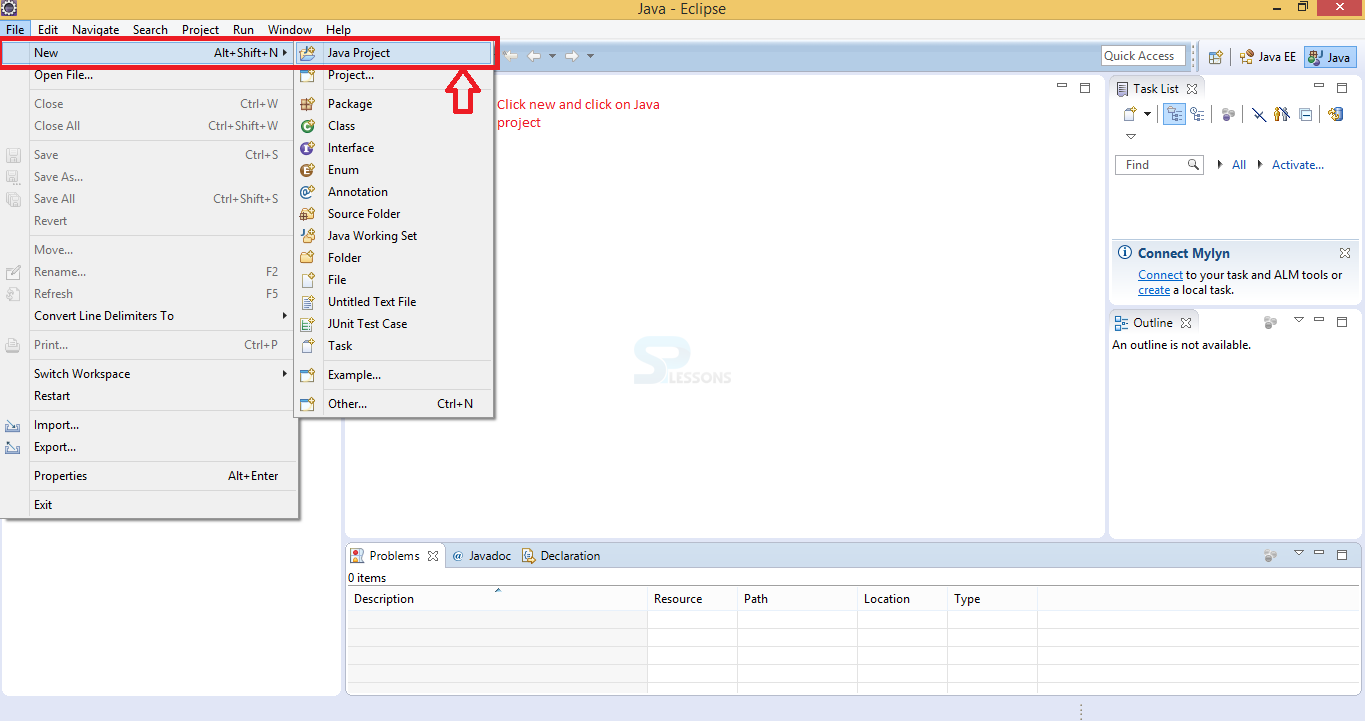
Eclipse has a user friendly environment user can easily create their own projects by using some inbuilt features. To develop the Java project first click on the File and then select New which explores a dialogue box select the Java project from that box the below image demonstrate the process clearly.
Step 2
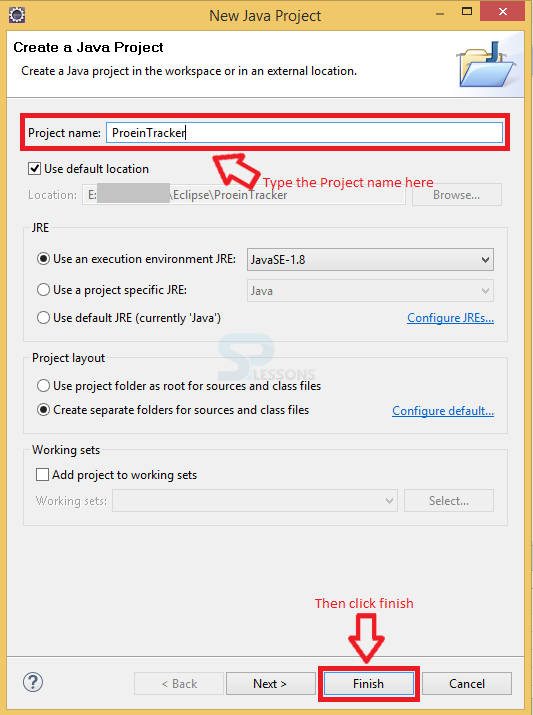
Now a window will be appears known as new Java project providing some options for creating a project like project name after completing the required changes proceed by click Finish button as shown in the below image.
Step 3
Assume the project name as ProteinTracker and the following are the two classes HistoryItem and TrackingService.
[c]
import java.util.List;
public class TrackingService {
private int total;
private int goal
private List history= new ArrayList();
private int historyId = 0;
public void addProtein(int amount)
{
total +=amount;
history.add(new HistoryItem(historyId++, amount, "add", total));
}
public void removeProtein(int amount)
{
total -= amount;
if(total = goal;
}
public list getHistory() {
return history;
}
[/c]
Developing the another class HistoryItem.Java
[c]
public class HistoryItem {
private final int id;
public int getId() {
return id;
}
public int getAmount() {
return amount;
}
public String getOperation() {
return operation;
}
public int getTotal() {
return total;
}
private final int amount;
private final String operation;
private final int total;
public HistoryItem(int id, int amount, String operation, int total) {
this.id = id;
this.amount = amount;
this.operation = operation;
this.total = total;
}
}[/c]
Description
User need to develop a Java project, assume the project name to be as ProteinTracker, then user need to add a test method to that project some thing like ProteinTrackerTest.
The code below demonstrate the test method for the created project.
[c]</pre>
<pre>[c]
import static org.junit.Assert.*;
import org.junit.Test;
public class helloJUnitTest {
@Test
public void test() {
//fail("Not yet implemented");
}
}[/c]
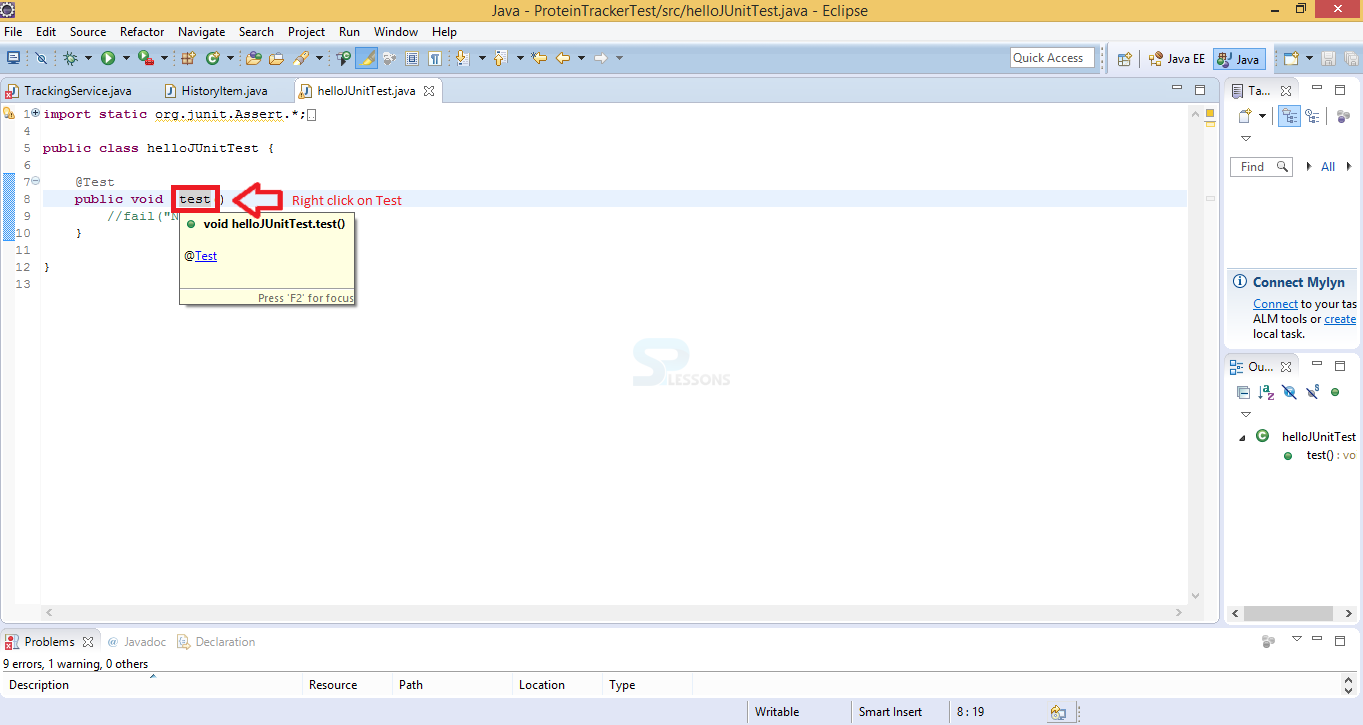
Step 1
The created project test method can be run as follows as shown in the below image.
Step 2
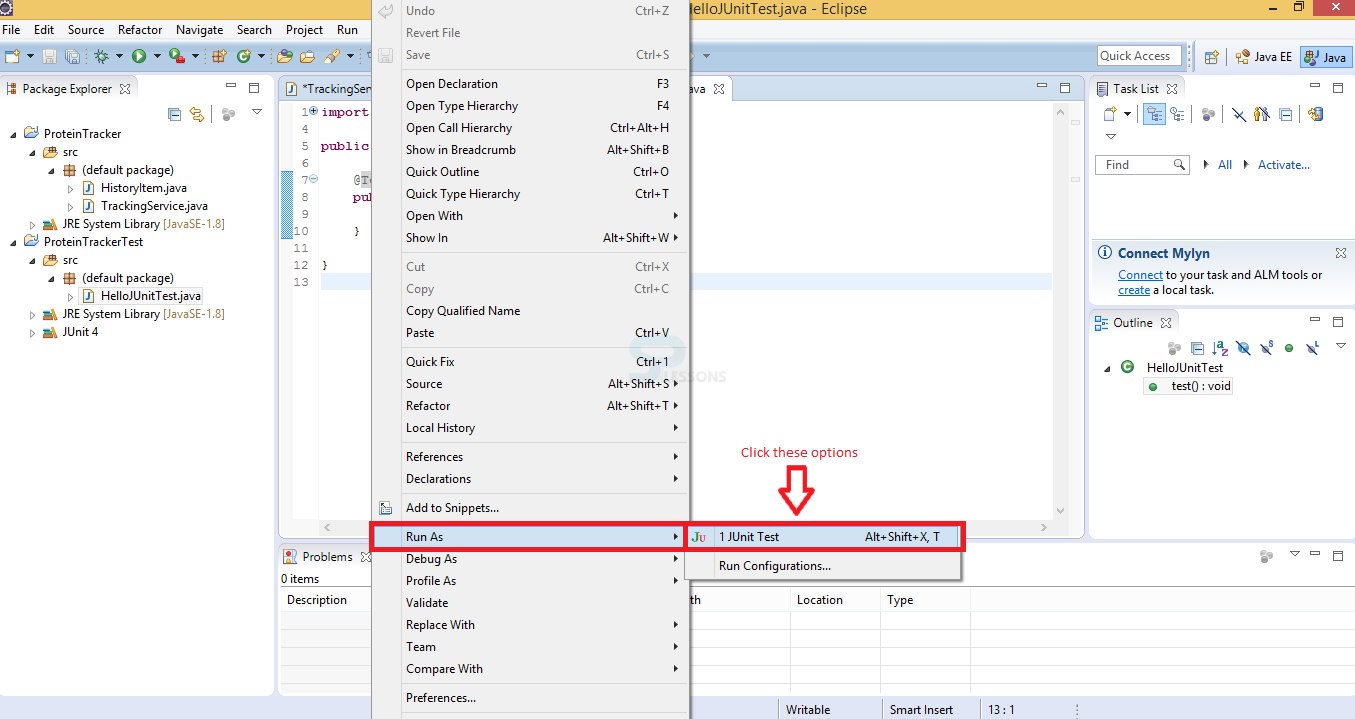
Now select the method - > Right click - > select run As - > select JUnit Test as shown in the below image.
Step 3
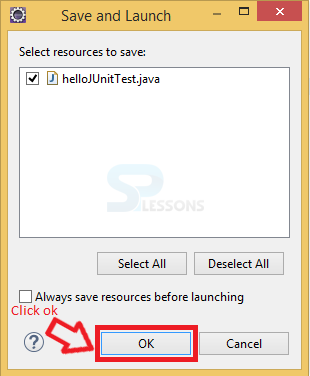
Now a popup window appear known as Save and Launch proceed by clicking Ok.
Step 4
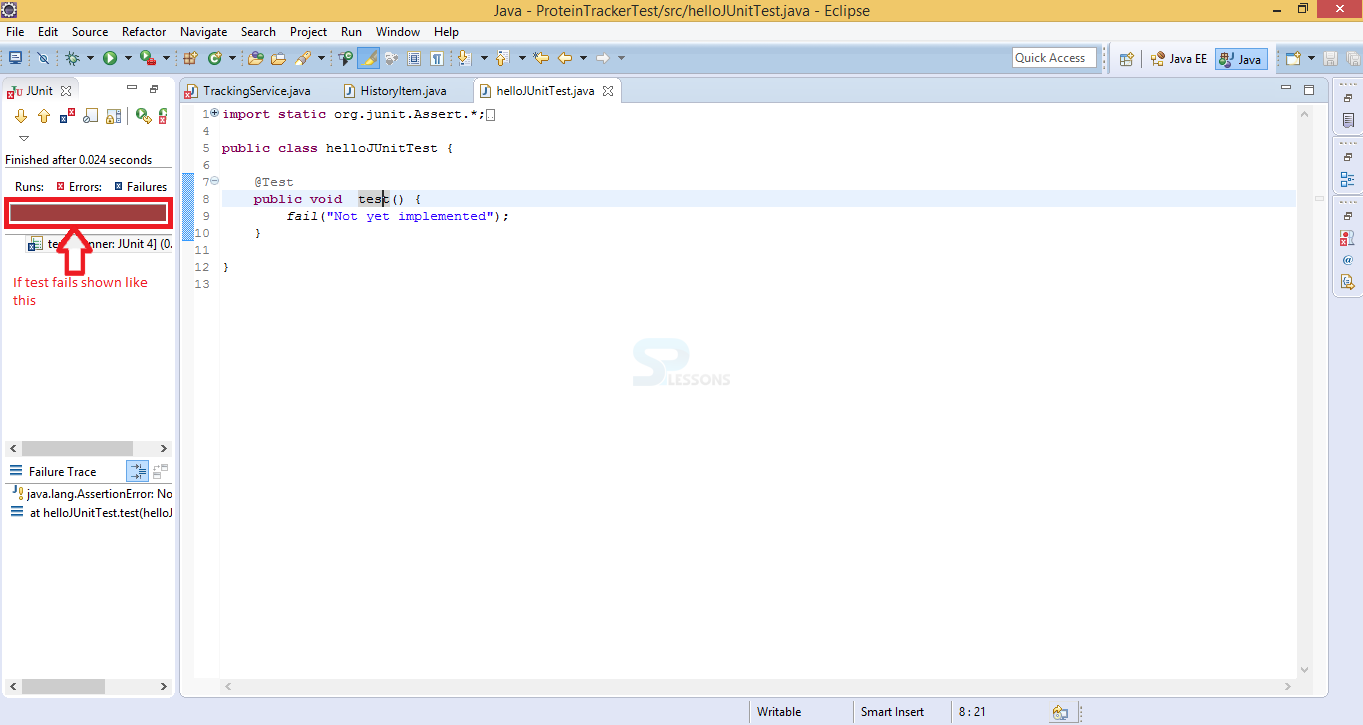
If the Test case have some errors then the output display would be in red color which indicates the test case failure as shown in below image.
Step 5
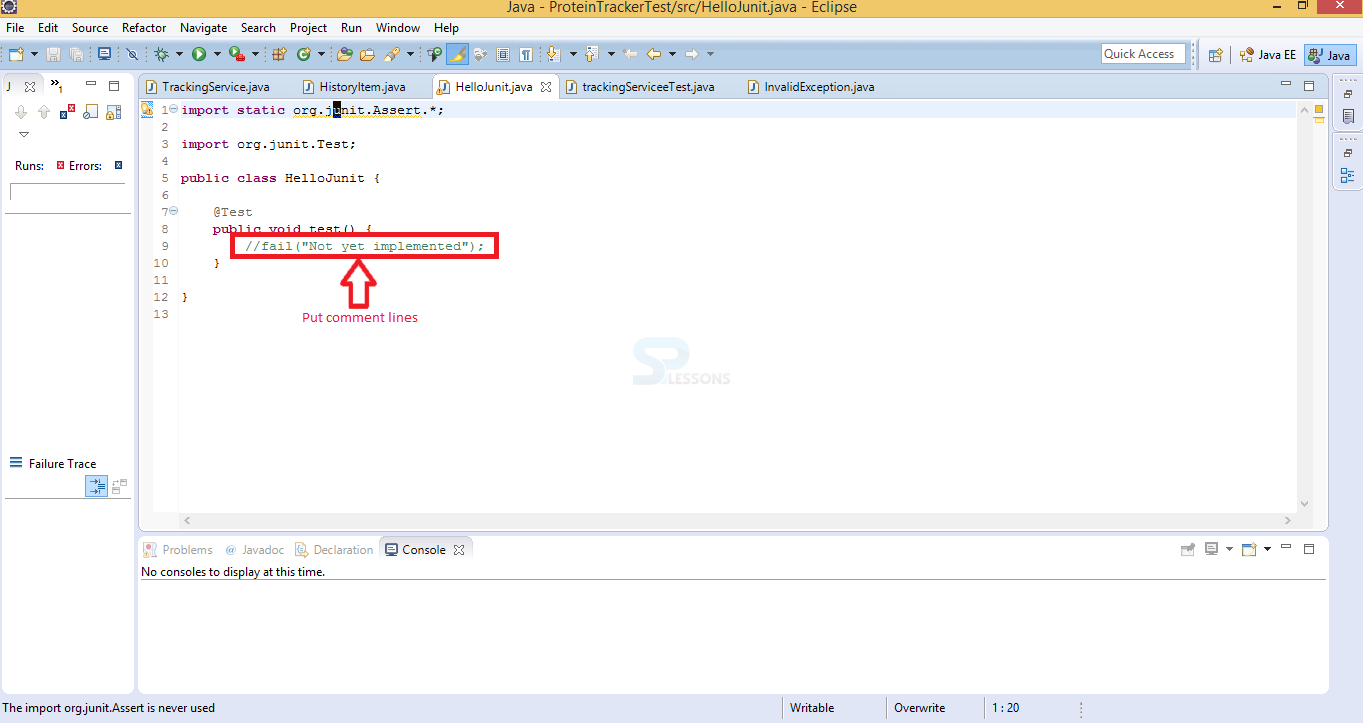
In order to obtain the positive results put two comment lines before file as shown in the below image.
Step 6
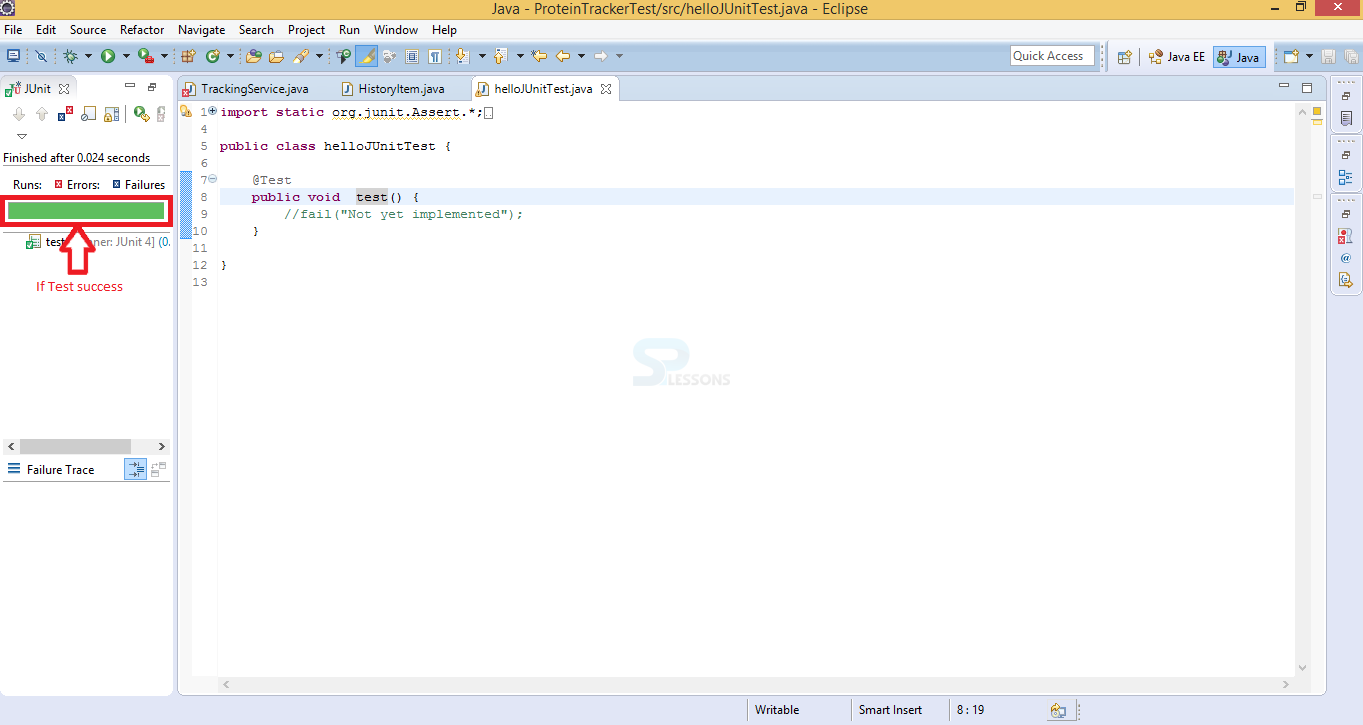
Now running the test case produces the output in green color which indicates as successful as shown in below image.
Key Points
- JUnit Test Methods - All Junit methods are available in JUint official page
- JUnit Test Methods - Eclipse available in different versions for different platforms.
- JUnit Test Methods - For every project user need to create the test Projects.
- JUnit Test Methods - Test project contain different test methods.