


 Introduction
This chapter JUnit Eclipse demonstrates the Eclipse environment set up. In order to run the JUnit for Java projects user need to set up the eclipse environment. Eclipse is a user friendly environment which is compatible for the many platforms. Following are the topics covered in this chapter.
- Creating JUnit tests
- Running JUnit tests
- Extracting the failed tests and stacktraces
- JUnit static imports
Description
In order to develop the test methods in JUnit user need to create Java project in Eclipse environment. If the project is created then only client able to create the JUnit test methods. The procedure shown below to demonstrates creating a Java project.
Step 1
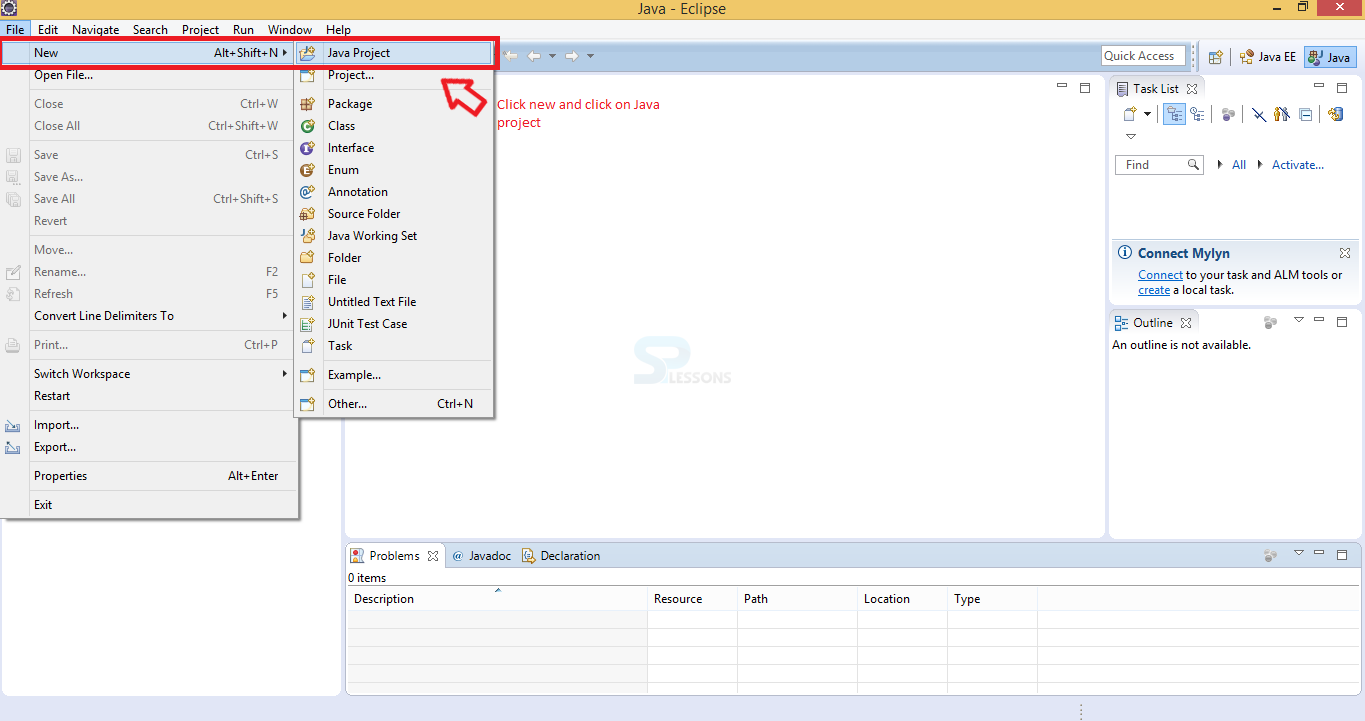
Eclipse has a user friendly environment user can easily create their own projects by using some inbuilt features. To develop the Java project first click on the File and then select New which explores a dialogue box select the Java project from that box the below image demonstrate the process clearly.
Step 2
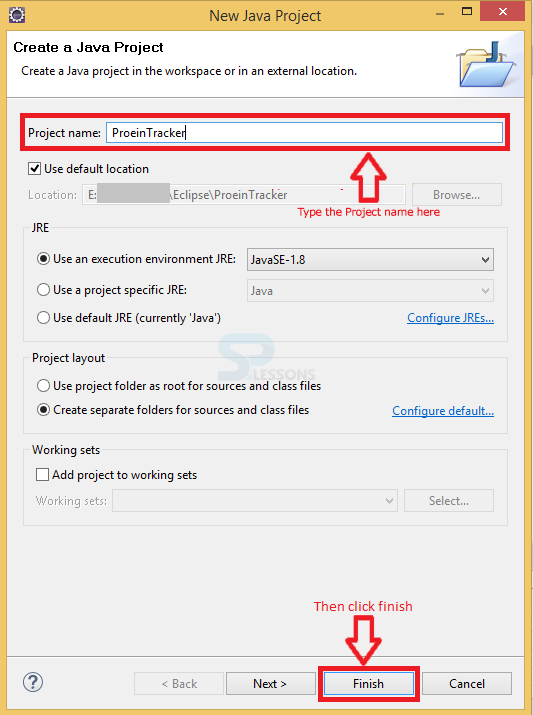
Now a window will be appears known as new Java project providing some options for creating a project like project name after completing the required changes proceed by click Finish button as shown in the below image.
Step 3
Assume the project name as ProteinTracker and the following are the two classes HistoryItem and TrackingService.
[c]
import java.util.List;
public class TrackingService {
private int total;
private int goal
private List history= new ArrayList();
private int historyId = 0;
public void addProtein(int amount)
{
total +=amount;
history.add(new HistoryItem(historyId++, amount, "add", total));
}
public void removeProtein(int amount)
{
total -= amount;
if(total = goal;
}
public list getHistory() {
return history;
}
[/c]
Developing the another class HistoryItem.Java
[c]
public class HistoryItem {
private final int id;
public int getId() {
return id;
}
public int getAmount() {
return amount;
}
public String getOperation() {
return operation;
}
public int getTotal() {
return total;
}
private final int amount;
private final String operation;
private final int total;
public HistoryItem(int id, int amount, String operation, int total) {
this.id = id;
this.amount = amount;
this.operation = operation;
this.total = total;
}
}[/c]
Step 4
User need to develop a Java project, assume the project name to be as ProteinTracker, then user need to add a test method to that project some thing like ProteinTrackerTest.
The code below demonstrate the test method for the created project.
[c]
import static org.junit.Assert.*;
import org.junit.Test;
public class helloJUnitTest {
@Test
public void test() {
//fail("Not yet implemented");
}
}[/c]
Description
Once done with the test method now its time to run the test method. The steps below demonstrate running the JUnit tests.
Step 1
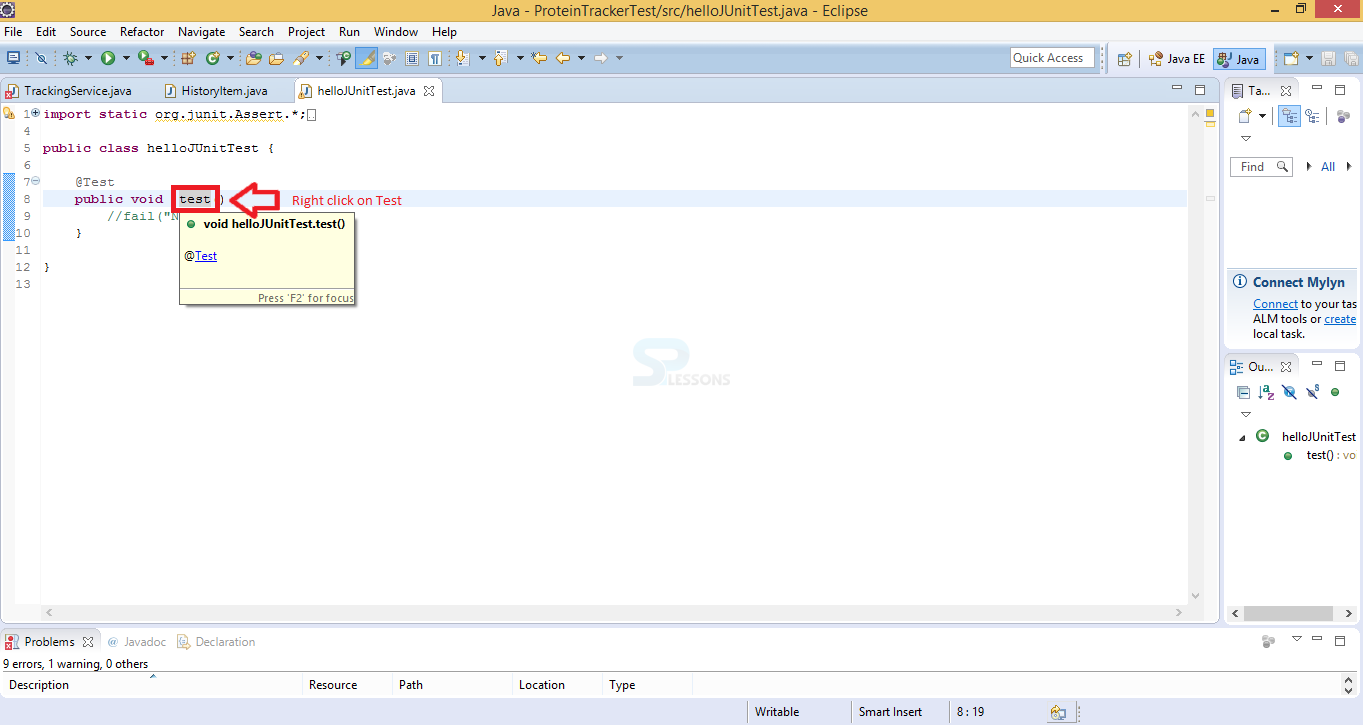
The created project test method can be run as follows as shown in the below image.
Step 2
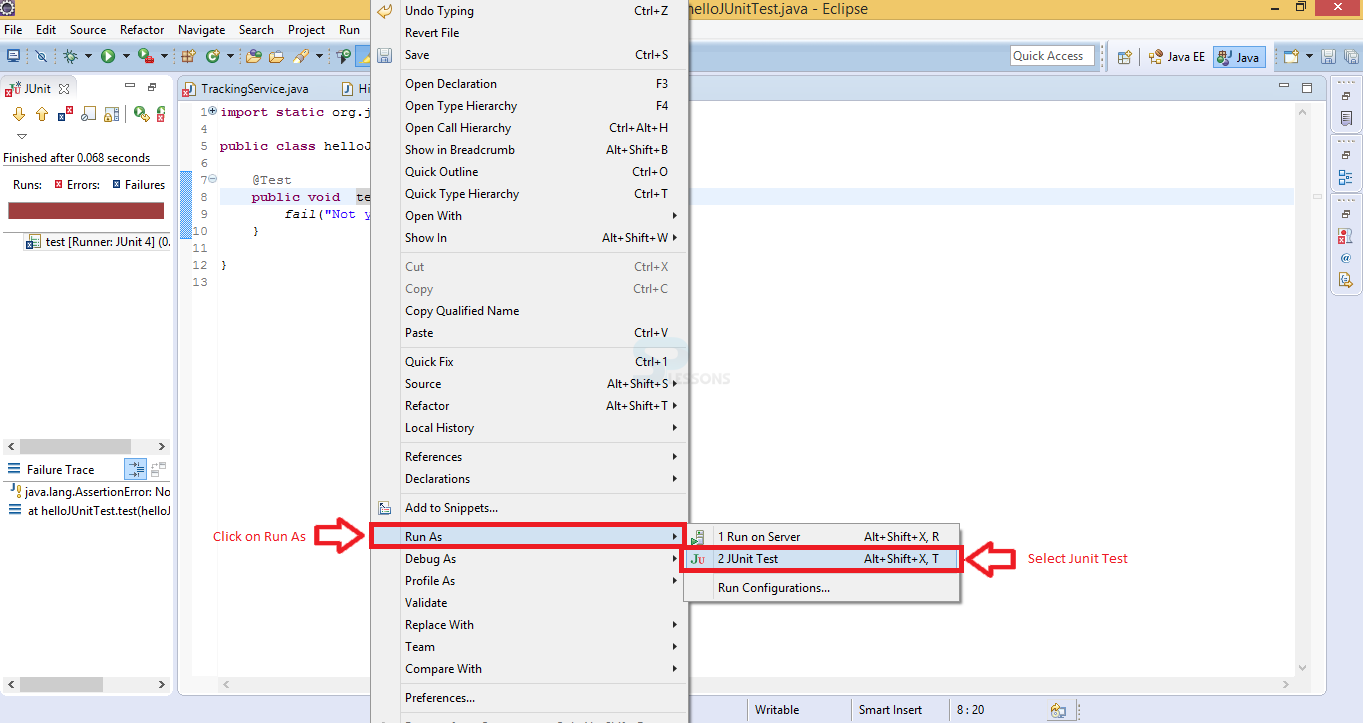
Now select the method - > Right click - > select run As - > select JUnit Test as shown in the below image.
Step 3
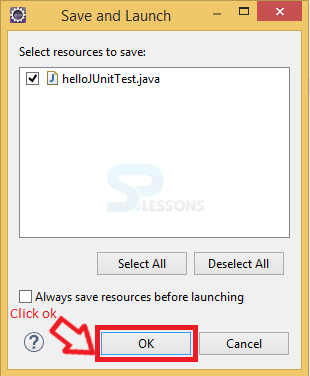
Now a popup window appear known as Save and Launch proceed by clicking Ok.
Step 4
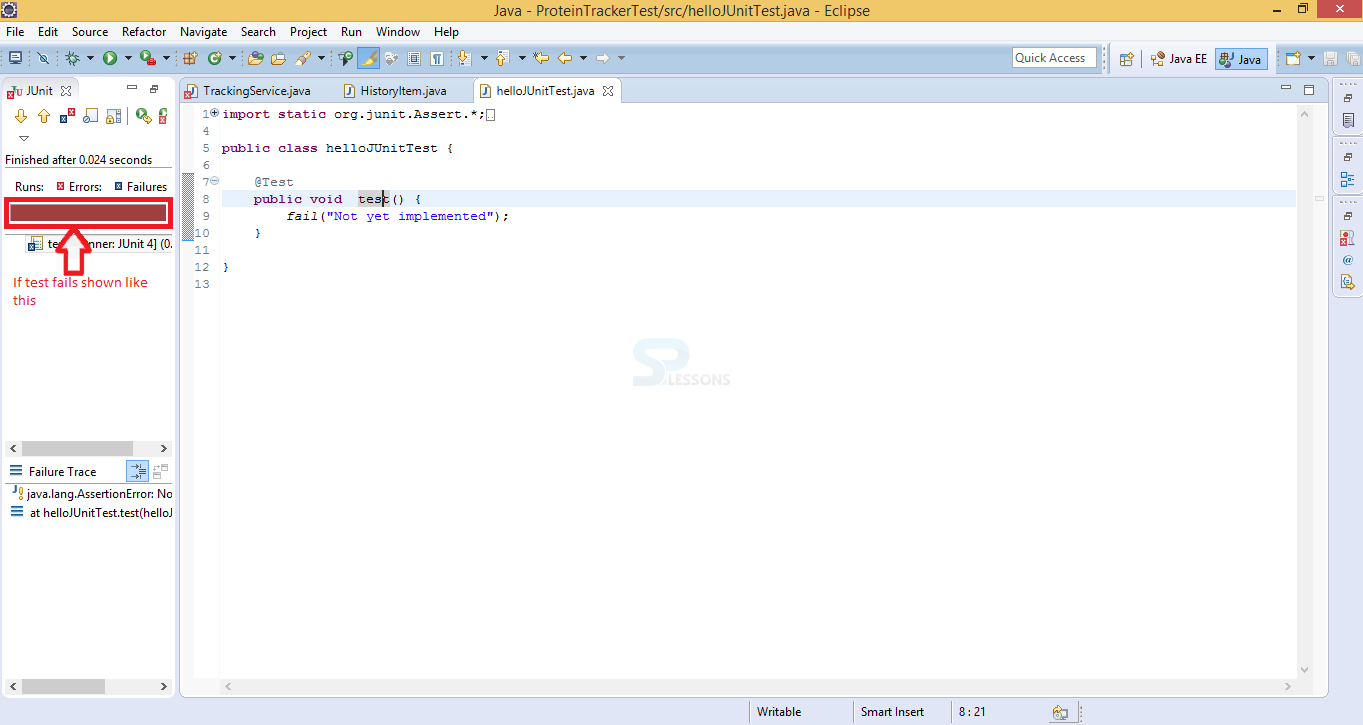
If the Test case have some errors then the output display would be in red colour which indicates the test case failure as shown in below image.
Step 5
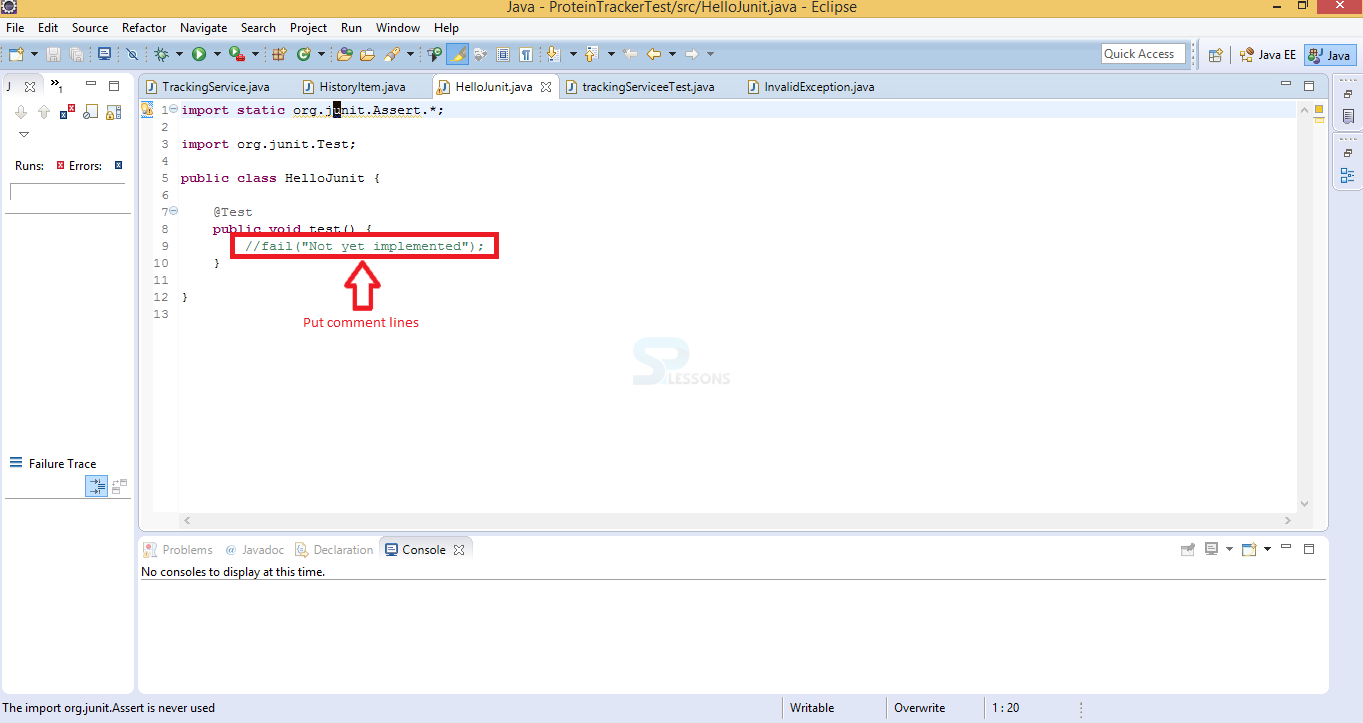
In order to obtain the positive results put two comment lines before file as shown in the below image.
Step 6
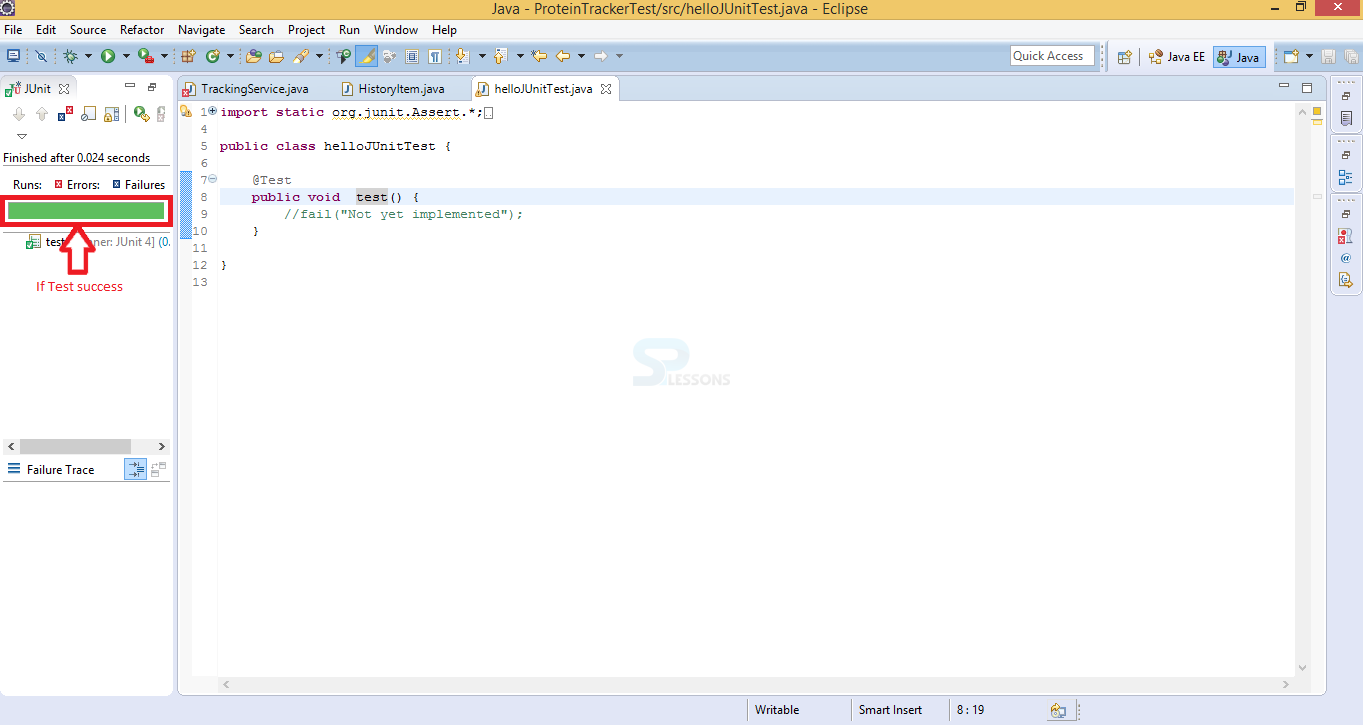
Now running the test case produces the output in green colour which indicates as successful as shown in below image.
Description
Extracting the failed test and stack trace is the test when the user get a failure message can trace the failures these facility is known as stack trace the below steps demonstrate the extracting failures and stack traces.
Step 1
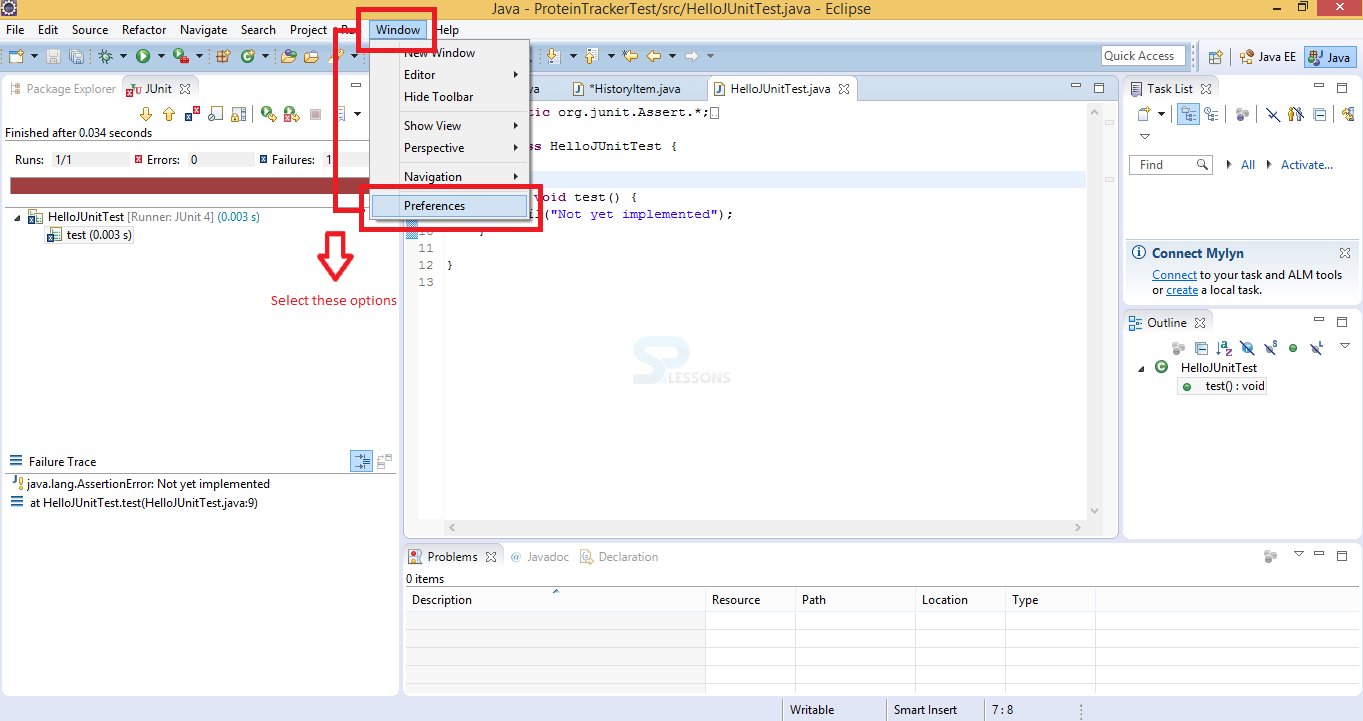
Follow the procedure in order to give JUnit Preferences.
Click on Window - > select Preferences
as shown in below image.
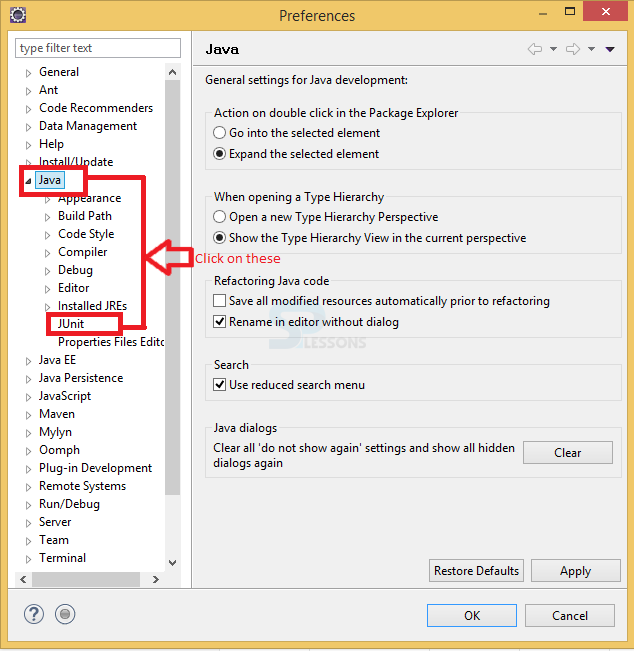
Step 2
Now a window get appear named as Preferences with providing some options. Select Java and JUnit the as shown in below image.
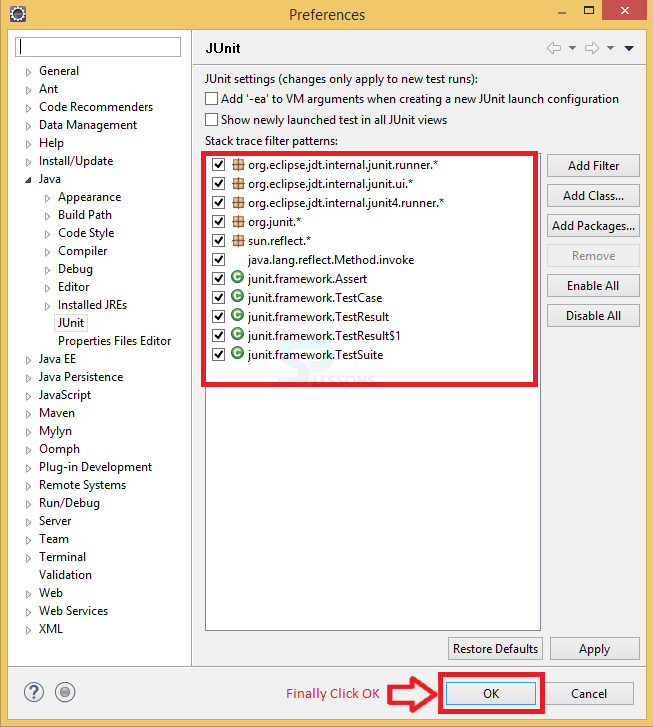
Step 3
Now user can view some JUnit packages and classes, click OK button in order to run the test.
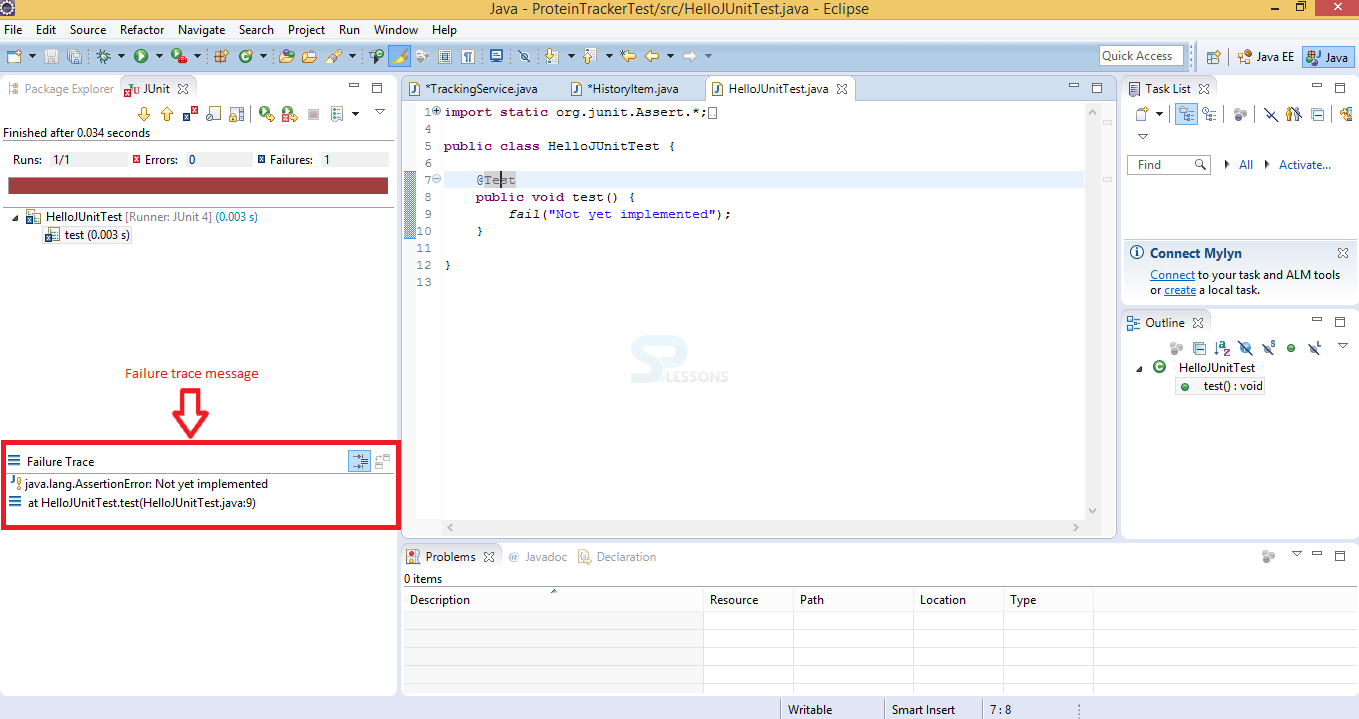
Step 4
Now user will run the test method and execute with some Failure Trace messages as is shown in below image.
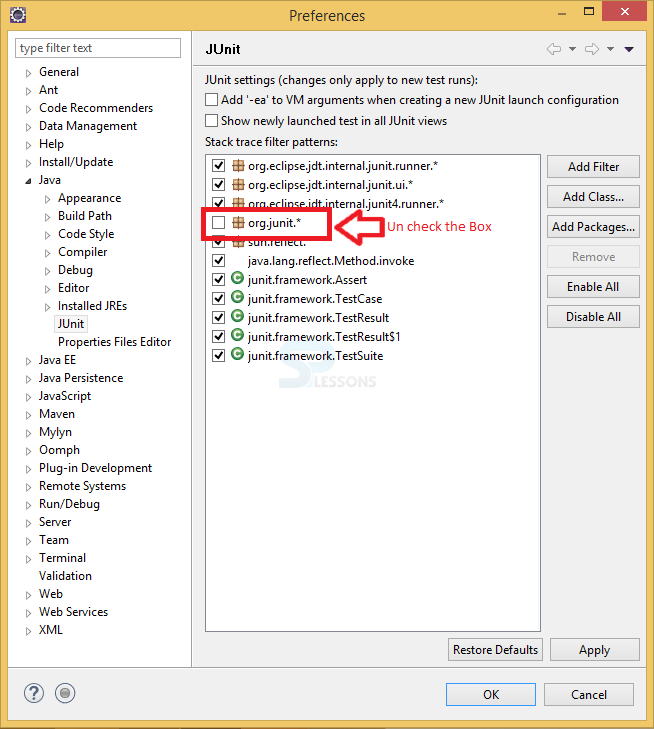
Step 5
In order to get the stack trace message user need to change the preferences of JUnit and run the test. In the preferences user unselecting the check box of org.Junit.* to get the stack trace message the process is shown In below image.
Step 6
Now again run the test method again will execute Stack trace message as shown in below image.

Description
Static imports are known as Eclipse imports. User need to add the some import statements to complete the code, to import the statements press Ctrl+Shift+O or save the imports while organizing imports. Below steps demonstrate the static imports of JUnit.
Step 1
In order to create Static imports follow the procedure as shown below
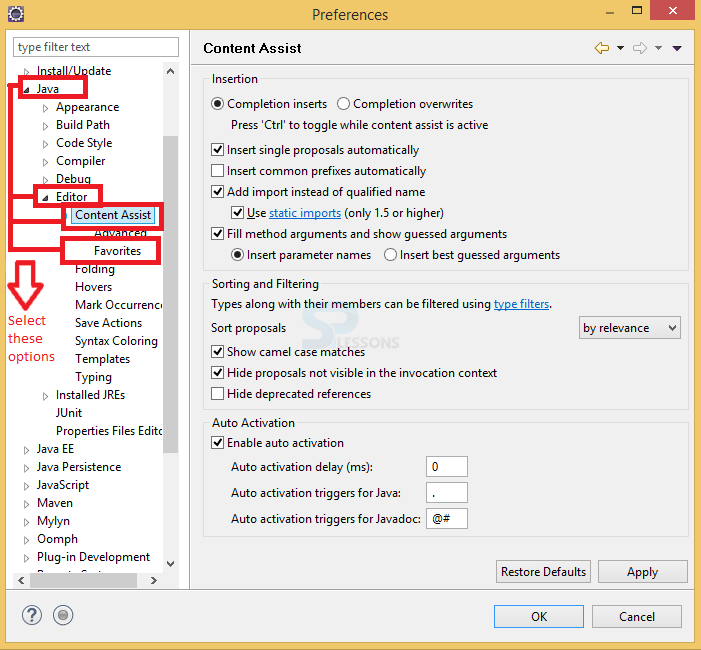
Select Window - > Click on Preferences - > then select Java - > click on Editors - > select Content Assist
The process is shown in below image.
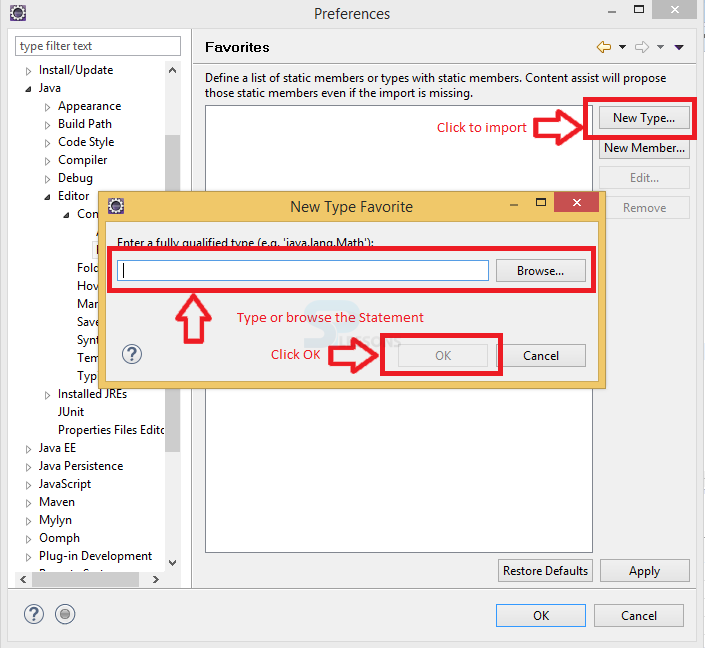
Step 2
A window get explored named as Preferences, now by clicking New Type buttona pop window will appear known as New Type Favorite, enter the import statement using the browse button after completing the required options proceed by clicking OK as shown in below image.
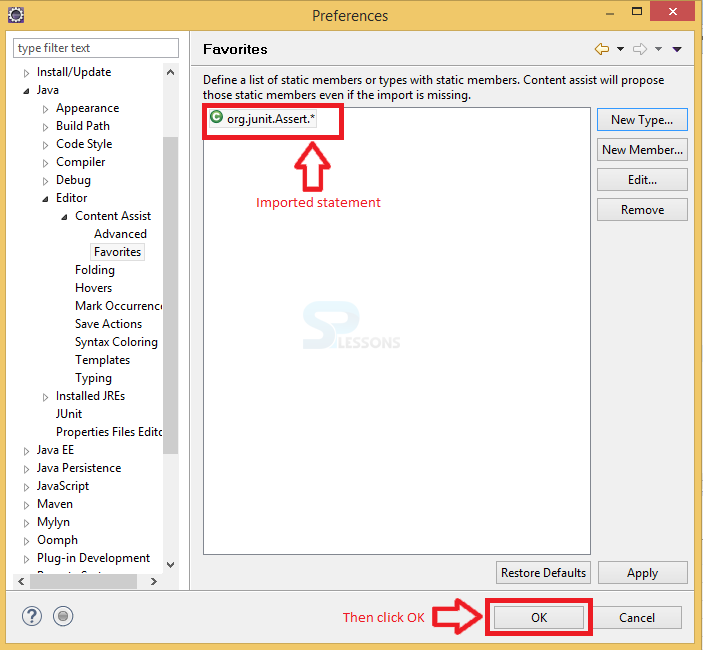
Step 3
A window get appear with imported statement, click OK button to complete the process as shown in below image.
Key Points
- JUnit Eclipse - While creating Java files and Classes user must and should follow the naming conventions.
- JUnit Eclipse - While running the Test case in Eclipse it is mandatory user should save and Launch the resources.
- JUnit Eclipse - By removing the slashes in the test code the test result must be fail.
- JUnit has several basic annotations used on methods inside a test class.
- Static import will works depends upon the organize import preferences.
- Stack trace perform complete tracing of the program.