


 Introduction
This chapter demonstrate about the JUnit Maven. Maven is developed based on the project developed model. Which gives complete framework life cycle and develop the multiple development teams environment in very short time. Following are the concepts covered.
- History of maven
- Setup Environment
- Integration with JUnit
Description
Maven was developed by the Apache group. Which is began life with Jakarta Alexandria project and it is designed for build multiple projects together, publish the project information deploying of projects, share jars across several projects. The Alexandria project is currently dead yet was the reproducing ground for Maven, as well as for the Gump and Forrest projects too.
Description
For the installation of Maven initially user must and should have installed Java set up if not go to the official page of Oracle then download and install Java.
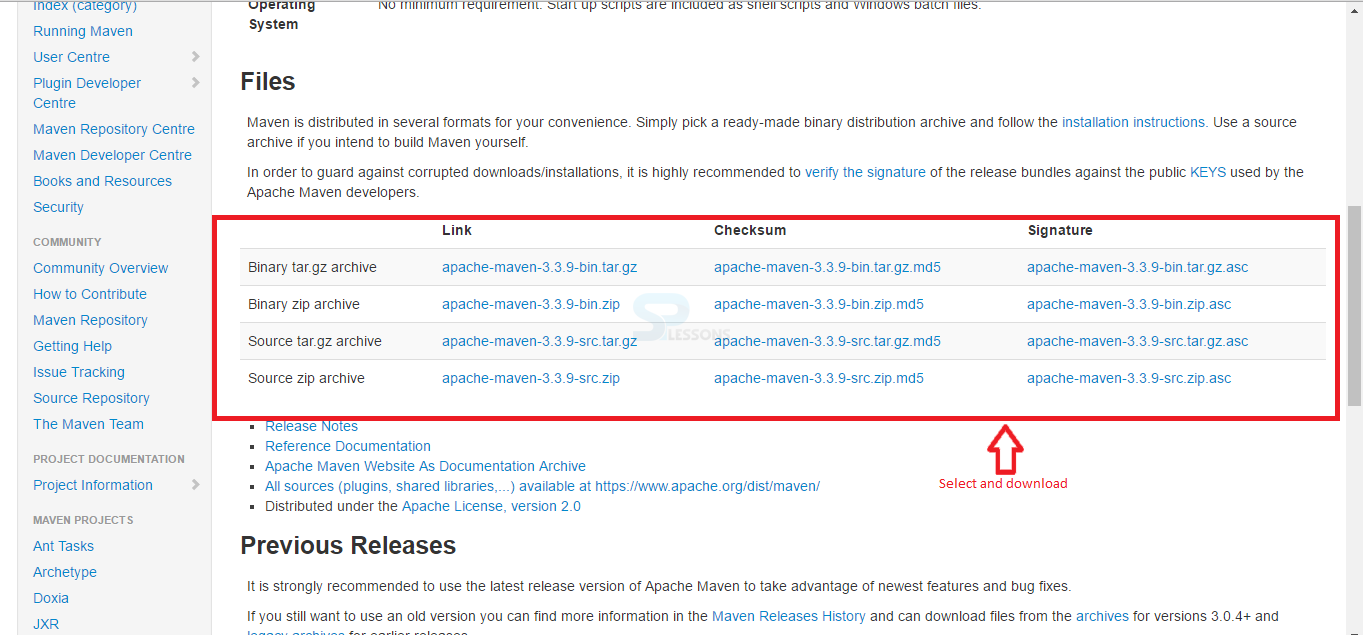
Now download Maven by visiting official page of Apache Maven project.
A window will appear with some links and Checksum and Signatures select the appropriate file and download in a suitable location. As shown in below image.
 System Requirements
- Maven requires JDK1.7 or above to execute.
- No minimum memory requirement.
- For Maven installation Approximately 10 MB is required. Addition to that at least 500MB used for local Maven repository.
- For Operating System no minimum requirement.
Description
JUnit also nicely integrate with Maven. Which is basically more than just a build tool it’s a whole dependency management tool that can also build your code and run your tests. Few dependencies are present to run the Maven for JUnit make sure that all files are in the right place and run a maven with a test goal.
Examples
The below demonstrate Example is for running the Maven for the JUnit Test. In the below steps describe about creating Maven and setup the files and running the JUnit tests in following steps.
Step 1
Initially user need to convert the project to Maven project in order to run in maven. Converting process clearly shown in below image.

Step 2
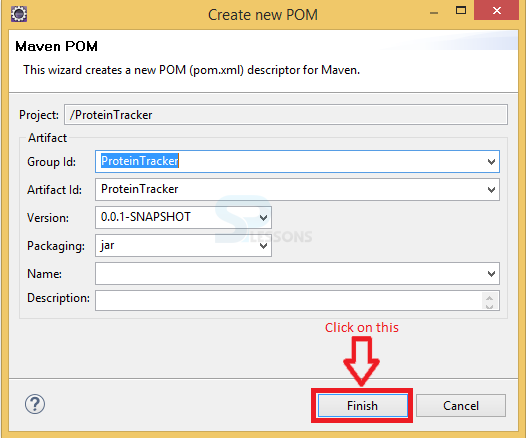
Now a window get appear with named as Create new POM and with created Group Id, Artifact Id and Version etc. Click on Ok to create the new POM the image is shown below.
 For ProteinTrackerTest also user need to create the POM file which is also same as above shown process.
Step 3
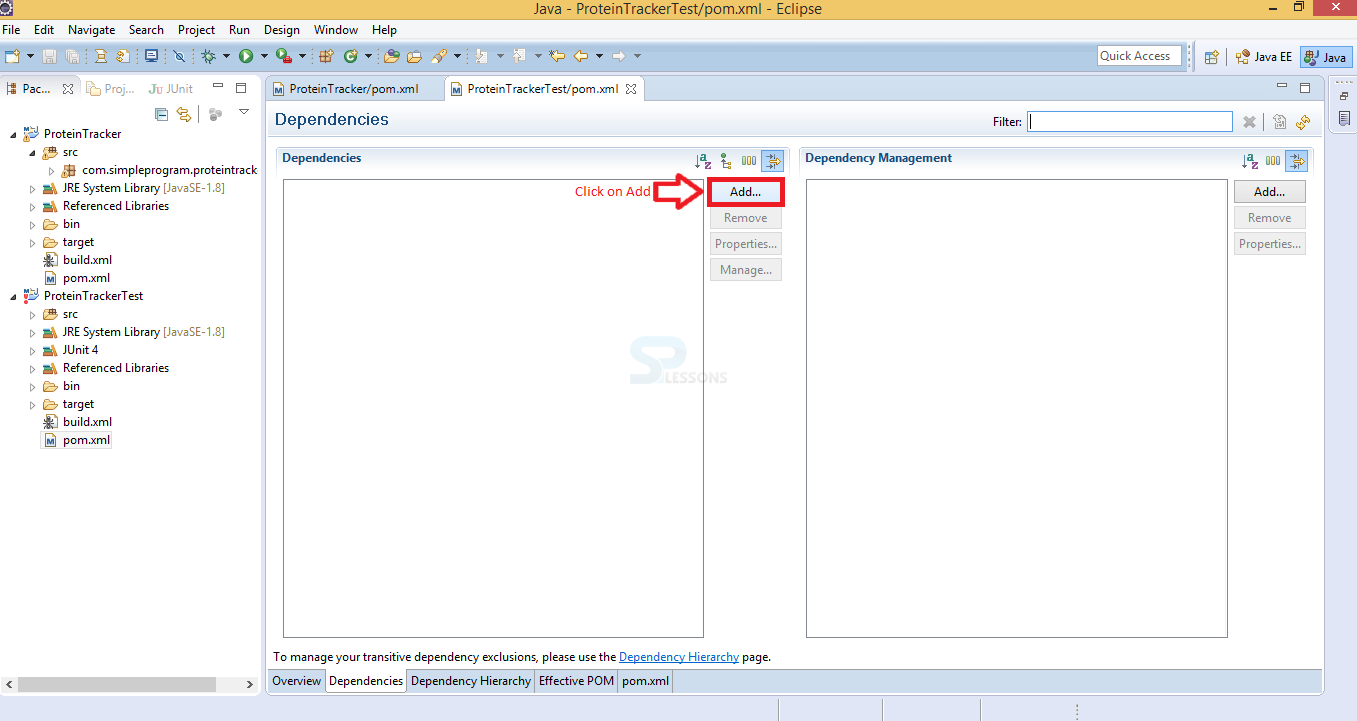
Then another window will appear with the dependencies. In this window user need to create the dependencies because ProteinTrackerTest depends on ProteinTracker in order to do this user select on the Add button to create dependencies that should be shown in following image.\
Step 4
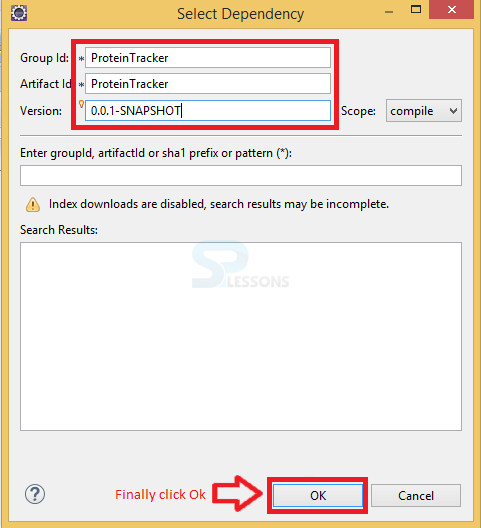
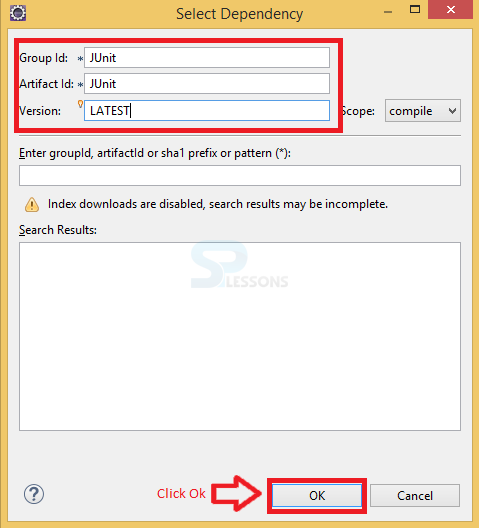
Now another window gets explored named as Select Dependency Here user need to enter the dependent Group Id, Artifact Id and Version then click on Ok.
 Now again select Add because these files also dependent on JUnit so create the dependencies on JUnit with the Latest version image is shown below.
Step 5
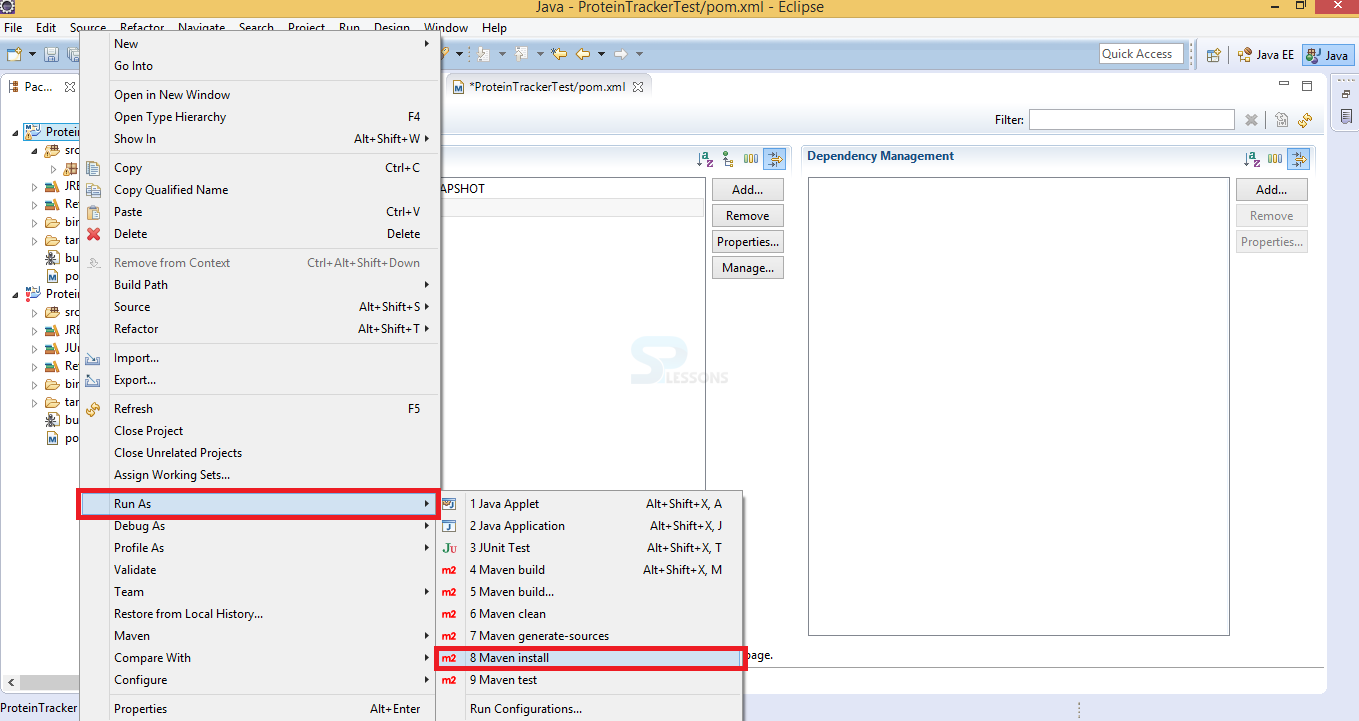
Right click on the project and Run As Maven install to run and install the Maven the image is shown below.
Step 6
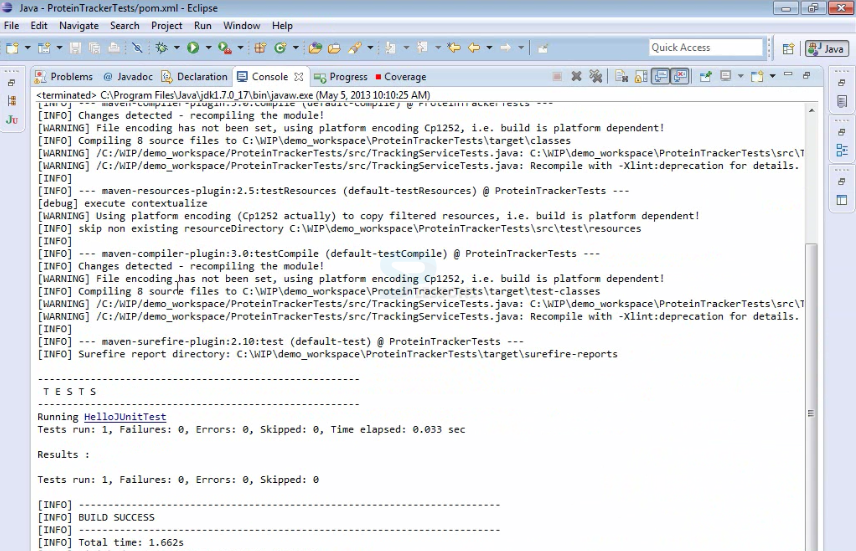
When the user go with the Run As and selected Maven install It will install the project into the Maven repository then it will run the all the test methods present in repository and generate the output with all the project details like building the protein files, Running class, Test time and some more information about the projects. The image is shown below.
Key Points
- JUnit Maven - To Run the Maven JDK is mandatory
- JUnit Maven - Maven provides sensible behavior for the project.
- JUnit Maven - All POM files require the three elements groupId, ArtifactsId and Version in a project.
- Maven allows transparent migration to new features