


 Introduction
This chapter demonstrate the JUnit Dependency which is really depends on history item and it is a simple DTO. In order to create the dependencies use the stubs following are the concepts.
- Stub
- Mocks
Description
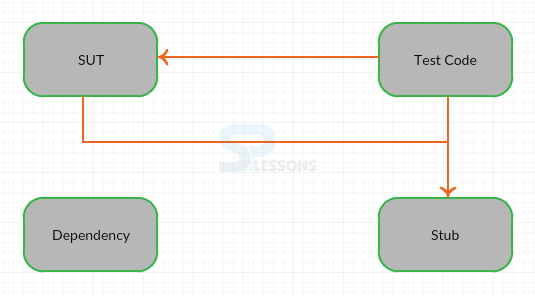
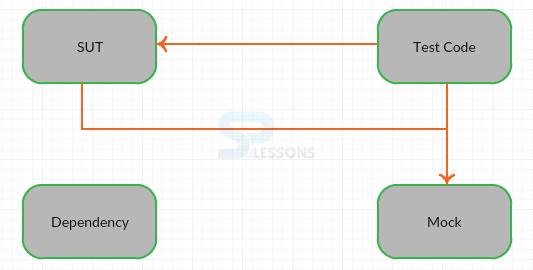
Stub is one of the easiest way to use JUnit Dependency which is basically some code that pretends the Dependency, by using SUT(System Under Test) and it is basically will allows to test SUT code without having to test any other dependencies in Java. In order to create the stub initially user need to create the interface that represents dependency. Once the Stub class was created will implements the interface. The below shown image demostrate the stub.
Step 1
Initially user need to create the dependency. In order to create the dependency user need to create Java interface the process should be as shown in below image. 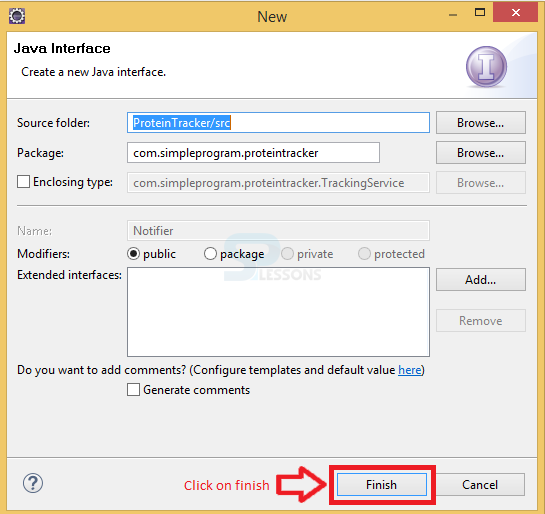 When creating the interface click on the method name and create the interface it will directly take the interface name user just click on the Finish button to finish the step then the dependency created.
Step 2
Now user need to create the Stub. In order to create the stub initially create the NotifierStub Java Class while creating the class, implement the interface with the class.
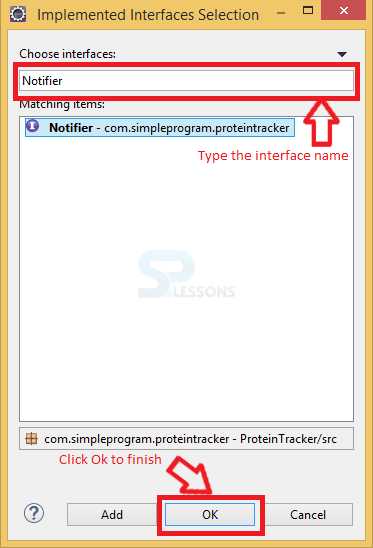
In order to implements the interface click on the add button provided, the process as shown in below image.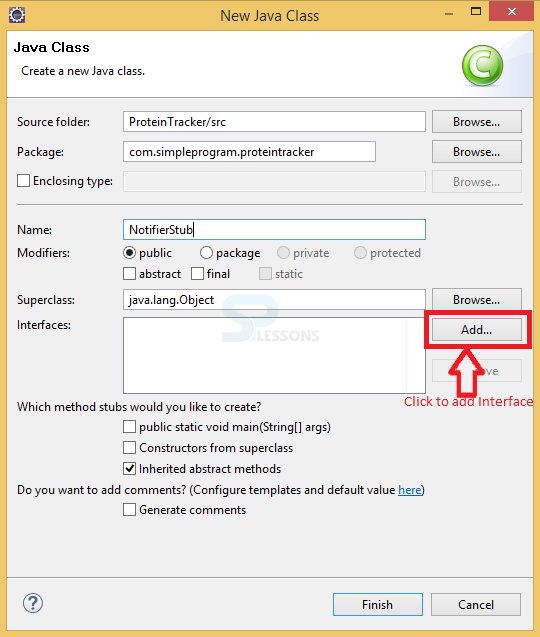 Now the window will appear named as Implement Interface Selection and type the interface name and proceed by clicking OK button.
 The code below demonstrate the new created class NotifierStub.
[c]package com.simpleprogram.proteintracker;
public class NotifierStub implements Notifier {
@Override
public boolean send(String message) {
return true;
}
[/c]
In order to use this class user make some changes to the TrackingService class as shown in below code.
[c]package com.simpleprogram.proteintracker;
import java.util.*;
public class TrackingService {
private int total;
private int goal;
private List <HistoryItem> history = new ArrayList<HistoryItem>();
private int historyId = 0;
private Notifier notifier;
public TrackingService(Notifier notifier)
{
this.notifier = notifier;
}
public void addProtein(int amount)
{
total +=amount;
history.add(new HistoryItem(historyId++, amount, "add", total));
if(total > goal)
{
boolean sendResult = notifier.send("goal met");
String historyMessage = "sent:goal met";
if(!sendRsult)
historyMessage = "send_error:goal met";
history.add(new HistoryItem(historyId++, 0, historyMessage, total));
}
{
boolean sendResult = notifier.send("goal met");
String historyMessage = "sent:goal met";
if(!sendResult)
historyMessage = "sent:goal met";
history.add(new HistoryItem(historyId++, 0, historyMssage, total));
}
}
public void removeProtein(int amount)
{
total -= amount;
if(total < 1);
total=0;
history.add(new HistoryItem(historyId++, amount, "subtract", total));
}
public int getTotal() {
return total;
}
public void setGoal(int value) throws InvalidException {
//if (value < 0) //throw new InvalidException(); goal = value; } public boolean isGoalMet(){ return total >= goal;
}
public List<HistoryItem> getHistory() {
return history;
}
}
[/c]
The Eclipse installed with the InfiniTest it will automatic run the test and get the output.
The code below demonstrate the new created class NotifierStub.
[c]package com.simpleprogram.proteintracker;
public class NotifierStub implements Notifier {
@Override
public boolean send(String message) {
return true;
}
[/c]
In order to use this class user make some changes to the TrackingService class as shown in below code.
[c]package com.simpleprogram.proteintracker;
import java.util.*;
public class TrackingService {
private int total;
private int goal;
private List <HistoryItem> history = new ArrayList<HistoryItem>();
private int historyId = 0;
private Notifier notifier;
public TrackingService(Notifier notifier)
{
this.notifier = notifier;
}
public void addProtein(int amount)
{
total +=amount;
history.add(new HistoryItem(historyId++, amount, "add", total));
if(total > goal)
{
boolean sendResult = notifier.send("goal met");
String historyMessage = "sent:goal met";
if(!sendRsult)
historyMessage = "send_error:goal met";
history.add(new HistoryItem(historyId++, 0, historyMessage, total));
}
{
boolean sendResult = notifier.send("goal met");
String historyMessage = "sent:goal met";
if(!sendResult)
historyMessage = "sent:goal met";
history.add(new HistoryItem(historyId++, 0, historyMssage, total));
}
}
public void removeProtein(int amount)
{
total -= amount;
if(total < 1);
total=0;
history.add(new HistoryItem(historyId++, amount, "subtract", total));
}
public int getTotal() {
return total;
}
public void setGoal(int value) throws InvalidException {
//if (value < 0) //throw new InvalidException(); goal = value; } public boolean isGoalMet(){ return total >= goal;
}
public List<HistoryItem> getHistory() {
return history;
}
}
[/c]
The Eclipse installed with the InfiniTest it will automatic run the test and get the output.
Description
Mock can test the behavior and isolate the SUT. Mock object will act like dependency and also record the calls were made to it which returns a specific data under certain conditions and also verify the expected and actually happened in tests. The below image demonstrate the Mock.
Description
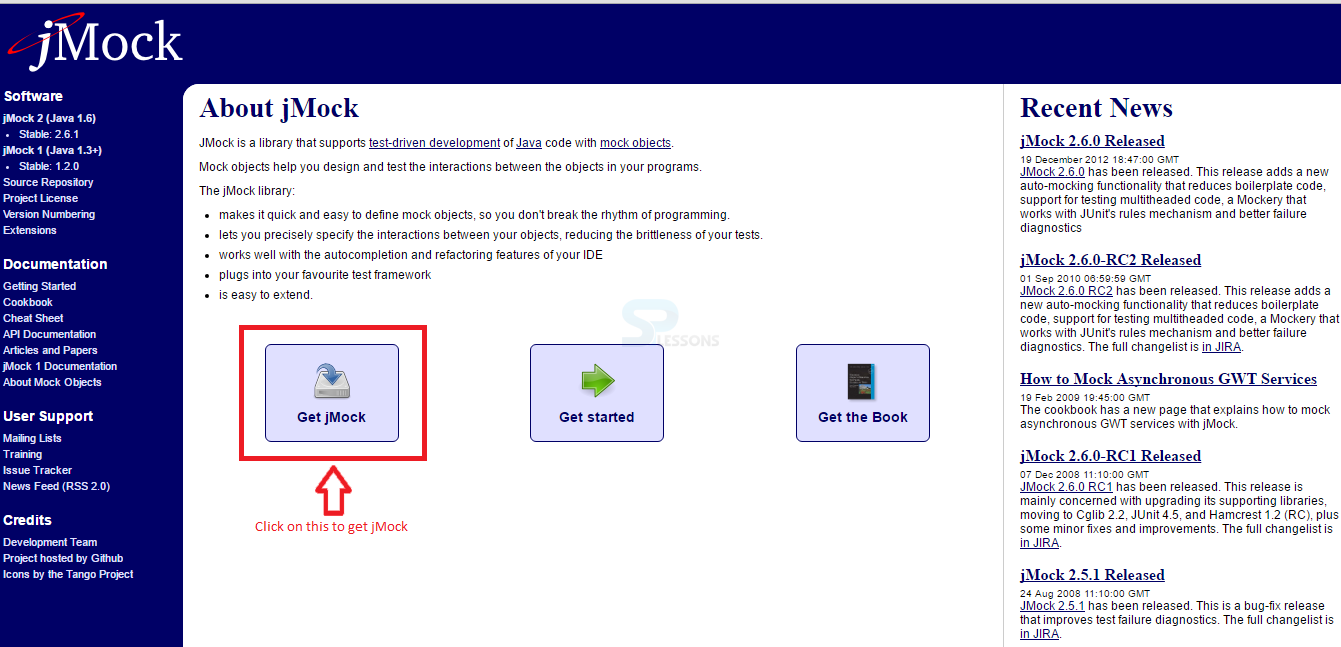
Java have the plenty of different mocking frameworks, in that mostly commonly used frame work is jMock. In order to use the jMock user need to download the jMock JAR from the official page of jMock.org and get the setup inside of project.
Step 1
Now a window get appear with some information About jMock and click on the Get jMock provided as shown in below image.
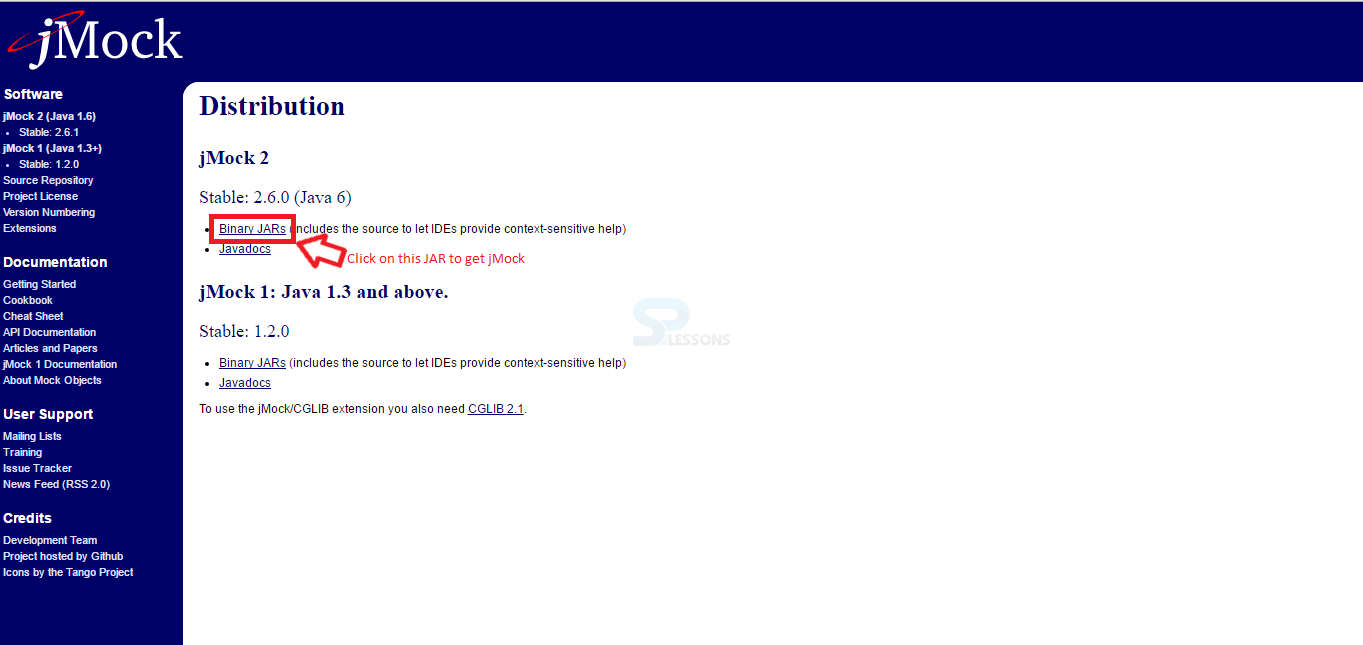
Step 2
Now a window get appear with Distribution of jMock files and with some different versions of jMock select the appropriate JAR file and download as shown in below image.
Step 3
In order to use jMock get it into eclipse follow the path shown below
Right click on ProteiTrackerTest - > Select Build Path - > select Add External Archives.
The below code demonstrate the using of jMock.
[c]
package com.simpleprogrammer.proteintracker;
import org.junit.Before;
import org.junit.BeforeClass;
import org.junit.Ignore;
import org.junit.Test;
import org.junit.After;
import org.junit.AfterClass;
import com.simpleprogram.proteintracker.InvalidException;
import com.simpleprogram.proteintracker.TrackingService;
import static org.junit.Assert.*;
public class trackingServiceeTest {
private TrackingService service;
@BeforeClass
public static void before()
{
System.out.println("Before Class");
}
@AfterClass
public static void after()
{
System.out.println("After Class");
}
@Before
public void setUp()
{
System.out.println("Before");
service = new TrackingService();
}
@After
public void tearDown()
{
System.out.println("After");
}
@Test
public void WhenGoalIsMetHistoryIsUpdate()
{
Mockery context = new Mockery();
final Notifier mockNotifer = context.mock(Notifier.class);
service = new TrackingService(mockNotifier);
context.checking(neww Expections(){{
oneOf(mockNotifier).send("goal met");
will(returnValue(true));
}});
service.setGoal(5);
service.addProtein(6);
HistoryItem result = service.gethistory().get(1);
assertEquals("setent:goal met", result, getOperation());
}
@Test
public void NewTrackingServiceTotalIsZero()
{
assertEquals("Tracking service was not zero", 0, service.getTotal());
}
[/c]
Key Points
- JUnit Dependency - Stub class return back dummy data and store little bit information.
- JUnit Dependency - Mock object will act like a real dependency.
- jMock support test-driven development for Java.