


 Introduction
This chapter demonstrate about the Install JUnit, For JUnit unit testing users need not to create any environment. Which is already available with Java environment set up at server side and also creates own environment by installing JDK in user’s machine. To get the JUnit in user’s machine following are the method.
- Unit testing in Java
Description
Unit testing in Java is known as JUnit unit testing frame work for Java. Which is a testing environment set up for the Java there are many ways to set up the JUnit environment. In order to set up the JUnit environment follow the procedure shown below.
Description
JUnit is a widely used frame work for Java. User can get the JUnit JAR files from the JUnit.org official web site and go to the download and Install JUnit.
Step 1
To get the Install JUnit link follow the official page of JUnit.org as shown in below image.
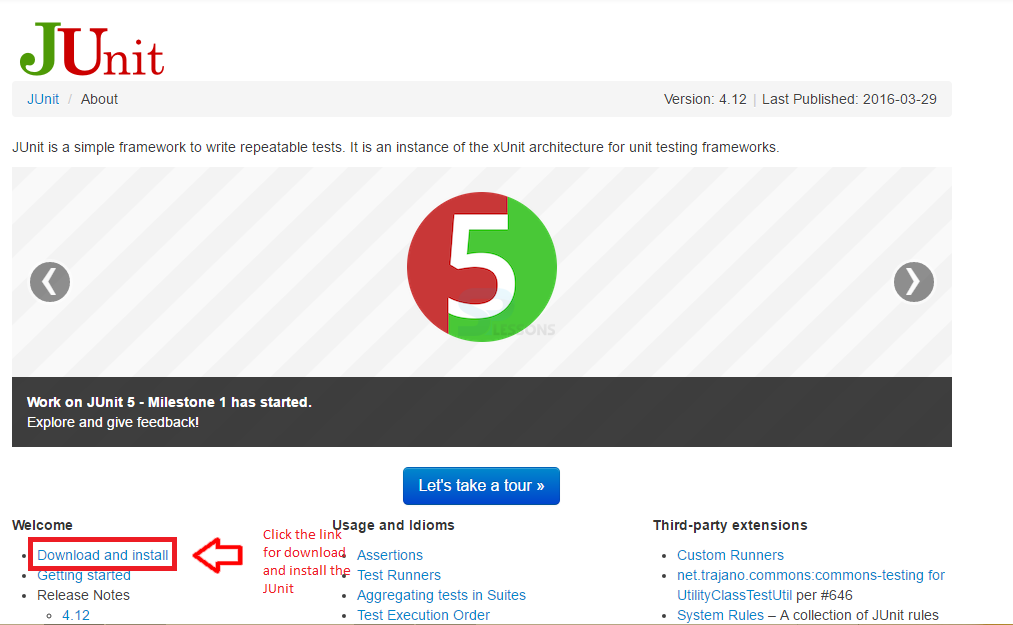 Proceed by clicking on the Download and Install to get these JUnit.
Step 2
Now the page appears with JUnit.jar and hamcrest.jar files click and select appropriate file to download and complete the installation process of JUnit.
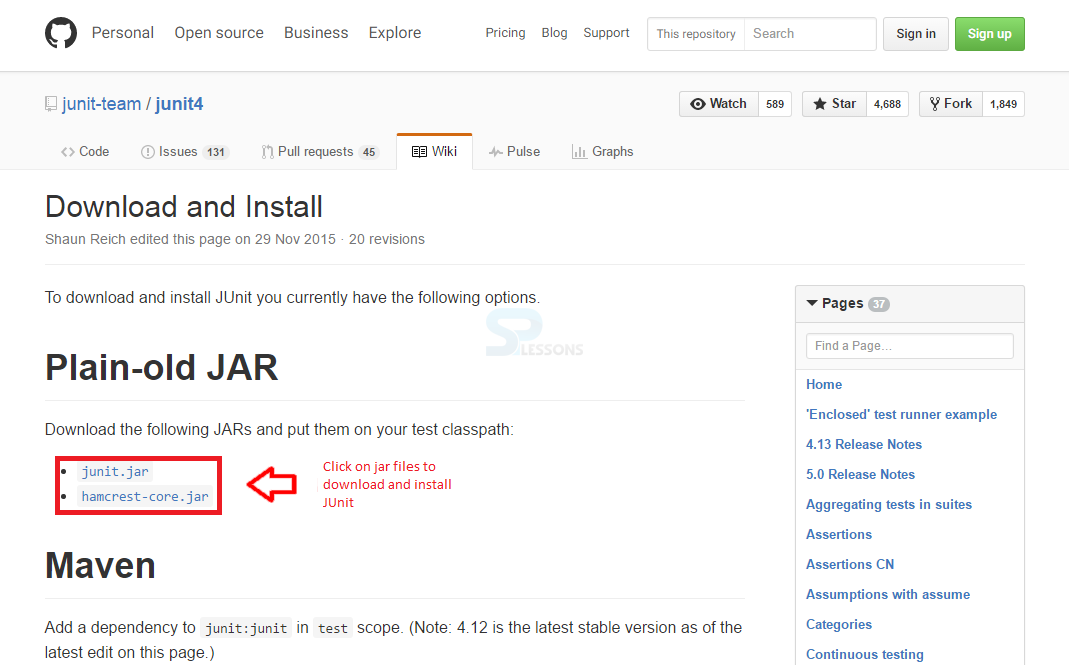 Put these jar files in a test path to complete the test process of the JUnit testing .
Description
In order to set up JUnit testing user need to set up Java environment initially. If user already have a Java IDE there is a chance to have JUnit by default if not following Steps demonstrate downloading and installation process of Java.
Step 1
In order to get the Java Check the official page of ORACLE.
Step 2
Select one of JDK File and proceed by clicking, now the page redirects to the latest version of selected JDK, proceed by clicking the download link as shown in the image below.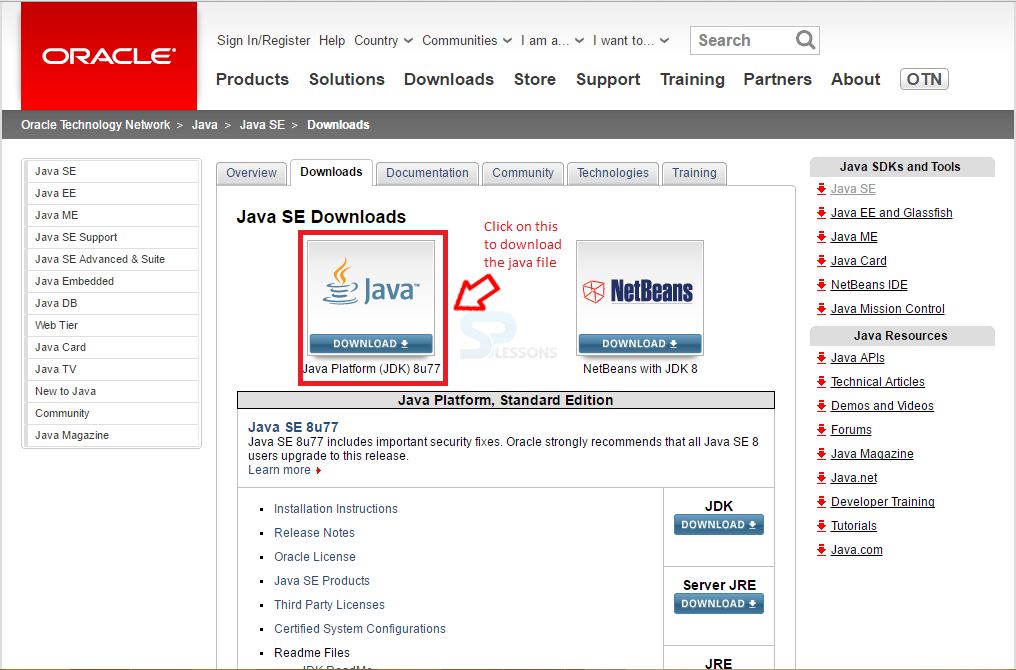
Step 3
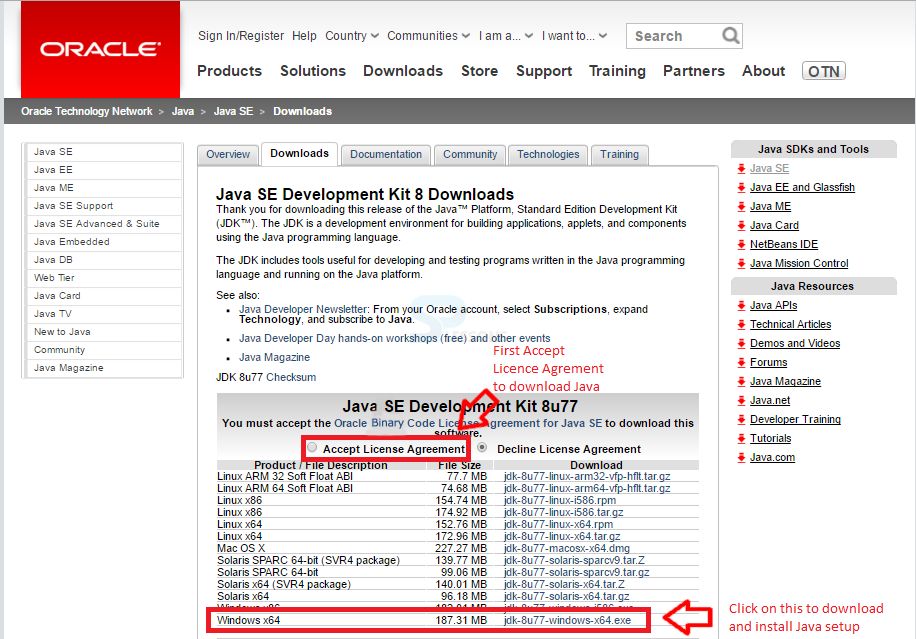
Click Accept the License Agreement and select the JDK that shown in the image below.
Step 4
Select the downloaded file and run the file in order to install, by running the file a Setup window gets displayed, proceed by clicking Next as shown in the below image.

Step 5
A Custom Setup window appears providing some Optional features to be installed, client can change the features as per the choice and proceed by clicking the Next button as shown in the image below.

Step 6
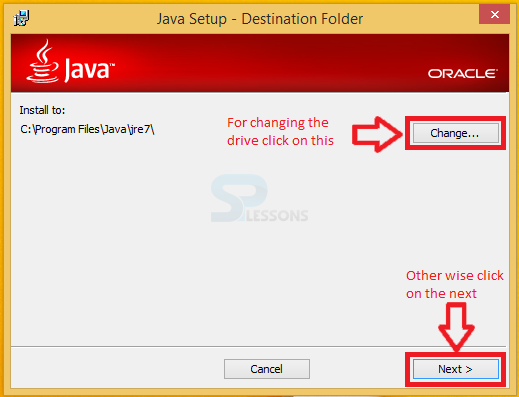
Now some operations are performed removing old copies, copying some new files, Extracting the installer and also It will display the status of the installation. After these process a window appears called destination folder user can either change the destination folder or can leave it as default. Proceed by clicking Next button.
Step 7
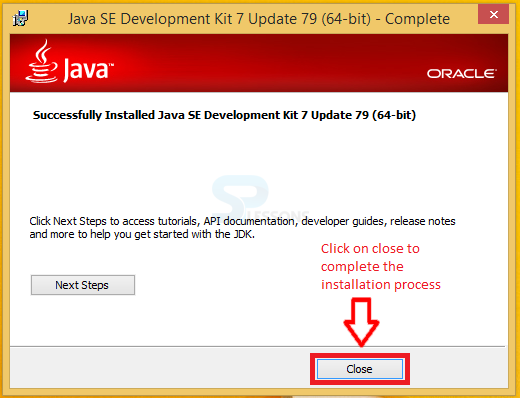
Now a window appear known as complete which display the message Successfully Installed Java SE Development kit. Now proceed by clicking Close button.
Step 8
After completing Java installation user need to set class path.
In order to do this select the path from the drive as shown below.
My Computer -> Program Files -> Java -> Jre7 -> bin
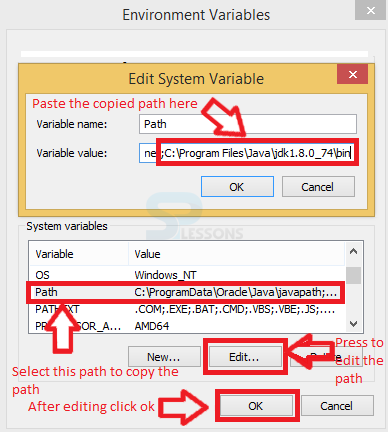
Now paste the path in the path process as shown in below images.
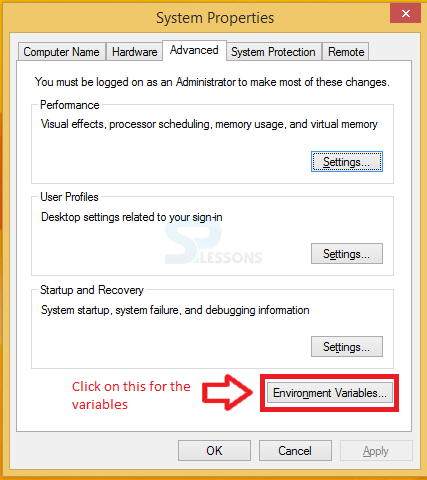
First right click on My Computers and then go to the Properties then users will get the window as shown below.
Then click on the Advance System settings then another window will appear as shown in below image.
 By clicking on Environment Varibles button a window appears by providing some options like Edit System variables, after completing all the required changes proceed by clicking OK as shown in below image.
Description
Before downloading the Eclipse, pick up the target platform Linux/Mac/ Windows and make sure that the machine has a Java run time environment already installed, use either a 32-bit or a 64-bit versions of Eclipse and must have a JRE/JDK source that matches i.e.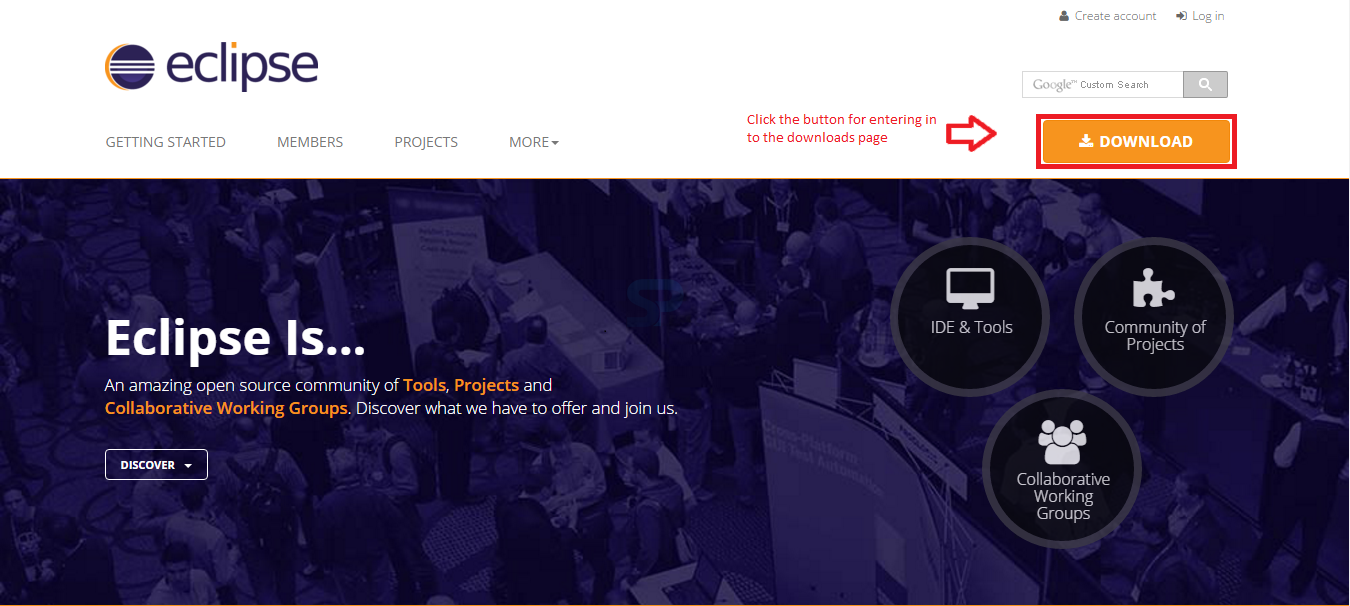 A page appears providing a list of Eclipse versions by clicking the download link button, select the preferred version and download the Eclipse by clicking on it as shown in the image below.
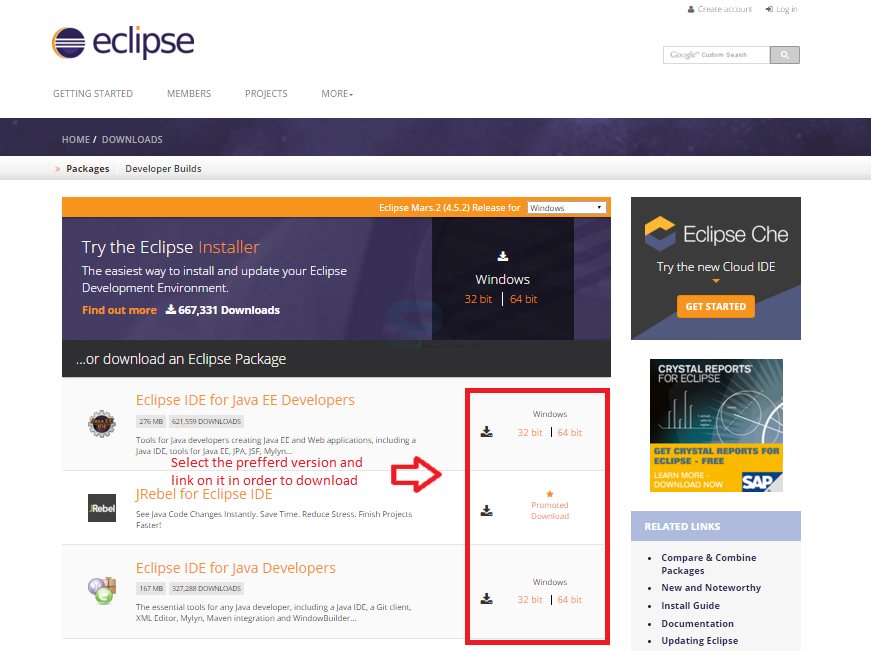 It shows drop down box in the right corner of the download page to set the operating system on which eclipse is to be installed.choose from drop down box Windows, Linux and Mac. Eclipse is packaged as a zip file, so extract the zip file into preferred drive.
Select the Preferred Eclipse version.
In order to use the Eclipse for JUnit, Download from the official website of Eclipse.
By clicking the link, a page appears with a download link for Eclipse as shown in the image below, now click the Download button on the page in order to download the Eclipse for JUnit.
- 32 bit JRE needs the 32 bit version of Eclipse
- 64 bit JRE needs the 64 bit version of Eclipse
- Java
- C++
- Others
- Make your own
- For Java, Download JDK for the selected platform
Description
If the directory have a fairly long path, when the user unzip the downloaded files under Windows can get errors about path names being too long. In order to avoid such errors make sure that the default download directory is fairly deep on the hard drive that and first move this up fairly high on the hard drive before unzipping, and thereafter no errors about path names being exceeded.
In order to install Eclipse, required a tool which can extract the contents of a zip file. The tools like,
Now, Right click on the downloaded Zip file and extract all the files to the preferred directory to be installed by clicking Extract. The image below display the Eclipse files folder extracted to the particular directory given.

- PeaZip
- IZArc
- 7-zip
Description
Immediately after lunching Eclipse, a window appears asking the drive to store the Workspace. A workspace is a collection of projects that are to be work with when launching Eclipse. A project can take any number of forms from a desktop executable, a library, a set of web pages, and more. If the client used to working with a product like Visual Studio, a workspace can be a little bit of an adjustment. Not all projects in a workspace have to be related and can take any approach that are like to creating a workspace.
User can create a single workspace and create every programming project under that workspace. Eclipse is actually geared towards this approach. It has some additional tools like working sets, but working sets allow for convenient grouping to make it easy to work with a subset of the projects and can also create any number of workspaces. The work space can be set to default or changed to new folder location using the Workspaces Preference window as shown in the image below.

Key points
- Install JUnit - Choose the right platform and requirements To download the Java.
- Install JUnit - Setting the Class path is mandatory to run the Java.
- Choose the workspace folder in Eclipse to store the projects in a single folder.
- Java have several optional features. User can change choice of features after installation by using the Add/remove programs utility in the Control Panel.