


 Introduction
In order to use GitHub for Mac OS X, ensure that Mac running at least OS X 10.7. To check the Mac version, go up to the top left of the screen, click the Apple menu and select about this mac. And also ensure the user account on the computer has admin privileges, and know the password before proceeding to install Git on Mac.
In this article, one can learn about.
- Command line tool for OS X installation.
- Terminal Application.
- Installing Git.
- GitHub for Mac.
- GitHub X code projects.
- Generating SSH Keys.
Description
For setting up Git and GitHub for Mac OS X need a specific set of command line tools, which occupies much less space. However Apple offers Xcode nearly 4GB developer suite from the Mac app store. If one don’t want all the 4 GB go for Xcode can register at connect.apple.com. Create an account to download tools.
After full filling the required registration details, tools can be found at Apple official website. Click view downloads and select the required command line tool for the Mac version.
For OS X 10.7.x, download the 10.7 command line tool and if it is OS X 10.8.x, download the 10.8 command line tools. Complete the download process and open the DMG, run the command line tools installer.
Description
The Terminal application has some variety of uses, the application is installed by default with the OS X, and located in the Utilities folder under the Applications folder and can access quickly using the Spotlight.
Terminal configured by default with the syntax/command set called Bash. When one enter a command and press return or enter, the terminal execute it and complete the task immediately.
Description
Git is a version control system or source control system which track the changes and allow to commit the changes to a source control repositories. These systems are developed to facilitate collaboration among a group of developers working in the same code base. Git is different from other version control systems and is a modern Distributed version control system. There are most advantageous scenarios in Git as a distributed system. Git mainly focuses on.
In an open source community, version control system should be very fast and Git has been proved very fast and scalable. As software project scales from small to large projects with number of developers involved in. So, system need to be distributed and parallelized.
- Branching and merging
- Committing
- pulling and pushing
Description
Mac OS X comes with an old version of Git installed by default and the dock have no icon, but can be used by the Terminal and other applications. So, the one using Mac have to make sure themselves that whether the terminal is using the updated version or not.
The advantage of having the newer version of Git is to have a nice authentication feature that allows seamlessly interact with GitHub. The following steps explains the download process and installation process of Git in Mac.
Step 1
Download and install the latest version of Git-OS-X.
Step 2
After downloading, run the file in DMG. Before installing modify the Security settings to allow the installation of third-party applications only if using the OS X 10.8.
Step 3
In order to configure Git open the terminal and type the below commands.
git config --global user.name “your name”
git config –global user.email your@email.com
Step 4
After installing the Git, create a Git repository. Open the terminal, cd into the root folder of the project, and type the command.
git init Step 5
Initially the Git repository looks empty. So, first need to Stage by adding to the index.
To add files to the project using the command:
git add
To commit the added files type the command:
git commit –m “commit message”
To view the status of the repository:
git status Description
Git repositories can be controlled using the command line. But, in order to make the transaction smooth download GitHub for Mac. The following steps explain the process how to download GitHub for mac and install.
Step 1
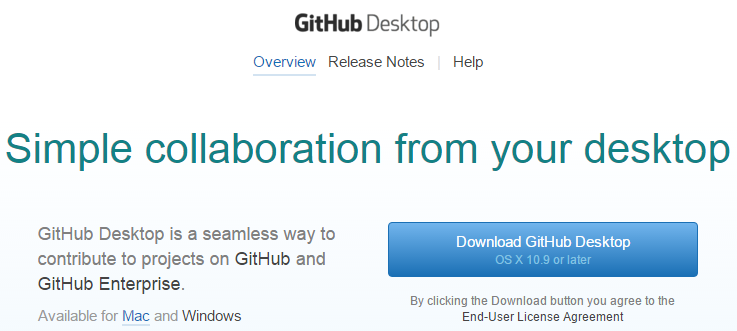
In order to download GitHub for Mac create an account in GitHub.com. Immediately after singing in click the Set up Git. That’s going to bring a page and provide download link for the Github setup for Mac. Click the link below to download GitHub for Mac.
https://desktop.github.com/ click the link and that’s going to bring a page as shown below.
Step 2
Download the file, run the file to install. After installation automatically it opens a window initially GitHub for desktop have empty repositories. So, go head create a repository in Github and connect it to a folder in the hard drive.
Step 3
To create a new repository, go to GitHub account type the user name in the upper bar and push the New repository button.
Step 4
By clicking the button new repository, that’s going to bring a page, where the desired name and description to be filled.
Step 5
After filling the required information click the button create repository, which going to open up a page with several instructions. Skip the Global setup section since it executed already while setting up Git. So, click the Next step section. Open the terminal and make a directory to save the local repo. The commands varies as per the user name provided.
Step 6
Go back to the GitHub account and now a README file is created in the empty repository, where the first commit was done.
Step 7
Open GitHub app -> got to GitHub -> click Preferences -> click Repositories -> click Scan for repositories. And select the folder which is created in the repository showed in list. If not selected select it. And from now the local repository is available on the main window of the GitHub app.
Step 8
Now click the arrow on the right side of the repository box in the app, which access the repository page, where one can watch repository story, changes, branches and settings. Modify the README file in the editor and the changes page reflects that.
Step 9
If one want the changes to be reflected in the repository there are two methods.
Method 1
Commit the code so that the local repository will be updated. Which is done using the Commit changes button.
Method 2
If one wants the changes to be published in the remote repository, i.e. in GitHub repository, can simply push the change or sync that to commit, which bring changes from the main repository and push the pending commits.
The unsynced commits can be found in the same page. Click the Sync button so that the code will be updated in the remote repository.
In this way one can have their own project in GitHub for Mac OS X and sync with the local repository folder.
Description
If one want to use the repository to host an Xcode project, recommended to create a .gitignore file, which avoids to push unnecessary files. The below is the code for right .gitignore file.
# Exclude the build directory
build/*
# Exclude temp nibs and swap files
*~.nib
*.swp
# Exclude OS X folder attributes
.DS_Store
# Exclude user-specific XCode 3 and 4 files
*.mode1
*.mode1v3
*.mode2v3
*.perspective
*.perspectivev3
*.pbxuser
*.xcworkspace
xcuserdata
Copy the above code into the .gitignore file box in the GitHub app and save the changes. Now it’s ready to create a new Xcode project. Before creating make sure that the project is created in the same folder, where the local Git repository is created and uncheck the Create local git repository option. Description
The SSH keys are used to identify the trusted computers, without involving the password always. These keys uses public-key cryptography for authenticating the remote computer and allow the user to authenticate, if necessary.
SSH keys can be used in several ways, it automatically generate public-private key pairs to simply encrypt a network connection, and use password to log on.
Description
To check the existing SSH keys on computer, open the Git Bash and enter the below code.
$ ls –al ~/.ssh
If the public and private pair listed keys already exist, no need of generating a new a SSH key instead it can be added to the SSH-agent.
Description
Open the Git Bash, copy and paste the below text and make sure to substitute the GitHub email address.
$ ssh-keyen –t rsa –b 4096 –c “email@example.com”
Press enter, so that it generate the ssh key and The provided email address will act as a label. Keep the default setting as they are and when prompted to “Enter a file in which to save the key”, simply press Enter to continue.
The Git Bash ask you to enter a passphrase. Type a secure and good passphrase then it provides the fingerprint or id for the SSH key.
Description
To add the SSH key to the GitHub account, copy SSH key to the clipboard. Sing in into the GitHub and on the top right corner of the main page open the settings page and follow the instructions below.
Click Settings -> click SSH keys -> click Add SSH key
Give a Title and add some Description label for the new key. And paste the copied Key filed and click Add Key and confirm the action made by entering the GitHub password.
Description
To test the working of SSH key, open the Git Bash and enter the below text.
$ ssh –T git@github.com
Press Enter -> a warning message appears -> simple type yes -> press Enter again, if the username in the message matches with the user name provided then successfully the SSH key got set up.
Key Points
- By default Mac OS X as old version of Git. So, recommended to make sure about using the updated version.
- Terminal application are installed by default in Mac OS X.
- SSH keys identify the trusted computers without involving password always.
- SSH Keys can be created using Git Bash.