Mysql installation can be done in various platforms. Current tutorial shows the installation steps for Windows platform.
The following steps describes MySQL Installation.
Step - 1
Initially, click on the below URL, and follow the next steps.
MySQL Download
Step - 2
Go to the end of the page and find the options as shown below.
Step - 3
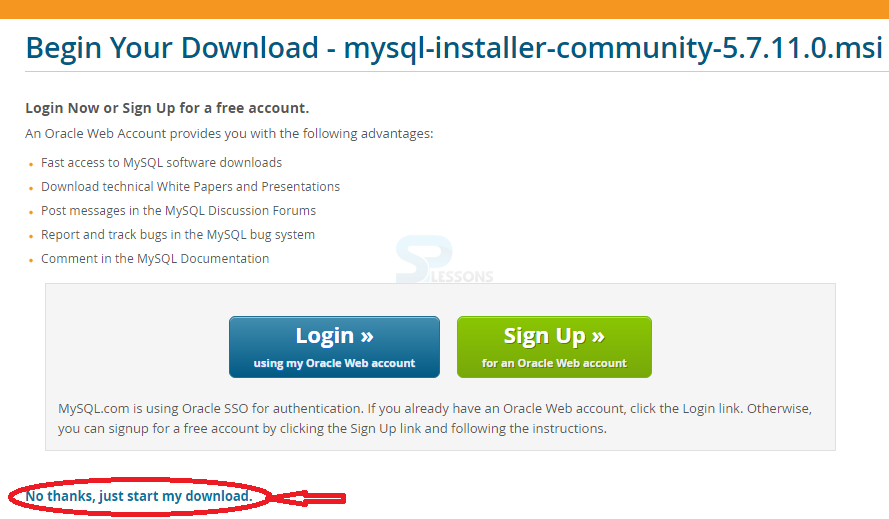
And it will redirect to another page, where following action to be done.Click on No thanks, Just start my download.
Step - 4
Click on MySQL Installer Community.
Step - 5
It show a Welcome Box. Just click on Next button.
step - 6
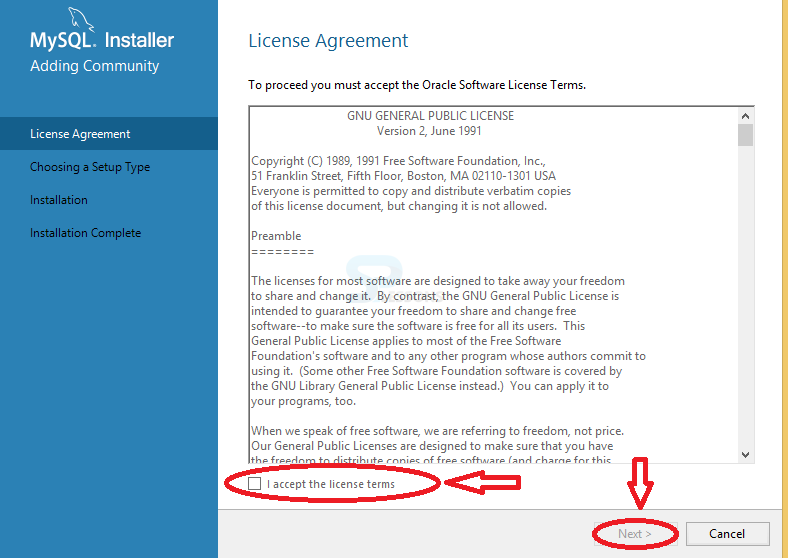
Check the box and click Next button, to accept the terms and conditions.
step - 7
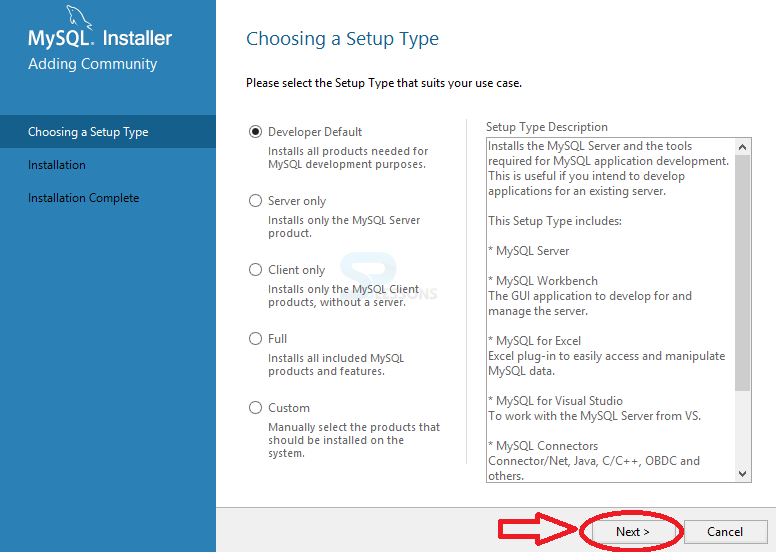
Choose the setup type and click Next button.
Step - 8
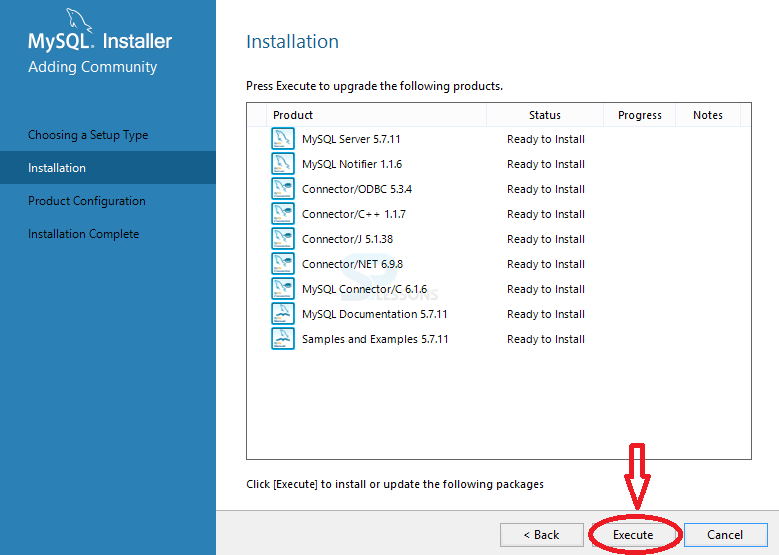
Click on Execute button, to run the installation setup.
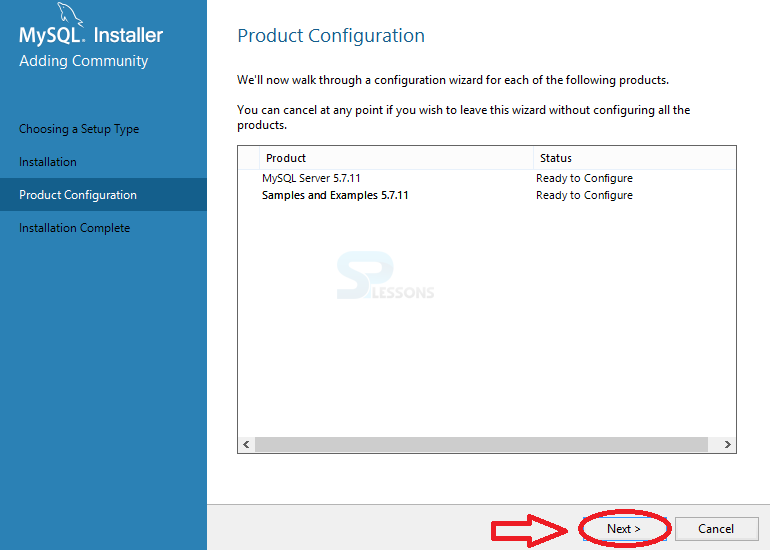
Step -9
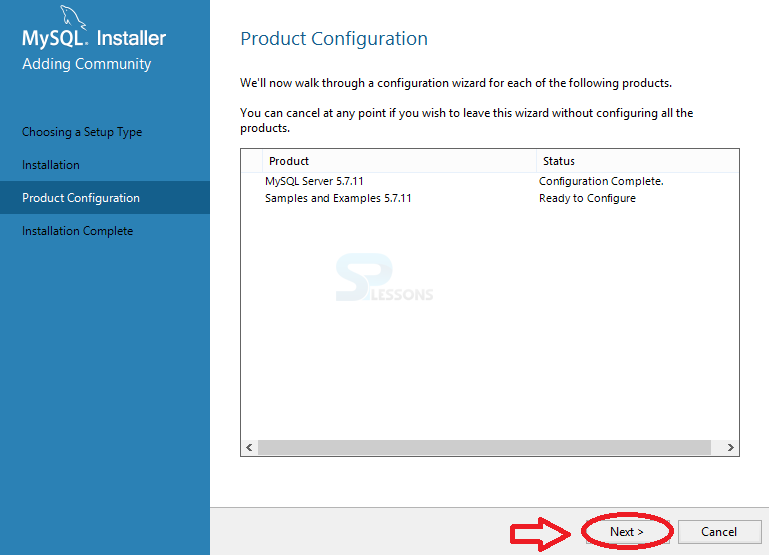
Click on Next button for product configuration.
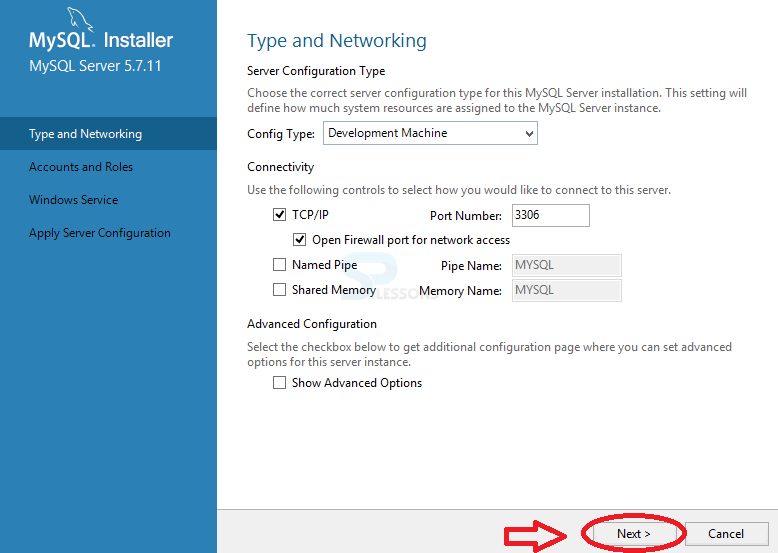
Step - 10
Select the type of network and click Next button.
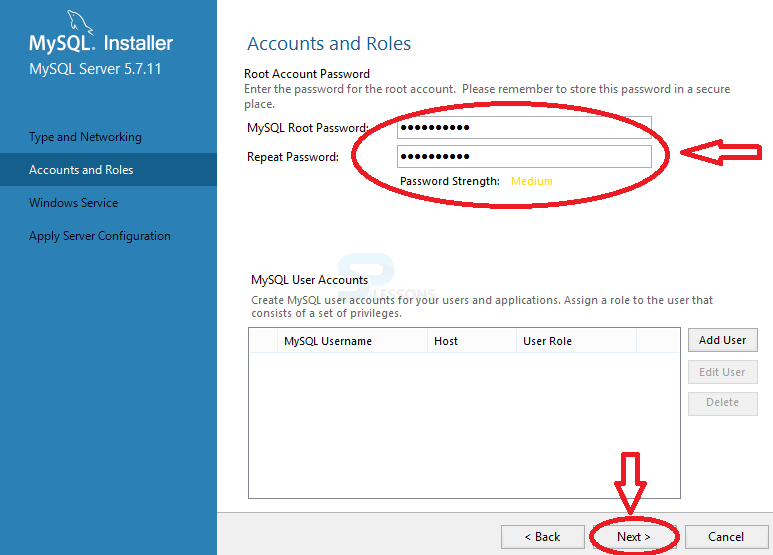
Step - 11
Enter MySQL Root password of strong entity type and repeat the same password and click Next button.
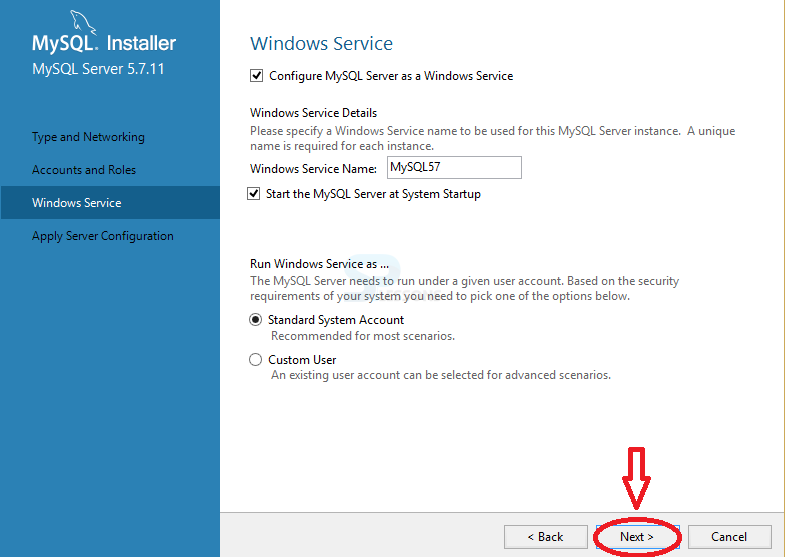
Step -12
Check all window service configurations and click Next button.
Step -13
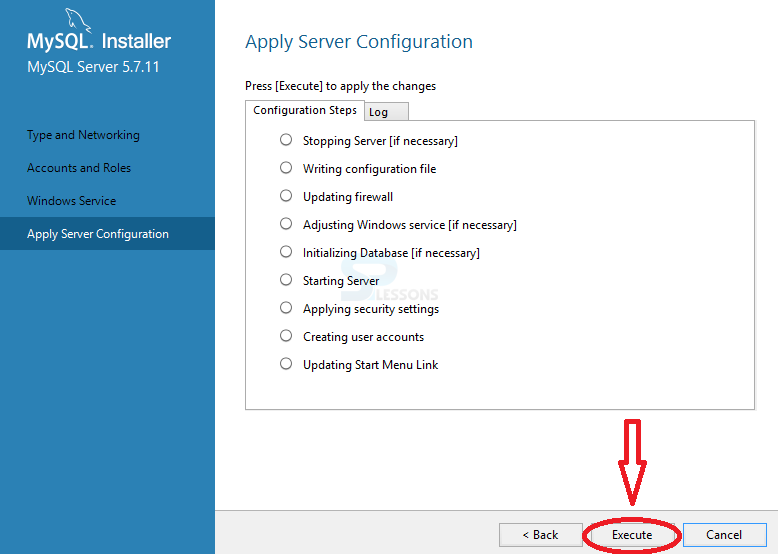
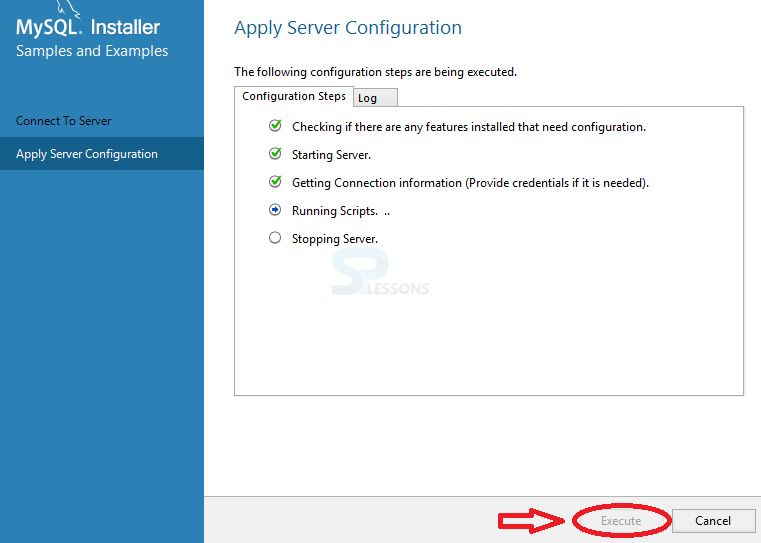
Check all the server configurations and click on Execute button.
Step -14
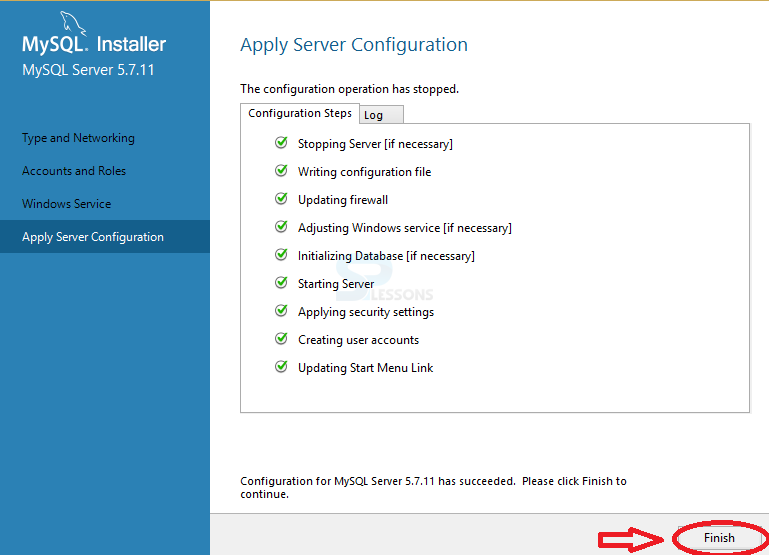
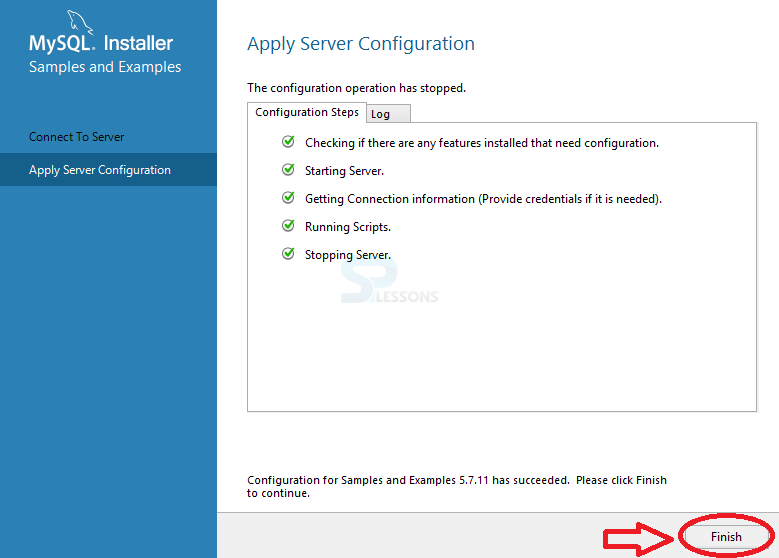
After checking all server configurations click on the button to Finish .
Step - 15
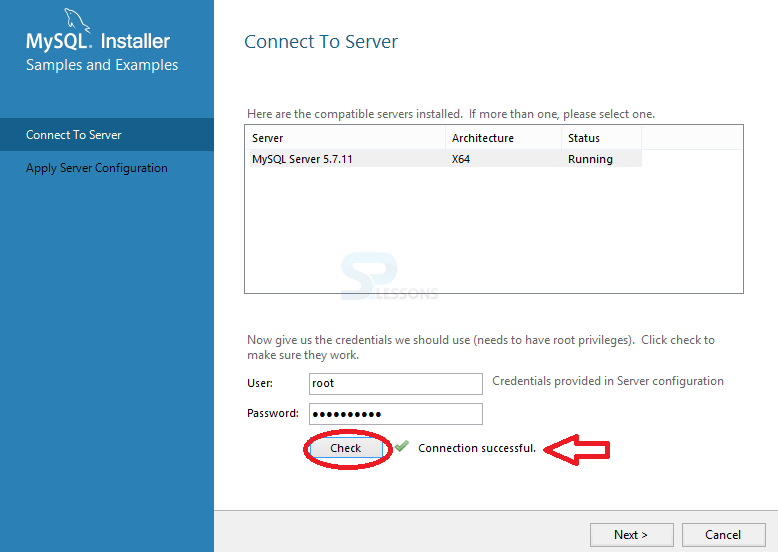
Click the button to proceed for the Next step.
Step - 16
Click on Check box and click Next button.
Step -17
Click on Execute button .
Step -18
Click on Finish button.
Step -19
Product configuration will be shown. Click Next button.
Step - 20
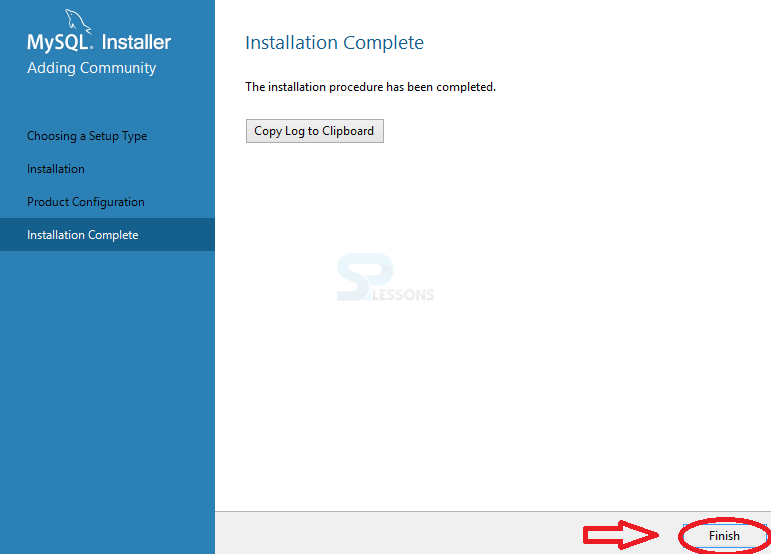
Click on Finish button which completes installation.
Summary
Key Points
By viewing the above steps, one can easily understand the installation steps of MySQL on Windows platform.