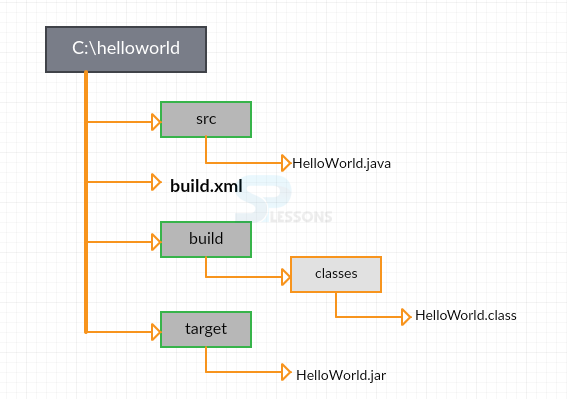
 Introduction
Before going to learn about ANT Structure, one has to know about the ANT Terminology. Apache ANT Structure chapter gives an overview about:
- ANT Terminology
- build.xml file
- Tasks and Targets involved.
 Description
Any build file consists of the following three basic nodes:
ANT Terminology
- ANT Project: It is the collection of named targets, which can run in any order depending on the file time stamps in the file system.
- ANT Task : Tasks are smaller work units that can execute, compile or copy or replace. It can operate many files but the operation will be the same when applied on each file.
- ANT Target : It is a group of tasks placed in an order which depends on other targets. Targets depend only on other targets and doesn’t depend on projects or tasks.A target is an item that has to be created; it can be a single item like a jar, or a group of items like classes.
 Example
Each build file consists of a project and atleast one default target. The following code is considered as build.xml file for this exercise:
[java]
<?xml version="1.0" ?>
<! - -project is the outer most tag in xml - ->
<project name="FirstTest" default="hello">
<target name="hello">
<echo message="Hello.Welcome to SPLessons!!!"/>
</target>
</project>
[/java]
The following output is seen when the above code is compiled and executed.
[java]
C:\>ant
Buildfile: C:\build.xml
info: [echo] Hello.Welcome to SPLessons!!!
BUILD SUCCESSFUL
Total time: 0 seconds
C:\>
[/java]
 More Info
Target can have dependencies. Another example is shown below. Initially, create a build directory, compile Java code, place the compiler class in the build directory, and generate the executed jar file along with the MANIFEST file that is required to execute the jar file.
 Examples
[java]
<?xml version=”1.0” ?>
<project name=”JarBuild” basedir=”.” Default=”jarfile”>
<target name=”init” description=”Initializes properties”>
<propery name=”project.name” value=”helloWorld”/>
<propery name=”src.dir” value=”src”/>
<propery name=”build.dir” value=”build”/>
<propery name=”classes.dir” value=”$(build.dir)/classes”/>
<propery name=”etc.dir” value=”etc”/>
</target>
<target name=”prepare” description=”Creates the build and classes directories” depends=”init”>
<mkdir dir=”$(classes.dir)”/>
</target>
<target name=”compile” description=”Compiles the code” depends=”prepare”>
<javac srcdir=”$(src.dir)” Destdir=”$(classes.dir)”/>
</target>
<target name=”jarfile” description=”JARs the code” depends=”compile”>
<jar destfile=”$(build.dir)/$(project.name).jar” Basedir=”$(classes.dir)” Manifest=”$(etc.dir)/MANIFEST.MF”/>
</target>
<target name=”clean” description=”Delete the build directory” depends=”init”>
<delete dir=”$(build.dir)”/>
</target>
</project>
[/java]
In the above code,
- The default target of this project is the jar file target.But before creating the jar file, java classes have to be compiled as the jar file target depends on the compile target.
- In order to compile the classes, the classes directory has to be created. For that the prepare target has to be called to check whether the classes directory is created or not.
- To prepare, project properties has to be set which is done by init target.
- In the prepare target, a task called mkdir(make directory) is created in directory. It can repeatedly create its own parent directory(build directory).
- To update the classes, clean target has to be used, which will delete the current build directory. It is used only if required and called explicitly.
- Compile target consists of javac task, which is used to run the Java C Compiler. It compares the classes timestamps with the source code.
 Key Points
- Project is the collection of targets, which in turn consists of tasks.
- There will be atleast one default project.
- The flow of compilation goes from init-prepare-compile-jar.
- Clean target cleans the build directory.


