 Introduction
This chapter demonstrates about the W3CSS Navigation which is supported by all types of navigation bars following are the concepts covered in this chapter.
- Navigation Bar
- Types of Navigation bars
 Description
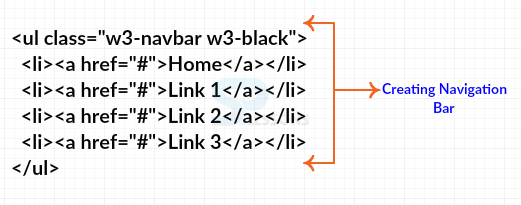
Navigation bars are used to navigate from one page to another page. Basic Navigation bar is created w3-navbar class and which is an horizontal navigation bar. The image below demonstrates the Navigation bar.
The code below demonstrates to creating Basic Horizontal Navigation bar as shown.
[html]
<!DOCTYPE html>
<html>
<title>W3.CSS</title>
<meta name="viewport" content="width=device-width, initial-scale=1">
<link rel="stylesheet" href="http://www.w3schools.com/lib/w3.css">
<body>
<div class="w3-container">
<h2>Navigation Bars</h2>
<p>The <strong>w3-navbar</strong> class creates a horizontal navigation bar.</p>
<p>Full-width navigation bars:</p>
</div>
<ul class="w3-navbar w3-black">
<li><a href="#">Home</a></li>
<li><a href="#">Link 1</a></li>
<li><a href="#">Link 2</a></li>
<li><a href="#">Link 3</a></li>
</ul>
<div class="w3-container">
<p>Inside a container:</p>
<ul class="w3-navbar w3-black">
<li><a href="#">Home</a></li>
<li><a href="#">Link 1</a></li>
<li><a href="#">Link 2</a></li>
<li><a href="#">Link 3</a></li>
</ul>
</div>
</body>
</html>
[/html]
Result
By running the above code in a preferred browser user can get the following output as shown in below image.
 Description
In W3.CSS user can use the different types of navigation bars user can use these bars for multi purposes which can be applied on HTML elements in which some navigation bars are listed below.
Colored Navigation Bar
User can use the multi colored navigation bars by using the w3-color class which is used to add color to the navigation bar. The code below demonstrates to adding colors to the navigation bars as shown.
[html]
<!DOCTYPE html>
<html>
<title>W3.CSS</title>
<meta name="viewport" content="width=device-width, initial-scale=1">
<link rel="stylesheet" href="http://www.w3schools.com/lib/w3.css">
<body>
<div class="w3-container">
<h2>Colored Navigation Bars</h2>
<p>Use the w3-color class to add a background color to the navigation bar:</p>
<ul class="w3-navbar w3-purple">
<li><a href="#">Home</a></li>
<li><a href="#">Link 1</a></li>
<li><a href="#">Link 2</a></li>
<li><a href="#">Link 3</a></li>
</ul>
<br>
<ul class="w3-navbar w3-aqua">
<li><a href="#">Home</a></li>
<li><a href="#">Link 1</a></li>
<li><a href="#">Link 2</a></li>
<li><a href="#">Link 3</a></li>
</ul>
<br>
<ul class="w3-navbar w3-blue">
<li><a href="#">Home</a></li>
<li><a href="#">Link 1</a></li>
<li><a href="#">Link 2</a></li>
<li><a href="#">Link 3</a></li>
</ul>
<br>
<ul class="w3-navbar w3-red">
<li><a href="#">Home</a></li>
<li><a href="#">Link 1</a></li>
<li><a href="#">Link 2</a></li>
<li><a href="#">Link 3</a></li>
</ul>
<br>
<ul class="w3-navbar w3-teal">
<li><a href="#">Home</a></li>
<li><a href="#">Link 1</a></li>
<li><a href="#">Link 2</a></li>
<li><a href="#">Link 3</a></li>
</ul>
</div>
</body>
</html>
[/html]
Result
By running the above code in a preferred browser user can get the following output as shown in below image.
Hoverable Links
User can also creates the H0verable Links which means when mouse over the links inside the navigation bar then the background color will change. In order to get the Hoverable links user can use the two types of classes.
The code below demonstrates to get the hoverable links as shown.
[html]
<!DOCTYPE html>
<html>
<title>W3.CSS</title>
<meta name="viewport" content="width=device-width, initial-scale=1">
<link rel="stylesheet" href="http://www.w3schools.com/lib/w3.css">
<body>
<div class="w3-container">
<h2>Hoverable Links</h2>
<strong>w3-hover-text-color</strong> classes.</p>
<p>Hover background color:</p>
<ul class="w3-navbar w3-border w3-blue">
<li><a class="w3-hover-red" href="#">Home</a></li>
<li><a class="w3-hover-blue" href="#">Link 1</a></li>
<li><a class="w3-hover-green" href="#">Link 2</a></li>
<li><a class="w3-hover-teal" href="#">Link 3</a></li>
</ul>
<p>Hover Text</p>
<ul class="w3-navbar w3-black">
<li><a class="w3-hover-none w3-text-white" href="#">Home</a></li>
<li><a class="w3-hover-none w3-text-grey w3-hover-text-white" href="#">Link 1</a></li>
<li><a class="w3-hover-none w3-text-grey w3-hover-text-white" href="#">Link 2</a></li>
<li><a class="w3-hover-none w3-text-grey w3-hover-text-white" href="#">Link 3</a></li>
</ul>
</div>
</body>
</html>
[/html]
Result
By running the above code in a preferred browser user can get the following output as shown in below image.
Right Aligned Links
User can align the specific links at the right side from a list of links by using the w3-right. The code below demonstrates the right aligned links.
[html]
<!DOCTYPE html>
<html>
<title>W3.CSS</title>
<meta name="viewport" content="width=device-width, initial-scale=1">
<link rel="stylesheet" href="http://www.w3schools.com/lib/w3.css">
<body>
<div class="w3-container">
<h2>Right-Align Links</h2>
<ul class="w3-navbar w3-blue w3-border">
<li><a href="#">Home</a></li>
<li><a href="#">Link 1</a></li>
<li><a href="#">Link 2</a></li>
<li class="w3-right"><a class="w3-aqua" href="#">Link 3</a></li>
</ul>
</div>
</body>
</html>
[/html]
Result
By running the above code in a preferred browser user can get the following output as shown in below image.
Navigation Bar with Icons
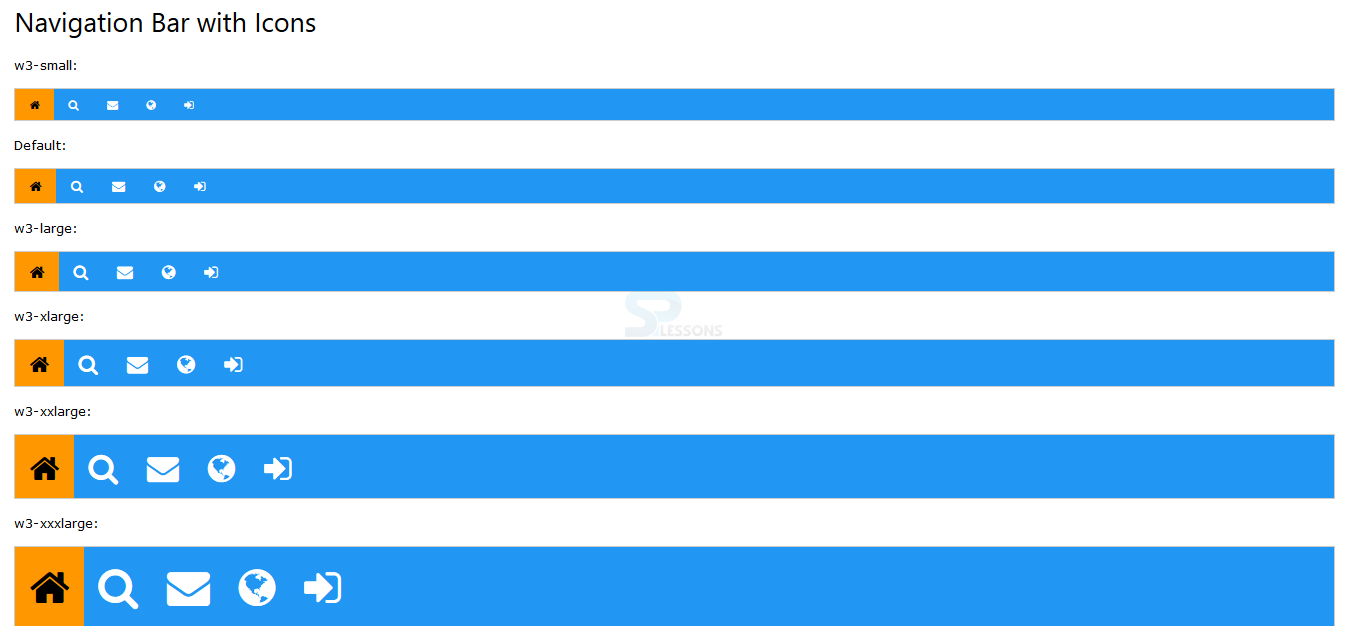
User can arrange the navigation bar with Icons which may contain different types of icons like Font Awesome Icons. The code below demonstrates the Navigation Bar with Icons as shown.
[html]
<!DOCTYPE html>
<html>
<title>W3.CSS</title>
<meta name="viewport" content="width=device-width, initial-scale=1">
<link rel="stylesheet" href="http://www.w3schools.com/lib/w3.css">
<link rel="stylesheet" href="https://cdnjs.cloudflare.com/ajax/libs/font-awesome/4.6.3/css/font-awesome.min.css">
<body>
<div class="w3-container">
<h2>Navigation Bar with Icons</h2>
<p>w3-small:</p>
<ul class="w3-navbar w3-blue w3-small w3-border">
<li><a class="w3-orange" href="#"><i class="fa fa-home"></i></a></li>
<li><a href="#"><i class="fa fa-search"></i></a></li>
<li><a href="#"><i class="fa fa-envelope"></i></a></li>
<li><a href="#"><i class="fa fa-globe"></i></a></li>
<li><a href="#"><i class="fa fa-sign-in"></i></a></li>
</ul>
<p>Default:</p>
<ul class="w3-navbar w3-blue w3-border">
<li><a class="w3-orange" href="#"><i class="fa fa-home"></i></a></li>
<li><a href="#"><i class="fa fa-search"></i></a></li>
<li><a href="#"><i class="fa fa-envelope"></i></a></li>
<li><a href="#"><i class="fa fa-globe"></i></a></li>
<li><a href="#"><i class="fa fa-sign-in"></i></a></li>
</ul>
<p>w3-large:</p>
<ul class="w3-navbar w3-blue w3-large w3-border">
<li><a class="w3-orange" href="#"><i class="fa fa-home"></i></a></li>
<li><a href="#"><i class="fa fa-search"></i></a></li>
<li><a href="#"><i class="fa fa-envelope"></i></a></li>
<li><a href="#"><i class="fa fa-globe"></i></a></li>
<li><a href="#"><i class="fa fa-sign-in"></i></a></li>
</ul>
<p>w3-xlarge:</p>
<ul class="w3-navbar w3-blue w3-xlarge w3-border">
<li><a class="w3-orange" href="#"><i class="fa fa-home"></i></a></li>
<li><a href="#"><i class="fa fa-search"></i></a></li>
<li><a href="#"><i class="fa fa-envelope"></i></a></li>
<li><a href="#"><i class="fa fa-globe"></i></a></li>
<li><a href="#"><i class="fa fa-sign-in"></i></a></li>
</ul>
<p>w3-xxlarge:</p>
<ul class="w3-navbar w3-blue w3-xxlarge w3-border">
<li><a class="w3-orange" href="#"><i class="fa fa-home"></i></a></li>
<li><a href="#"><i class="fa fa-search"></i></a></li>
<li><a href="#"><i class="fa fa-envelope"></i></a></li>
<li><a href="#"><i class="fa fa-globe"></i></a></li>
<li><a href="#"><i class="fa fa-sign-in"></i></a></li>
</ul>
<p>w3-xxxlarge:</p>
<ul class="w3-navbar w3-blue w3-xxxlarge w3-border">
<li><a class="w3-orange" href="#"><i class="fa fa-home"></i></a></li>
<li><a href="#"><i class="fa fa-search"></i></a></li>
<li><a href="#"><i class="fa fa-envelope"></i></a></li>
<li><a href="#"><i class="fa fa-globe"></i></a></li>
<li><a href="#"><i class="fa fa-sign-in"></i></a></li>
</ul>
</div>
</body>
</html>
[/html]
Result
By running the above code in a preferred browser user can get the following output as shown in below image.
Navigation Bar Text
User can also use the text instead of Links inside navbar by using the w3-navitem class by which user can also get the same padding as links. The code below demonstrates the navigation bar text as shown.
[html]
<!DOCTYPE html>
<html>
<title>W3.CSS</title>
<meta name="viewport" content="width=device-width, initial-scale=1">
<link rel="stylesheet" href="http://www.w3schools.com/lib/w3.css">
<body>
<div class="w3-container">
<h2>w3-navitem</h2>
</div>
<ul class="w3-navbar w3-black">
<li class="w3-navitem">Text</li>
<li><a href="#">Link 1</a></li>
<li><a href="#">Link 2</a></li>
<li><a href="#">Link 3</a></li>
<li class="w3-navitem">More Text</li>
</ul>
</body>
</html>
[/html]
Result
By running the above code in a preferred browser user can get the following output as shown in below image.
Navigation Bar with Inputs
User can place the input fields by using the w3-navitem class which comes with handy to place the inputs. The code below demonstrates the Navigation Bar with inputs as shown below.
[html]
<!DOCTYPE html>
<html>
<title>W3.CSS</title>
<meta name="viewport" content="width=device-width, initial-scale=1">
<link rel="stylesheet" href="http://www.w3schools.com/lib/w3.css">
<body>
<div class="w3-container">
<h2>Navigation Bar with Input</h2>
<p>Input inside navbar (full height and width):</p>
<ul class="w3-navbar w3-blue w3-border">
<li><a href="#">Home</a></li>
<li><a href="#">Link 1</a></li>
<li><a href="#">Link 2</a></li>
<li><a href="#">Link 3</a></li>
<li><input type="text" class="w3-input w3-border-0" placeholder="Search.."></li>
</ul>
<p>Input with w3-navitem:</p>
<ul class="w3-navbar w3-black">
<li><a href="#">Home</a></li>
<li><a href="#">Link 1</a></li>
<li><a href="#">Link 2</a></li>
<li><a href="#">Link 3</a></li>
<li class="w3-navitem">
<input type="text" class="w3-input w3-border-0 w3-padding-0" placeholder=" Search..">
</li>
</ul>
<p>With w3-navitem and increased padding:</p>
<ul class="w3-navbar w3-aqua">
<li><a href="#" class="w3-padding-16">Home</a></li>
<li><a href="#" class="w3-padding-16">Link 1</a></li>
<li><a href="#" class="w3-padding-16">Link 2</a></li>
<li><a href="#" class="w3-padding-16">Link 3</a></li>
<li class="w3-navitem">
<input type="text" class="w3-input w3-border-0" placeholder="Search..">
</li>
</ul>
</div>
</body>
</html>
[/html]
Result
By running the above code in a preferred browser user can get the following output as shown in below image.
Dropnav
User can also get the full width dropdown menu by using the Dropnav class. The code below demonstrates to get the dropnav as shown below.
[html]
<!DOCTYPE html>
<html>
<title>W3.CSS</title>
<meta name="viewport" content="width=device-width, initial-scale=1">
<link rel="stylesheet" href="http://www.w3schools.com/lib/w3.css">
<body>
<ul class="w3-navbar w3-blue">
<li><a href="#">Home</a></li>
<li><a href="#">Link 1</a></li>
<li><a href="#">Link 2</a></li>
<li><a href="javascript:void(0)" onclick="w3_open()">Dropnav</a></li>
</ul>
<nav class="w3-dropnav w3-card-2" style="display:none" id="myDropnav">
<div class="w3-container">
<span onclick="w3_close()" class="w3-closebtn w3-xlarge" title="Close Menu">×</span>
</div>
<div class="w3-row-padding w3-padding-bottom">
<div class="w3-third">
<h3>HTML/CSS</h3>
<a href="#">HTML</a>
<a href="#">CSS</a>
<a href="#">W3.CSS</a>
</div>
<div class="w3-third">
<h3>JavaScript</h3>
<a href="#">Junit</a>
<a href="#">jQuery</a>
<a href="#">Servlet</a>
</div>
<div class="w3-third">
<h3>HTML5</h3>
<a href="#">Canvas</a>
<a href="#">SVG</a>
</div>
</div>
<br>
</nav>
<div class="w3-container">
<p>Click on the "Dropnav" button to open the dropnav menu.</p>
</div>
<script>
function w3_open() {
document.getElementById("myDropnav").style.display = "block";
}
function w3_close() {
document.getElementById("myDropnav").style.display = "none";
}
</script>
</body>
</html>
[/html]
Result
By running the above code in a preferred browser user can get the following output as shown in below image.
Side Navigation Bar
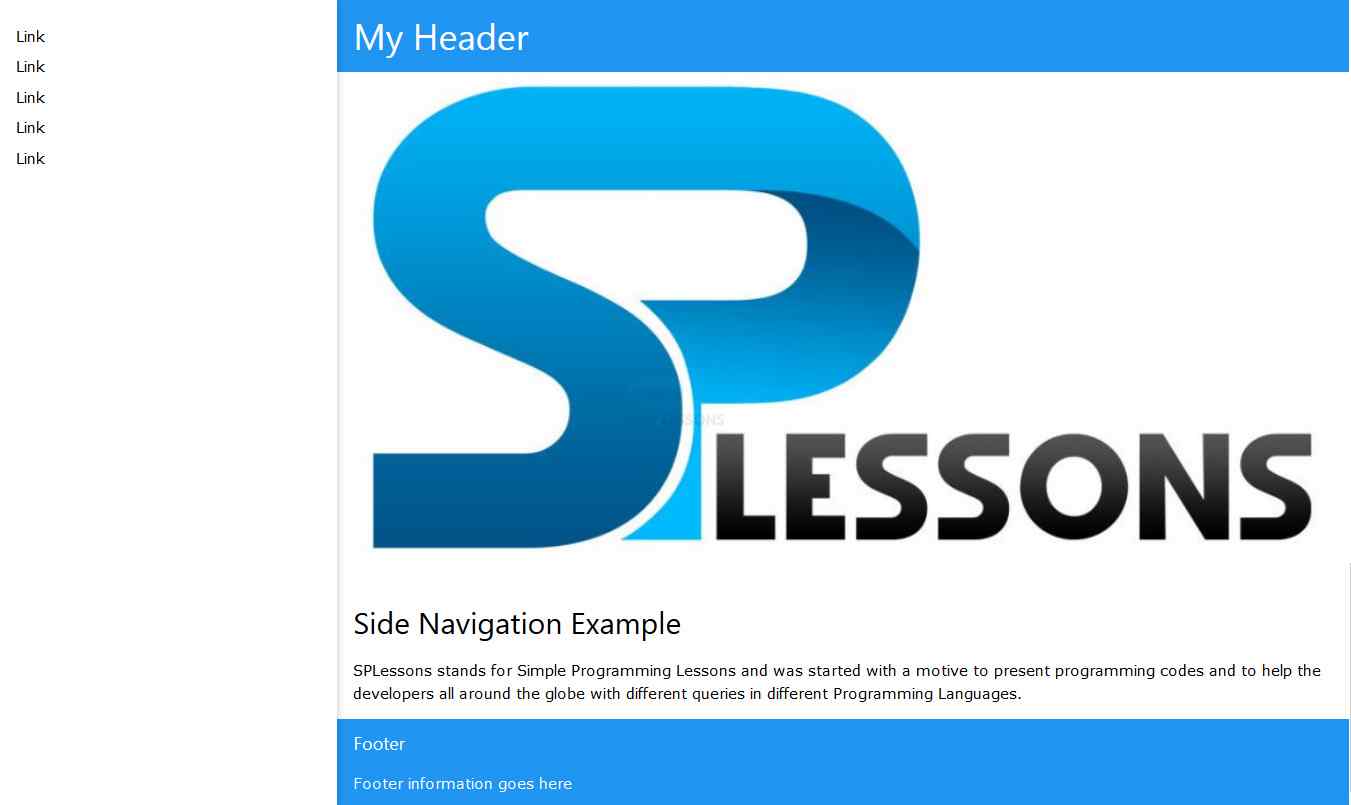
User can also get the Side Navigation Bar by using the w3-sidenav by which user can create verticle navigation bar. The code below demonstrates the Side Navigation Bar as shown below.
[html]
<!DOCTYPE html>
<html>
<title>W3.CSS</title>
<meta name="viewport" content="width=device-width, initial-scale=1">
<link rel="stylesheet" href="http://www.w3schools.com/lib/w3.css">
<body>
<nav class="w3-sidenav w3-white w3-card-2" style="width:25%">
<br>
<a href="#">Link</a>
<a href="#">Link</a>
<a href="#">Link</a>
<a href="#">Link</a>
<a href="#">Link</a>
</nav>
<div style="margin-left:25%">
<header class="w3-container w3-blue">
<h1>My Header</h1>
</header>
<img src="splessons.jpg" alt="splessons" style="width:100%">
<div class="w3-container">
<h2>Side Navigation Example</h2>
<p>SPLessons stands for Simple Programming Lessons and was started with a motive to present programming codes and to help the developers all around the globe with different queries in different Programming Languages.</p>
</div>
<footer class="w3-container w3-blue">
<h5>Footer</h5>
<p>Footer information goes here</p>
</footer>
</div>
</body>
</html>
[/html]
Result
By running the above code in a preferred browser user can get the following output as shown in below image.
- Colored Navigation Bar
- Hoverable Links
- Right Aligned Links
- Navigation Bar with Icons
- Navigation Bar Text
- Navigation Bar with Inputs
- Navigation Bar with DropDown
- Dropnav
- Fixed Navigation Bar
- Side Navigation Bar
- w3-hover-color By which user can get the different background colors.
- w3-hover-text-color By which user can get the different text colors when hover the mouse.
 Key Points
- User can also get navigation bar with any type of Icons.
- User can also get the verticle navigation bar by using w3-sidenav.
- By using Dropnav iser will get full width dropdown menu.


