


 Example
Following is an Struts 2 Example which shows how to build an application by using Struts 2 and following are the steps which shows that where to place the XML files and how to run an application. While working on Struts 2 applications some precautions needs to followed such as struts.xml file should be placed under the source folder, in the struts configuration action class and result tags will be used. While using this tags in the project developer has know what is the functionality of every element in the configuration file, every frame work will have configuration files why because those files are hearts to the frameworks.
Step 1
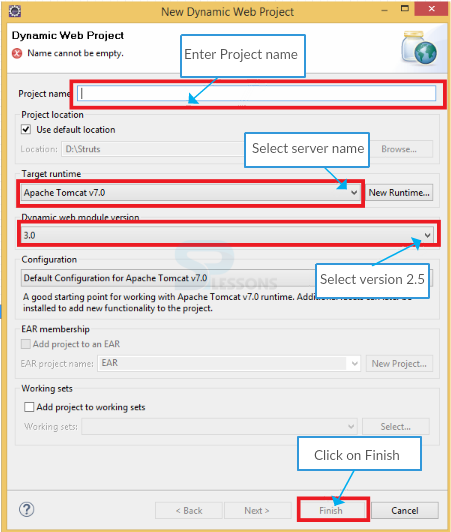
Go to the File -> New -> select Dynamic web project.Enter the Project name and all the details, Click on Finish.
Step 2
Add the jar files in lib folder like Struts 2 jar file, Servlet-API.jar file and ojdbc14.jar.
Step 3
One need to create the index.jsp, after that the action class container will map the web.xml. In Struts2, action class is FilterDispatcher class, which contain the org.apache.struts2.dispatcher.ng.filter.StrutsPrepare and Execute Filter package.
Step 4
The container will check the Action class in struts.xml file. Then, one can create the struts.xml and action class in src folder.
Step 5
After executing the execute() contain Action class, JSP pages display the result.
Example 2
In this Struts 2 Example, one employee details will be stored in the database from browser page using Struts 2 action class.
Step 1
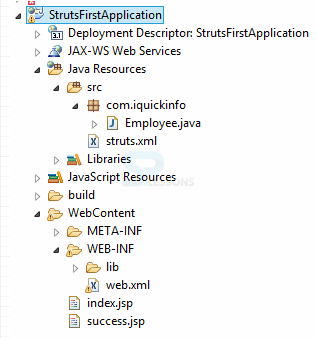
Create the project directory structure.
Step 2
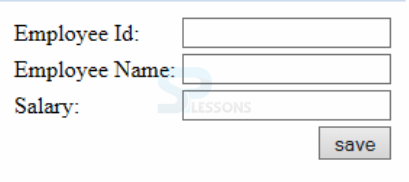
Create the index.jsp.
index.jsp
[java]<%@ taglib uri="/struts-tags" prefix="s" %>
<s:form action="employee">
<s:textfield name="id" label="Employee Id"></s:textfield>
<s:textfield name="name" label="Employee Name"></s:textfield>
<s:textfield name="salary" label="Salary"></s:textfield>
<s:submit value="save"></s:submit>
</s:form> [/java]
Here created all the text boxes to enter required details and also created the save button.
Step 3
Create the web.xml under WEB-INF folder.
web.xml
[xml]<?xml version="1.0" encoding="UTF-8"?>
<web-app>
<filter>
<filter-name>struts2</filter-name>
<filter-class>
org.apache.struts2.dispatcher.ng.filter.StrutsPrepareAndExecuteFilter
</filter-class>
</filter>
<filter-mapping>
<filter-name>struts2</filter-name>
<url-pattern>/*</url-pattern>
</filter-mapping>
</web-app>
[/xml]
Here make sure that filter-name should be same.The
FilterDispatcher (org.apache.struts2.dispatcher.FilterDispatcher) is used in the early Struts2 development, and it’s deprecated since Struts 2.1.3.
While using Struts version >= 2.1.3, it’s always recommended to upgrade the new filter class – StrutsPrepareAndExecuteFilter (org.apache.struts2.dispatcher.ng.filter.StrutsPrepareAndExecuteFilter).
Step 4
Create the struts.xml in src folder.
struts.xml
[xml]
<?xml version="1.0" encoding="UTF-8" ?>
<!DOCTYPE struts PUBLIC "-//Apache Software Foundation//DTD Struts Configuration 2.1//EN" "http://struts.apache.org/dtds/struts-2.1.dtd">
<struts>
<package name="default" extends="struts-default">
<action name="employee" class="com.itoolsinfo.Employee">
<result name="success">success.jsp</result>
</action>
</package>
</struts>
[/xml]
Where success is a predefined result type. action element is the sub component of package. It speaks to an activity to be conjured for the approaching request. It has name, class and method attributes. In the event that you don't determine name property as a matter of course execute() technique will be summoned for the predetermined actiion class.
Step 5
Create the action class under project name/src/package name/Action class name.
Employee.java
[java]
package com.itoolsinfo;
public class Employee
{
private int id;
private String name;
private double salary;
public int getId()
{
return id;
}
public void setId(int id)
{
this.id = id;
}
public String getName()
{
return name;
}
public void setName(String name)
{
this.name = name;
}
public double getSalary()
{
return salary;
}
public void setSalary(double salary)
{
this.salary = salary;
}
public String execute()
{
return "success";
}
}
[/java]
Here used Set and Get methods to work on data members.
Step 6
Create the success.jsp in WEB-INF folder.
success.jsp
[java]<%@ page language="java" contentType="text/html; charset=ISO-8859-1" pageEncoding="ISO-8859-1"%>
<!DOCTYPE html PUBLIC "-//W3C//DTD HTML 4.01 Transitional//EN" "http://www.w3.org/TR/html4/loose.dtd">
<%@ page isELIgnored="false"%>
<html>
<head>
<meta http-equiv="Content-Type" content="text/html; charset=ISO-8859-1">
</head>
<body>
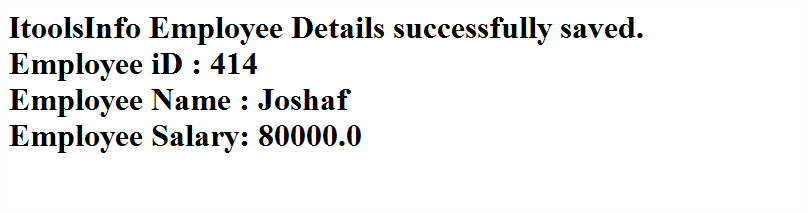
ItoolsInfo Employee Details successfully saved.
Employee Id : ${id}
Employee Name : ${name}
Employee Salary: ${salary}
</body>
</html>
[/java]
The content type is nothing to identify that which data has to be sent.
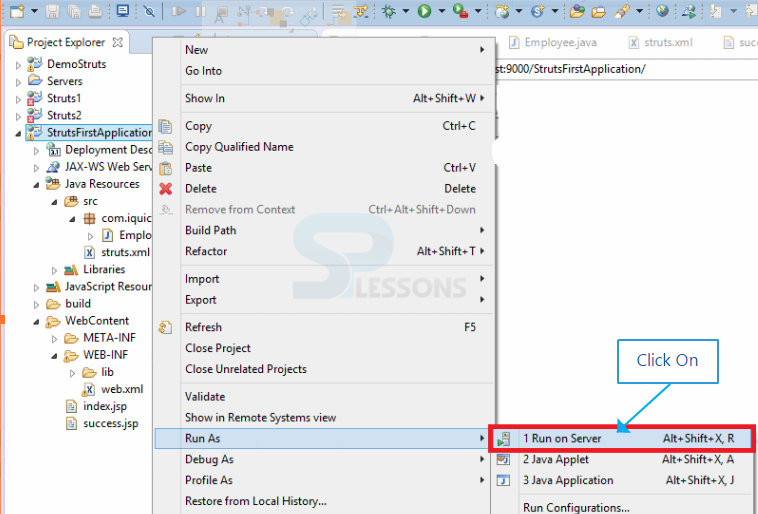
Step 7
Run on the server.
Output
The output will be displayed in the browser as follow.Enter the all the details, click on save button.
 When save the entered details message will be as follows.
Programming
Tips
- Struts 2 Example - The struts.xml file should be placed under the src folder.
- Struts 2 Example - The web.xml file should placed under WEB-INF folder.
- The JSP, HTML files should be placed under WEB ROOT.