


 Description
So far SPlessons had been doing Selenium tests without producing an appropriate arrangement for the test outcomes. Starting here on, user might handle how to make these reports utilizing a test structure called
TestNG.
TestNG is a testing system that beats the restrictions of another prominent testing structure called JUnit. The "NG" signifies Next Generation. Most Selenium clients utilize this more than JUnit as a result of its favorable circumstances. There are such a variety of components of TestNG. Following are the features of TestNG.
- Support for both annotations and parameterization.
- Data Driven Testing will be supported by using Data providers.
- Threat safe environment will be supported.
Step 1
Click on the 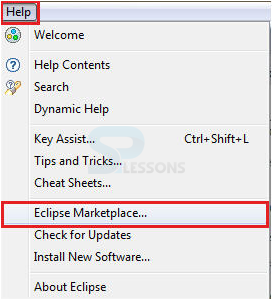
Help option within the menu -> Select Eclipse Marketplace.
Step 2
Search the 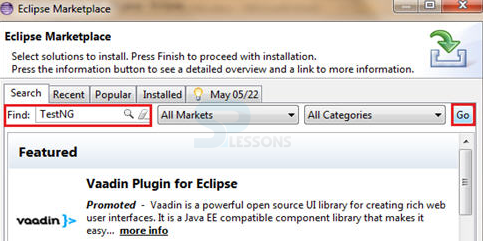
TestNG in search box and press GO button.
Step 3
Click on 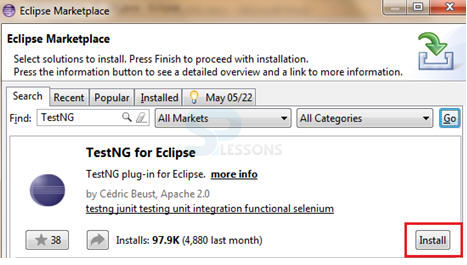
Install button.
Step 4
The client is provoked with a window to 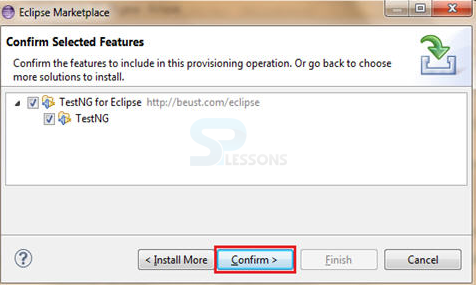
confirm the establishment.
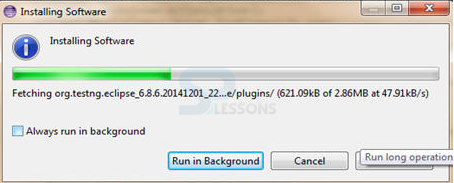
Step 5
Accept the terms and conditions then progress will be as follows.
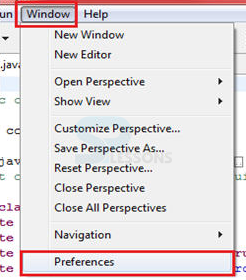
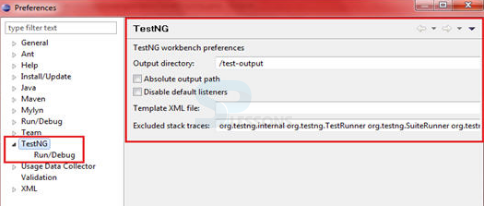
Step 6
To check whether the program installed or not then follow the steps.
Step 7
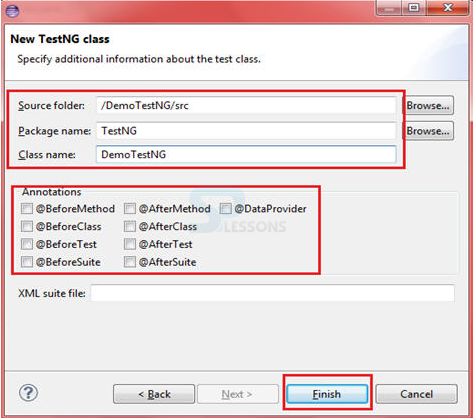
Here create the project name and click on 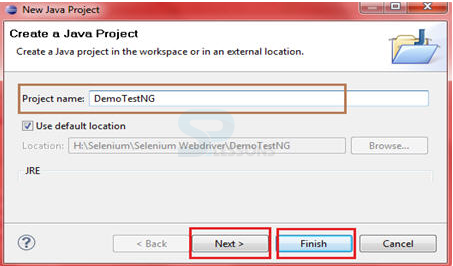
Finish.
Step 8
Now to add 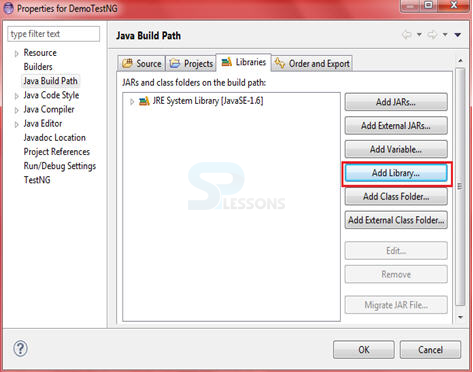
TestNG into the project go to Add Library by clicking properties of the project.
Step 9
Here select the TestNG library and click 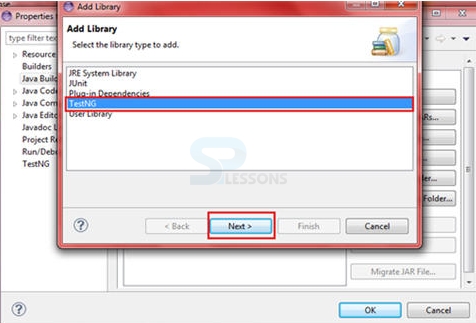
OK.
Step 10
Now go the project and right click on 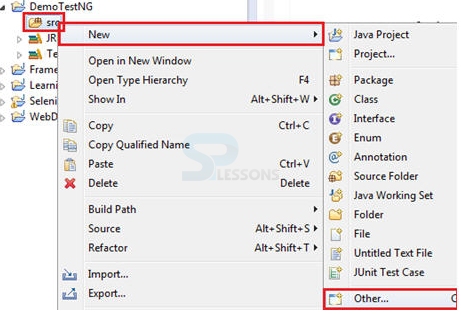
src and navigate to New and to Other.
Step 11
Here expand the 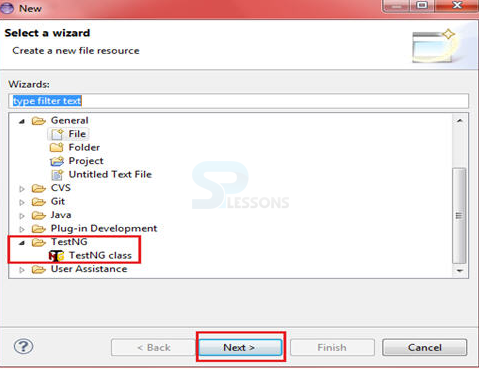
 DemoTestNG.java
[java]
//following is an example for Selenium TestNG Framework
package TestNG;
import org.openqa.selenium.By;
import org.openqa.selenium.WebDriver;
import org.openqa.selenium.WebElement;
import org.openqa.selenium.firefox.FirefoxDriver;
import org.testng.Assert;
import org.testng.annotations.Test;
public class DemoTestNG {
public WebDriver driver = new FirefoxDriver();
String appUrl = "https://accounts.google.com";
@Test
public void gmailLogin() {
// launch the firefox browser and open the application url
driver.get("https://gmail.com");
// maximize the browser window
driver.manage().window().maximize();
String expectedTitle = " Sign in - Google Accounts ";
String actualTitle = driver.getTitle();
Assert.assertEquals(expectedTitle,actualTitle);
WebElement username = driver.findElement(By.id("Email"));
username.clear();
username.sendKeys("TestSelenium");
//enter a valid password in the password textbox
WebElement password = driver.findElement(By.id("Passwd"));
password.clear();
password.sendKeys("password123");
//click on the Sign in button
WebElement SignInButton = driver.findElement(By.id("signIn"));
SignInButton.click();
//close the web browser
driver.close();
}
}
[/java]
There is no need of
DemoTestNG.java
[java]
//following is an example for Selenium TestNG Framework
package TestNG;
import org.openqa.selenium.By;
import org.openqa.selenium.WebDriver;
import org.openqa.selenium.WebElement;
import org.openqa.selenium.firefox.FirefoxDriver;
import org.testng.Assert;
import org.testng.annotations.Test;
public class DemoTestNG {
public WebDriver driver = new FirefoxDriver();
String appUrl = "https://accounts.google.com";
@Test
public void gmailLogin() {
// launch the firefox browser and open the application url
driver.get("https://gmail.com");
// maximize the browser window
driver.manage().window().maximize();
String expectedTitle = " Sign in - Google Accounts ";
String actualTitle = driver.getTitle();
Assert.assertEquals(expectedTitle,actualTitle);
WebElement username = driver.findElement(By.id("Email"));
username.clear();
username.sendKeys("TestSelenium");
//enter a valid password in the password textbox
WebElement password = driver.findElement(By.id("Passwd"));
password.clear();
password.sendKeys("password123");
//click on the Sign in button
WebElement SignInButton = driver.findElement(By.id("signIn"));
SignInButton.click();
//close the web browser
driver.close();
}
}
[/java]
There is no need of 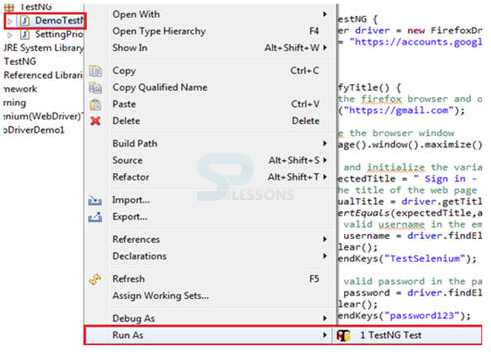 Output will be as follows. Following result from
 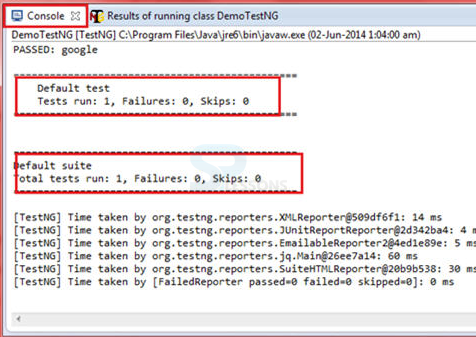 Following is
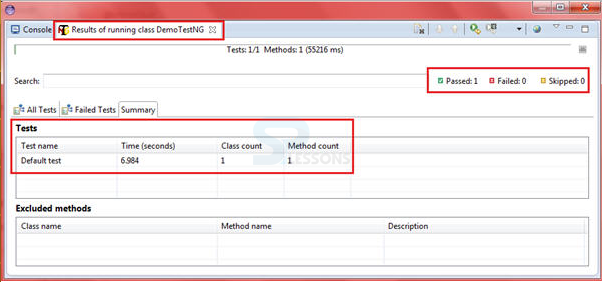
TestNG and click on Next button, then another page will be opened, fill the data.
main() strategy while making test scripts utilizing TestNG. The project execution is done on the premise of explanations.Now run the code as follows.
console.
TestNG result window.
Key Points
- In both TestNG and JUnit Annotations are preceded by a “@” symbol.
- Execution patterns can be set by TestNG.
- Test case dependencies can be set by TestNG.