


 Description
OBIEE or OBI is a reporting tool or application used by business users to query or requests the organization data stored over a period of time or in data warehouse or OLAP to obtain answers or results or reports for the analysis of business and make better decisions.
Also, these OBIEE 11g is based on a demonstrated and current innovative establishment that backings the most astounding workloads and most complex arrangements, while giving auspicious experiences to clients over an endeavor at a low general aggregate cost of ownership.The beneath steps portrays the OBIEE installation.
Step - 1
Download 
OBIEE version 11.1.1.7. Step - 2
Click on 
Oracle BI(11.1.1.x)Downloads. Step - 3
Accept the 
License Agreement. Step - 4
Download the 
Microsoft Windows x86-64-bit files. Step - 5
Download the 
Microsoft Windows(64-bit) file. Step - 6
Sign in to the oracle account.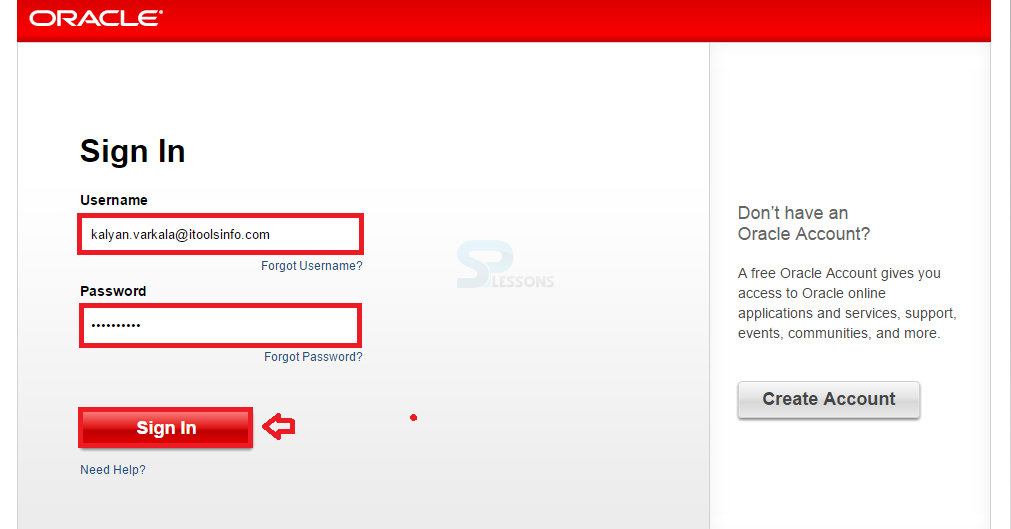
Step - 7
All the 
zip files have been downloaded. Step - 8
All the zip files have been extracted.
Step - 9
Double click on 
ruc files. Step - 10
Click on 
rucHome. Step - 11
Click on 
BIN. Step - 12
Select 
rcu batch file. Step - 13
Select the 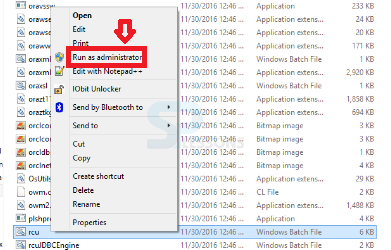
rcu file and click on Run as administrator. Step - 14
Check the box and click on 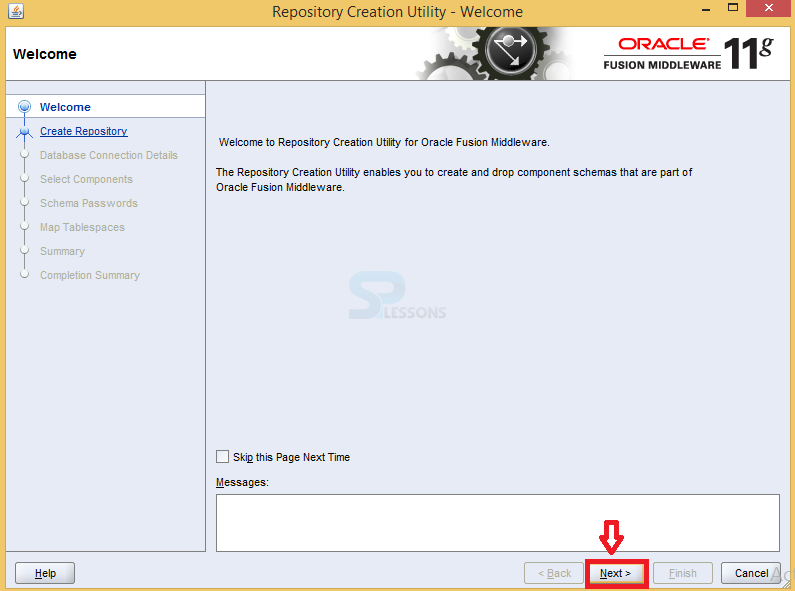
Next button. Step - 15
Click on 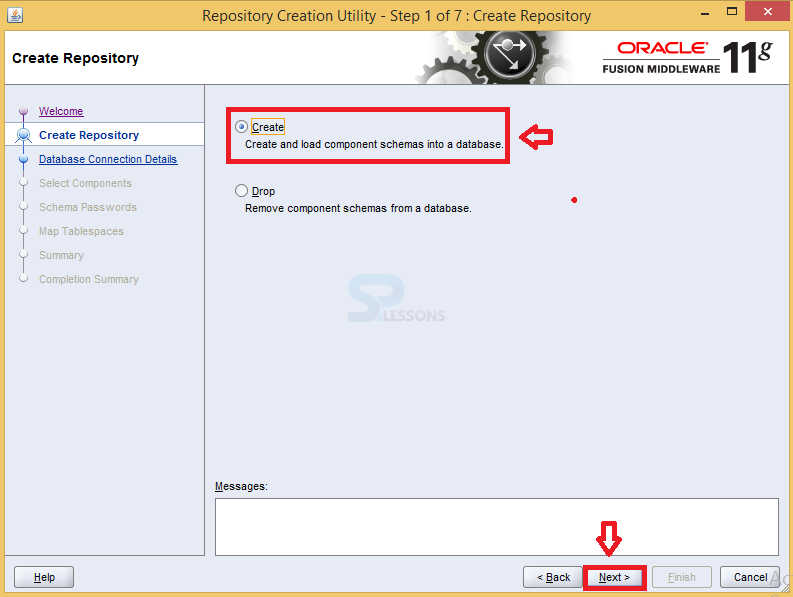
Create button and click on Next button. Step - 16
Enter all the 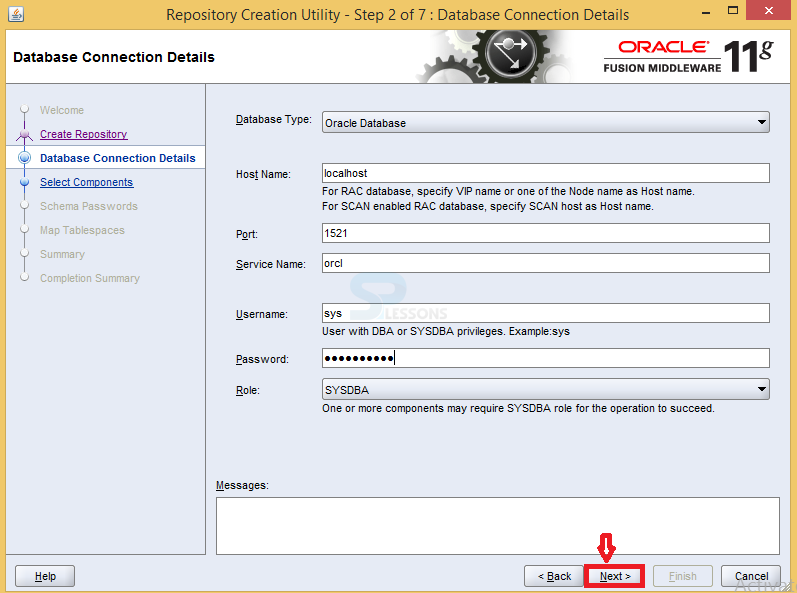
necessary privileges and click on Next button. Step - 17
Ignore the database connecting files.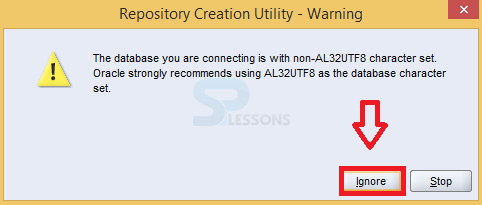
Step - 18
Checking all the global prerequisites.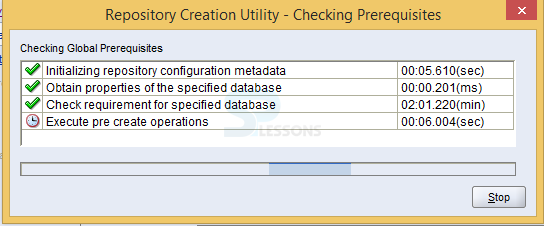
Step - 19
Select the 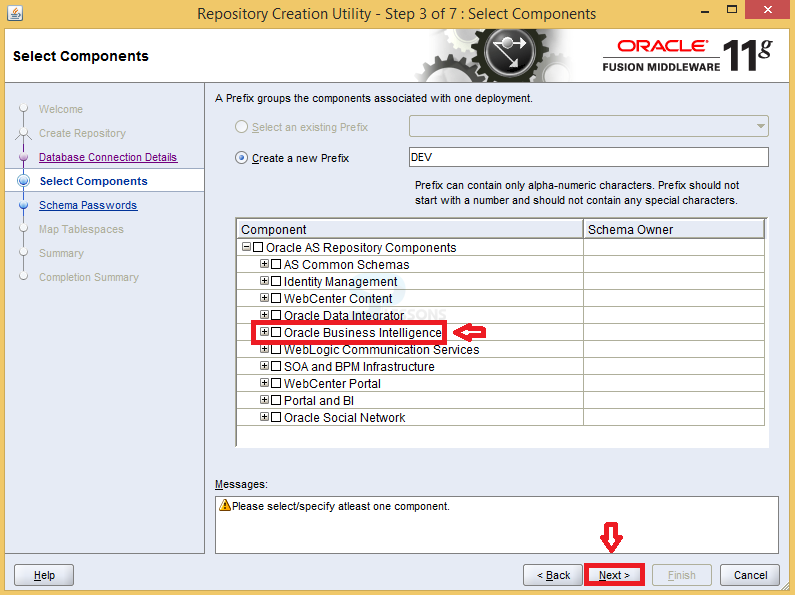
oracle business intelligence and click on Next button. Step - 20
Now click on 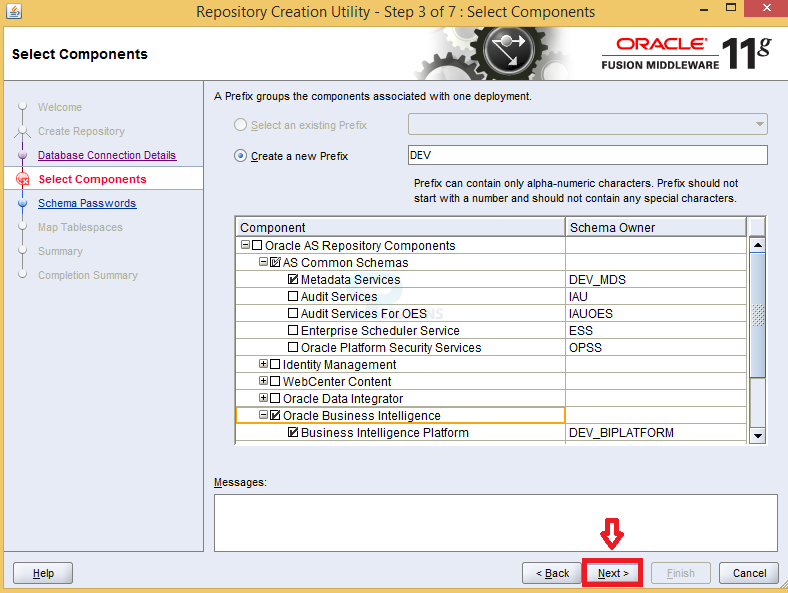
Next button. Step - 21
Now click on 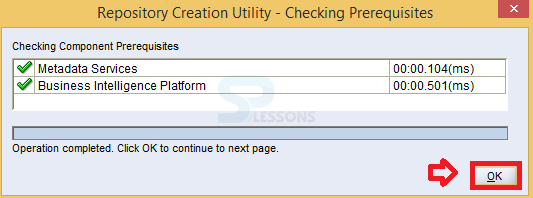
OK button. Step - 22
Enter 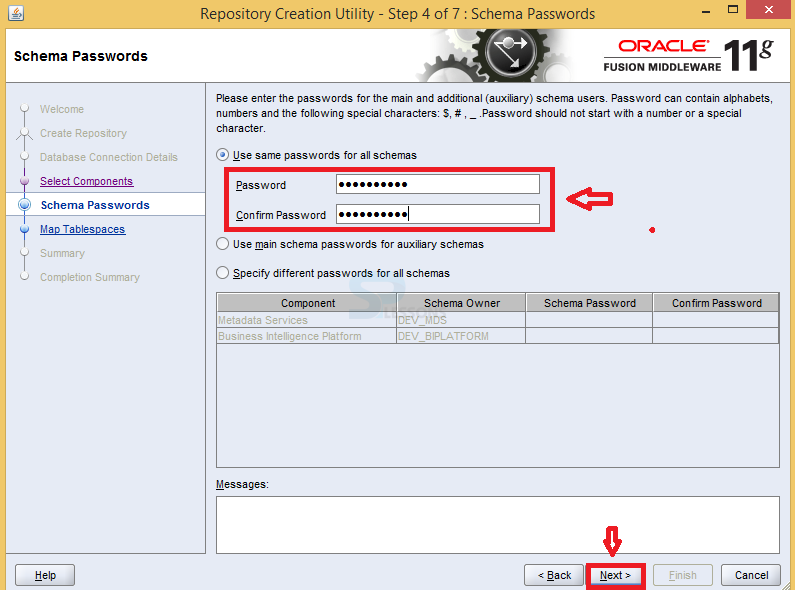
schema password and click on Next button. Step - 23
Now click on 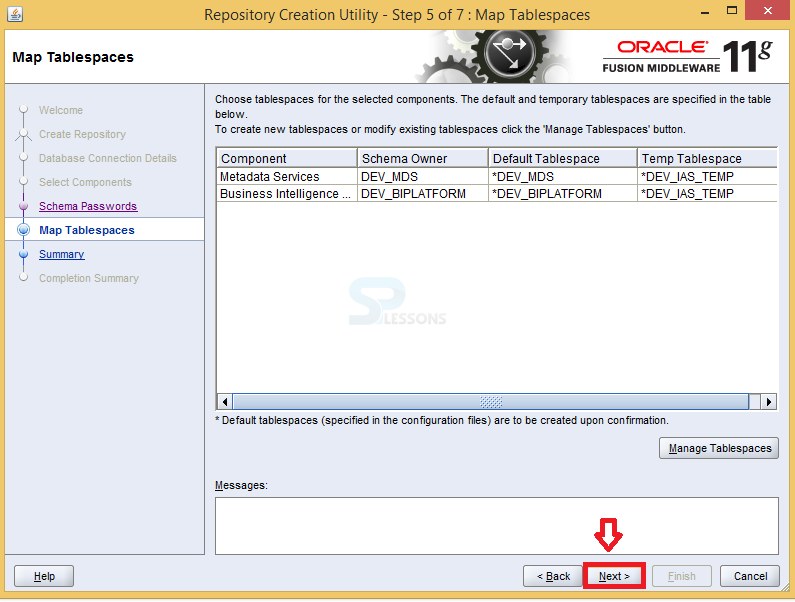
Next button. Step - 24
Click on 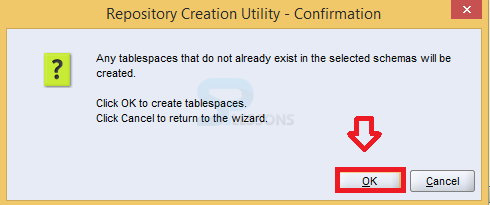
OK button in the repository creation utility. Step - 25
It is verifying and creating tablespaces.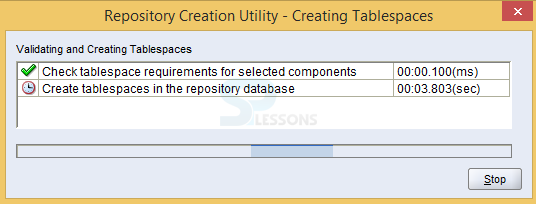
Step - 26
In Repository Creation Utility click on 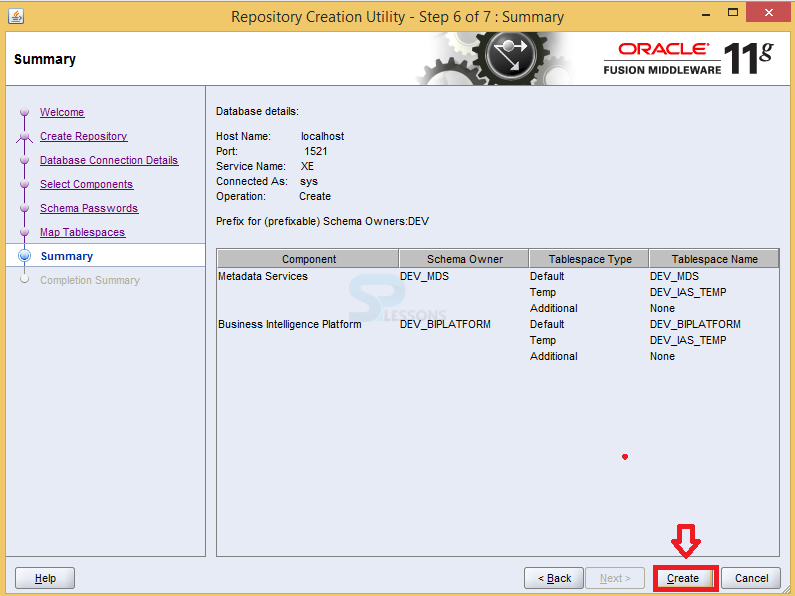
Create button. Step - 27
All the Repository files have begin progression.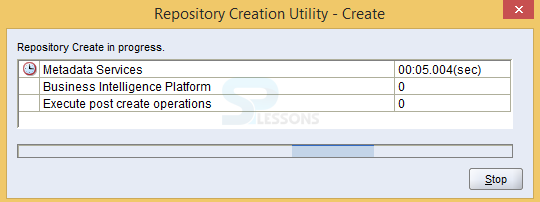
Step - 28
Click on 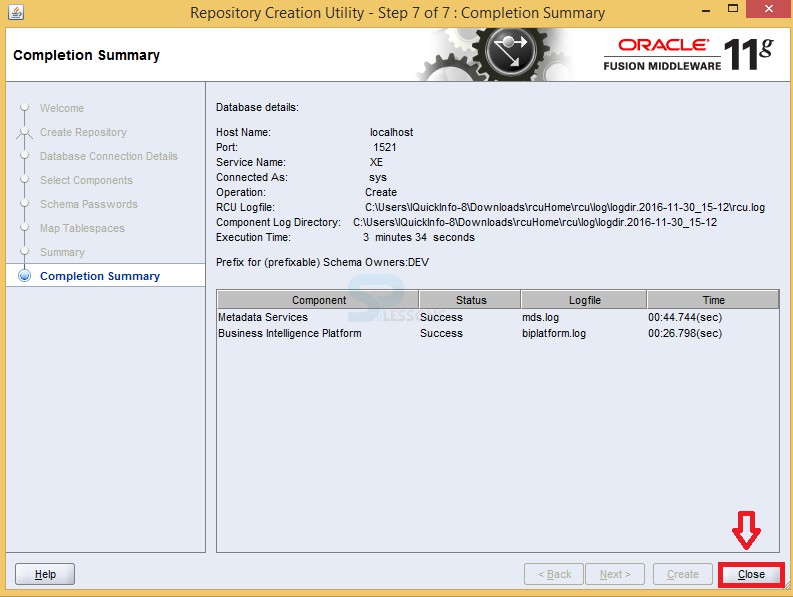
Close button. Step - 29
All the files have been extracted into a folder.
Step - 30
All the extracted files.
Step - 31
Select the first file and select the 
Disk1 folder. Step - 32
Right click on the 
setup file and select Run as administrator button. Step - 33
It get starting for the installation.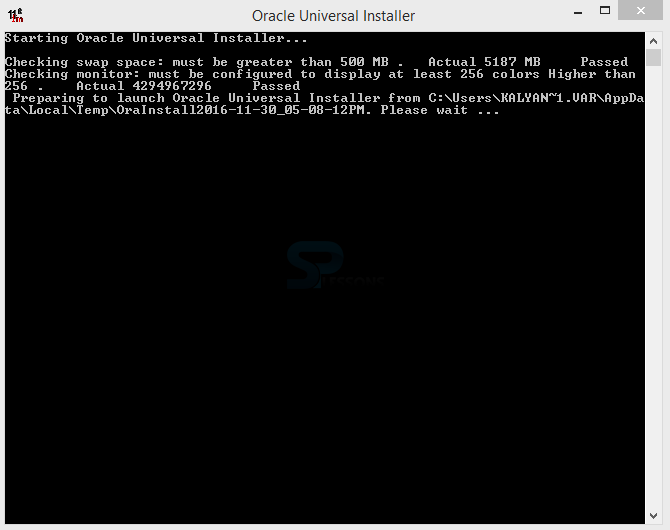
Step - 34
Oracle business intelligence is getting generated.
Step - 35
Click on 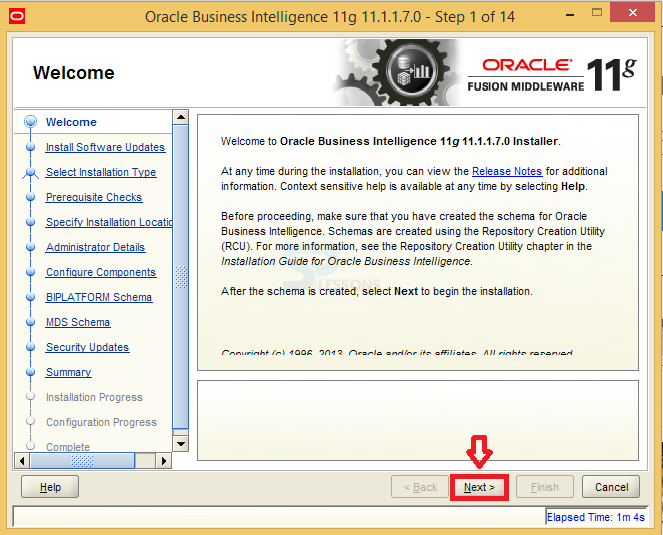
Next button. Step - 36
Check the box 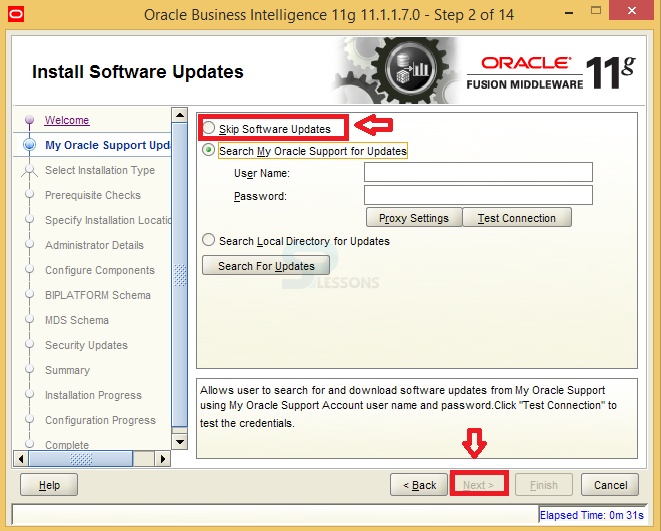
skip software updates and click on Next button. Step - 37
Check the 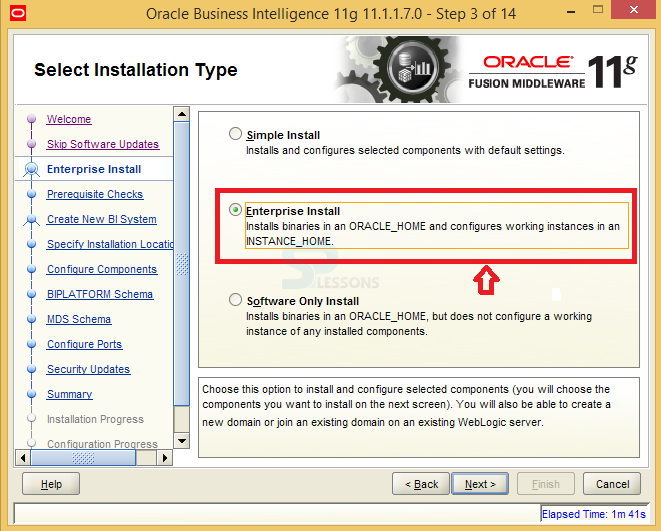
Enterprise Installer and click on Next button. Step - 38
Click on 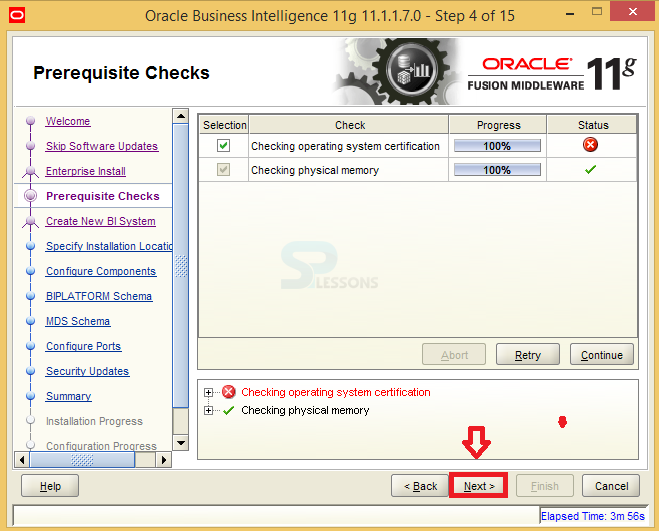
Next button. Step - 39
Enter the 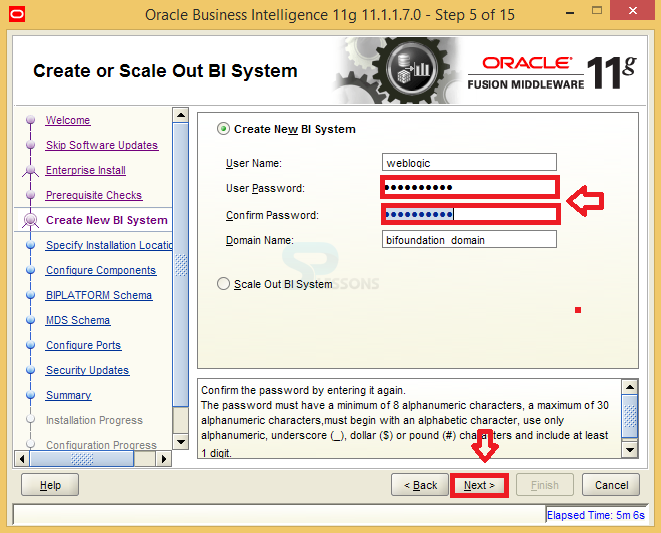
user password and click on Next button. Step - 40
Click on 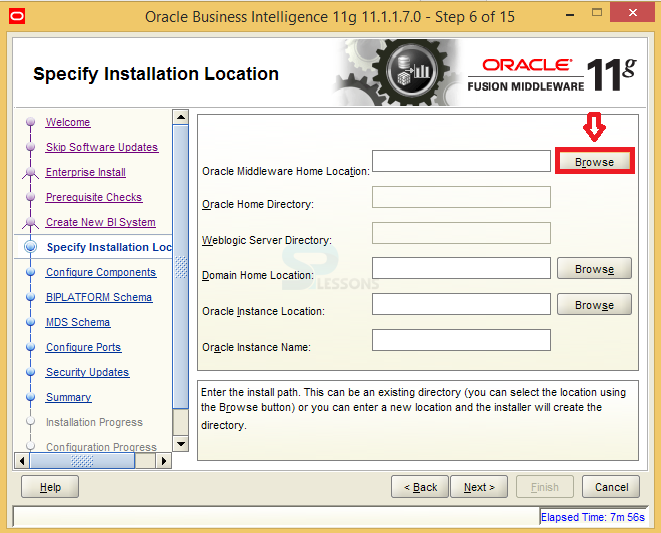
browse button and select the location. Step - 41
selecting the location.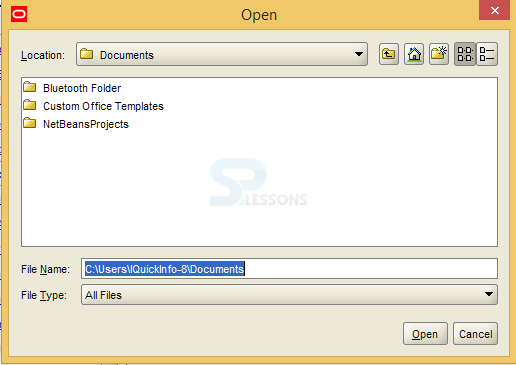
Step - 42
Create a new folder by name 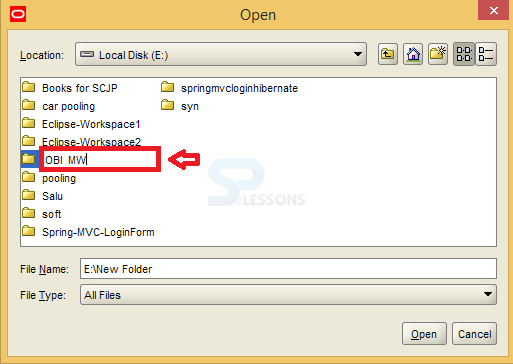
OBI MW. Step - 43
Click on 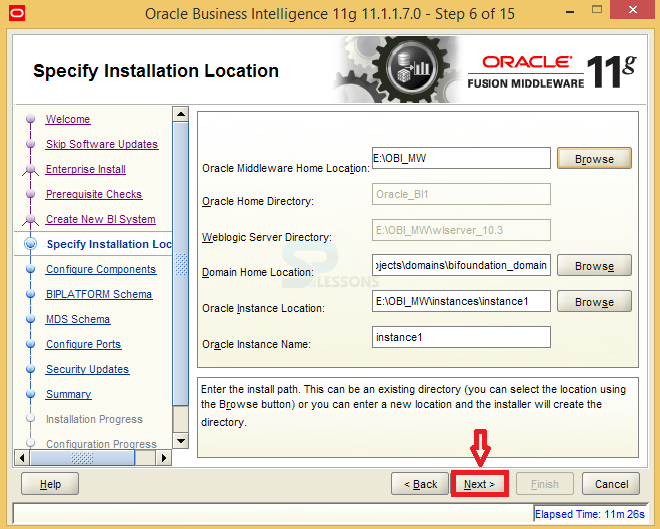
Next button. Step - 44
Click on 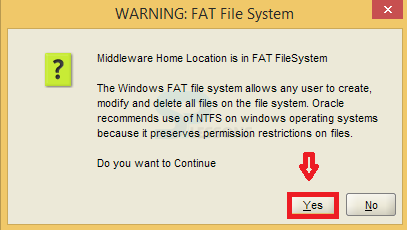
Yes button. Step - 45
In configuration components select 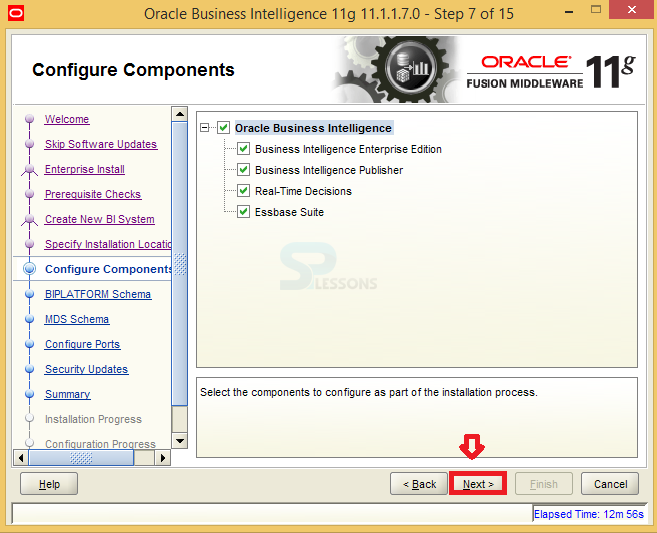
Next button. Step - 46
In 
BIPLATFORM schema select Next button. Step - 47
Check the 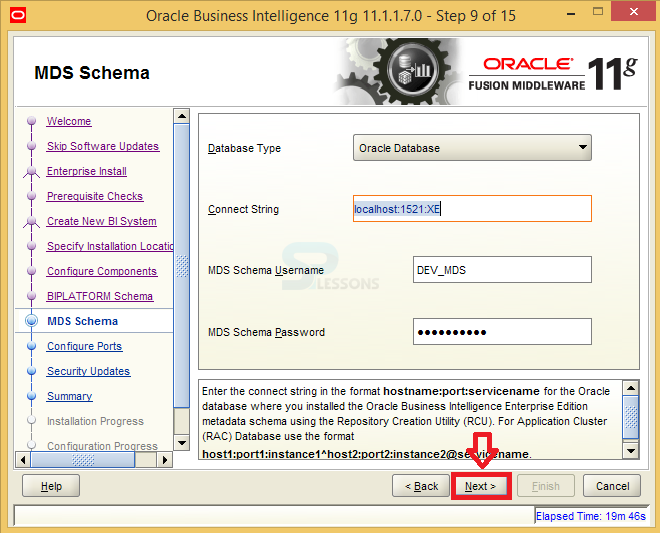
MDS Schema password and click on Next button. Step - 48
In configure ports select 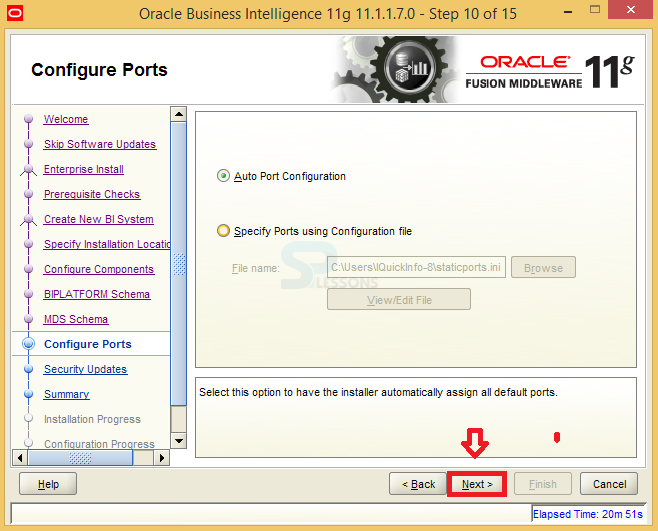
Next button. Step - 49
Click on 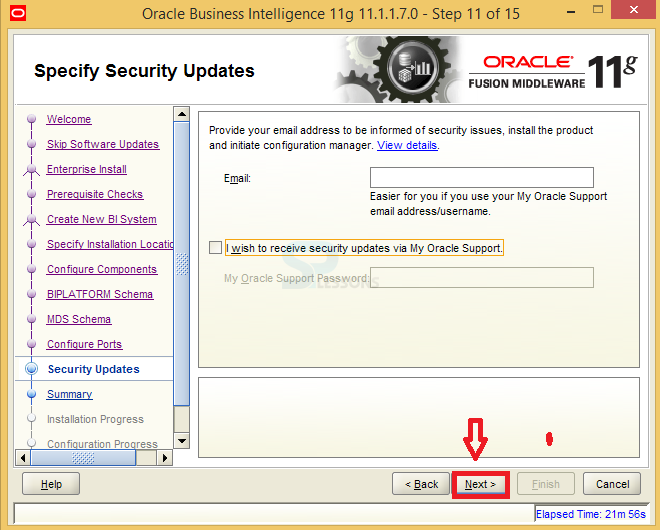
Next button. Step - 50
Click on 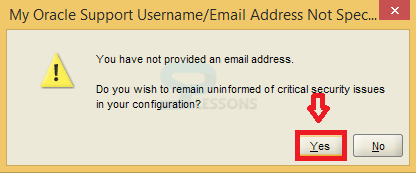
Yes button. Step - 51
Save the file into a folder and click on 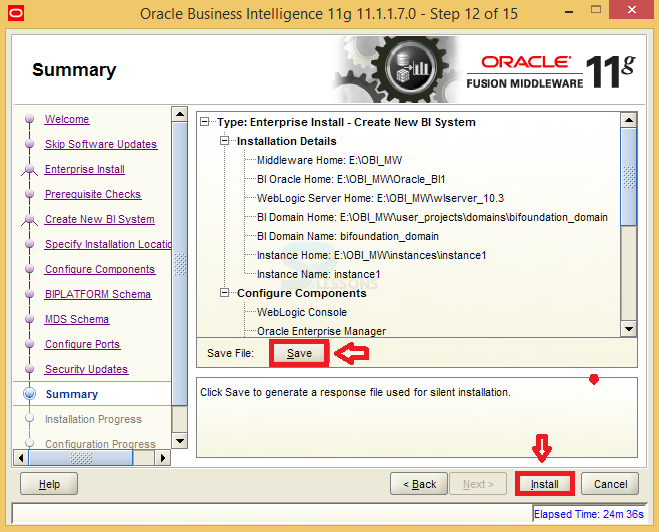
save and install button. Step - 52
Click on 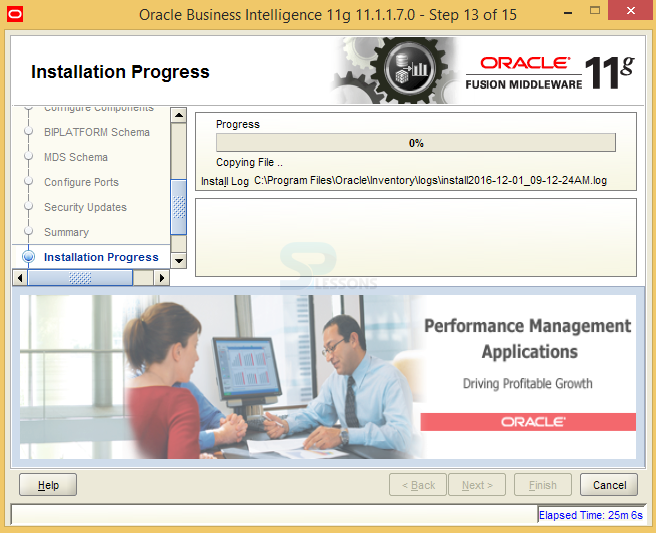
Next button. Step - 53
Check all the configuration process and click on 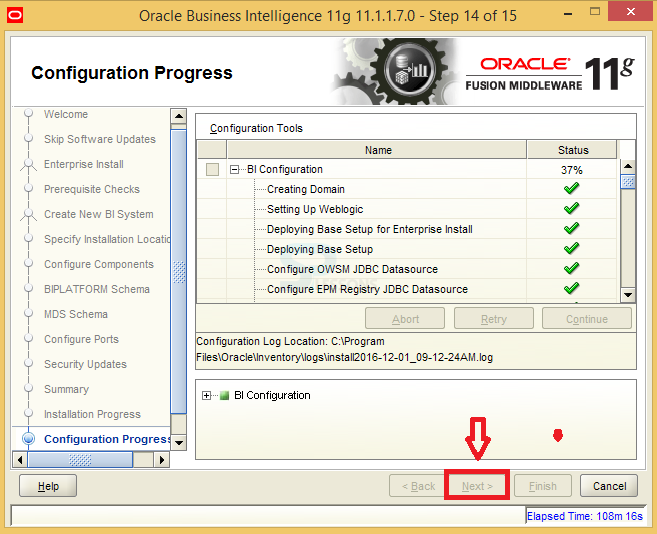
Next button. Step - 54
Click on 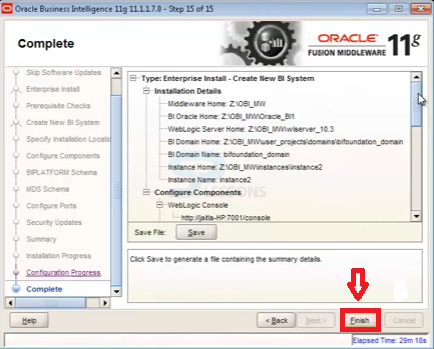
Finish button. Step - 55
Enter the 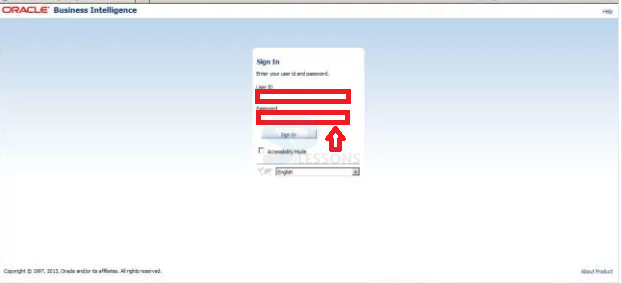
authorised credentials and click on sign_in button. Step - 56
The Oracle 11g OBIEE database have been successfully installed.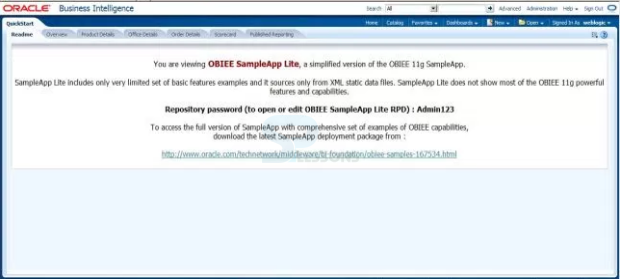
Key points
- Installation -Describe the installation steps for OBIEE database technology.