 Introduction
The chapter Node.js Express explains about express which is a web framework for Node.js, express give support to Node.js to design a web application, following are the concepts covered.
- Express
- Installing Node.js Express
- Route configuration
 Description
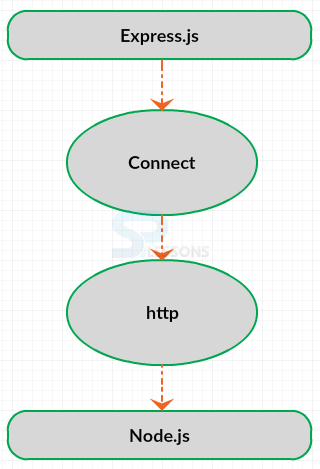
Express is the framework which gives support to Node.js for developing web and mobile applications, desing an application using Node.js alone take a lot of time but with the support of express one can design the application very fast and it is an easy process. The express depends on Node.js middleware module known as connect which in turn depends on HTTP module. The figure below demonstrate briefly the express.js framework.
Express advantages -
- Express allows user to define error handling middleware.
- The database like MySQL, MongoDB are easy to connect.
- Express is very easy and simple to customize and configure.
- Express support Node.js in designing an application easily and accurately.
 Description
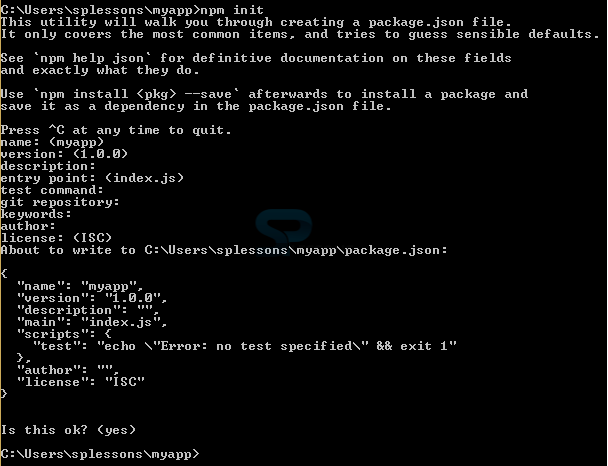
In order to install Express.js, first install Node.js. Download and install Node.js from the official Node.js website. If Node.js already installed perform the following steps to install Express.js.
 Step 1
 Step 2
 Step 3
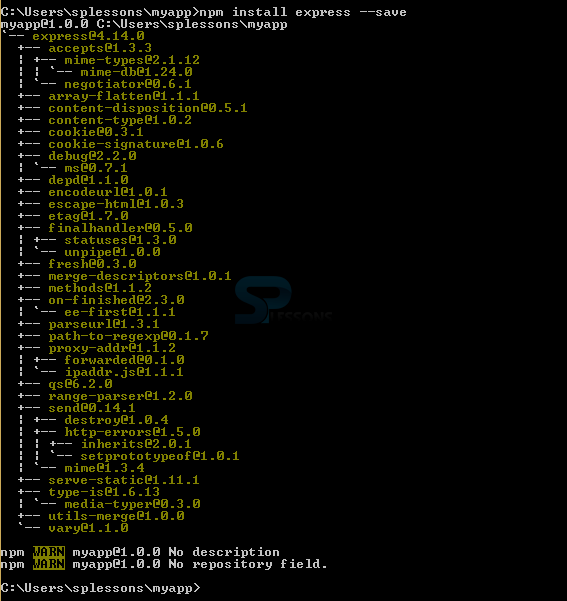
Now, install Express in the created folder i.e. myapp directory and save it in the dependency list using the following command.
[c]$ npm install express --save[/c]
Use this command as shown in the image below.
In order to install Express temporarily and don’t want to add to the dependency list remove --save from the command as shown below.
[c]$ npm install express[/c]
Use this command as shown in the image below.
 Step 4
Now, create a .js file in the myapp directory with the code shown below.
appEx.js
[c]
var express = require('express');
var app = express();
app.get('/', function (req, res) {
res.send('SPLessons Online Exams');
});
app.listen(3000, function () {
console.log('Example app listening on port 3000!');
});
[/c]
 Step 5
 Description
Additional modules should be installed along with express for handling HTTP request in Express.js version 4 and above, previously the middleware modules were inbuilt in express but now one should install them separately. Following are some important middleware modules.
multer –
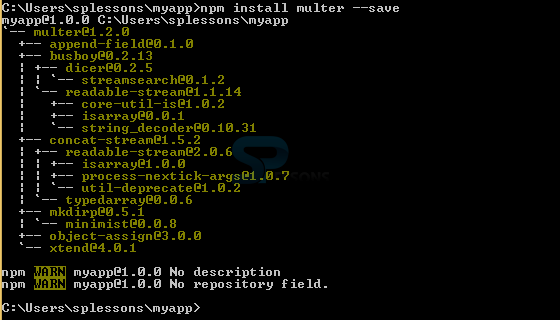
multer is the middleware which handles a form data. The command below is used to install the multer middleware.
[c]$ npm install multer --save[/c]
Use the command as shown in the image below.
body-parser –
body-parser is the middleware which handles JSON. The command below is used to install the body-parser middleware.
[c]$ npm install body-parser --save[/c]
Use the command as shown in the image below.
cookie-parser –
The required cookies are populated by cookie-parser. The command below is used to install the cookie-parser middleware.
[c]$ npm install cookie-parser --save[/c]
Use the command as shown in the image below.
 Description
The route for the application can be included using the app object. The methods like put(), get(), delete() and post()are used to configure route for HTTP request. The code below demonstrates configuring HTTP routes.
routing.js
[c]
var express = require('express');
var app = express();
app.get('/', function (req, res) {
res.send('<html><body><h2>Splessons Online Tutorials</h2></body></html>');
});
app.post('/submit-data', function (req, res) {
res.send('POST Request');
});
app.put('/update-data', function (req, res) {
res.send('PUT Request');
});
app.delete('/delete-data', function (req, res) {
res.send('DELETE Request');
});
var server = app.listen(8080, function () {
console.log('Node server is running..');
});
[/c]
Compile the file using the command shown below.
[c]$ node routing.js[/c]
By using the command one can get the following output as shown in the image below.
Now, run on browser using the port number localhost:8080 by doing this one can get the output as shown in the image below.
 Example
The example code below demonstrate creating a simple submit application for handling HTTP post request and get data. In order to do this first create an HTML file with the code as shown below.
form.html
[c]
<!DOCTYPE html>
<head>
<meta charset="utf-8" />
<title>SPLessons Registration</title>
</head>
<body>
<form action="/submit-student-data" method="post">
First Name: <input name="firstName" type="text" /> <br />
Last Name: <input name="lastName" type="text" /> <br />
Email Address: <input name="Email Address" type="text" /> <br />
Telephone Number: <input name="Telephone Number" type="text" /> <br />
<input type="submit" />
</form>
</body>
</html>
[/c]
Now, get the post request data by importing body-parser using the following code.
valid.js
[c]
var express = require('express');
var app = express();
var bodyParser = require("body-parser");
app.use(bodyParser.urlencoded({ extended: false }));
app.get('/', function (req, res) {
res.sendFile(__dirname + '/form.html');
});
app.post('/submit-student-data', function (req, res) {
var name = req.body.firstName + ' ' + req.body.lastName;
res.send(name + ' Submission Completed!');
});
var server = app.listen(8080, function () {
console.log('Node server is running..');
});
[/c]
Compile the code using the command
[c]$ node valid.js [/c]
By using the command one can get the following output as shown in the image below.
Now, run on browser using the port number localhost:8080 by doing this one can get the output as shown in the image below.
Type first name like SPLessons and last name like Tutorials and then click the Create Profile button, now the browser responds and display the message as shown in the image below.
 Key Points
- Using Node.js Express it is easy to create web server for rendering the HTML pages for various http request.
- Express.js support Node.js for designing the web application easily.
- Node.js Express allows user to define the error handling middleware.
- Using the Node.js Express it is easy to serve static files and resource of the applications.


