 Description
JMeter is unadulterated Java open source programming, which was at first made by Stefano Mazzocchi of the Apache Software Foundation, proposed to load test utilitarian direct and measure execution. An engineer can use JMeter to separate and measure the execution of web application or a combination of organizations. Execution testing suggests testing a web application against overpowering weight, diverse and concurrent customer development. JMeter at first is used for testing Web Application, FTP application. Presently it is utilizing for database server test moreover.
 Description
Testing is a process of finding the bugs in a program or application and also known as process of finding the difference between the expected output and actually given input. Testing evaluates the quality of the product which is done by testing team during the development process of the project.
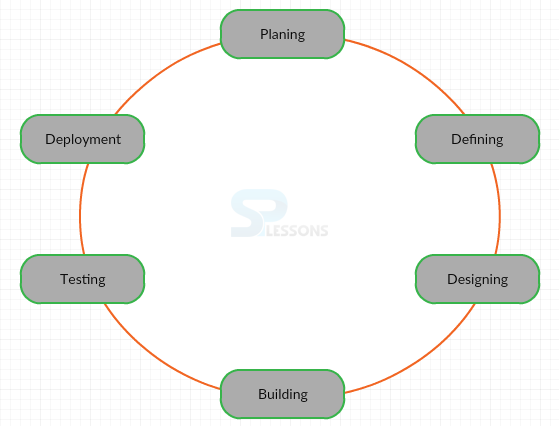
For maintaining and developing the projects Software Development Life Cycle (SDLC) was very useful for all software projects. The image below demonstrate life cycle of SDLC.
 Description
In order to describe the types of testing basically testing can be divided in to two types based on SDLC.
- Manual Testing
- Automation Testing
 Description
Manual Testing is the testing used to test the program or application manually means without using any additional tool. Following are some of the Manual Testing methods some methods are described below.
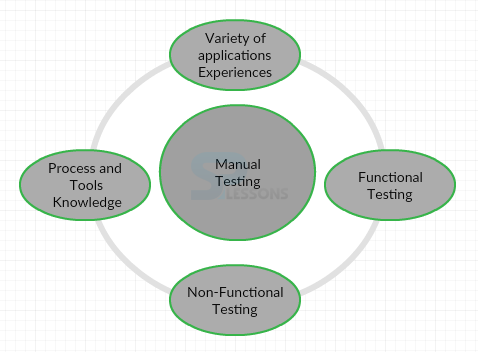
In order to test the software project or application developer need to use the some of the test Scripts and test cases or test scenarios for complete testing process. The below image demonstrate about Manual Testing.
- Black Box Testing
- White Box testing
- Integration Testing
- Unit Testing
- System Testing
- Functional Testing
- Acceptance Testing
- Regression Testing
- Load Testing
- Usability Testing
- Performance Testing
- Alpha Testing
- Beta Testing
 Description
 Description
Most of the people's utilized and right now utilizing the JUnit for the purpose of unit testing to test the Java code. Users may or may not know about each and every component of the JUnit. So, following are some of components of JUnit.
JUnit has the ability to integrate with most of the popular build systems for Java including Ant and Maven.
- Fixtures
- Asserts
- Test suites
- Test runners
- Junit classes
- Assumptions
- Rules
- Theories
- Integration with popular build systems
 Description
JUnit is used to compose some content code, the most part of the code is composed from different projects and is known as Subject under test(SUT). The most part of SUT is a Java class, JUnit can be utilized for the unit testing. The Test code capabilities of JUnit Framework make it easier to analyze the outcomes and different things like Setting up and Tearing down tests.
JUnit runner is used to see the running test and figure out what test exist and how it ought to run them and report those outcomes.
 Introduction
This chapter demonstrate the JUnit Test Classes. Which explore the some features of the test cases those features are use full to perform more test cases at a single time. JUnit have the several test classes below demonstrate some of the Junit Test Class.
- Creating Test class in JUnit.
- Parameterized test
 Description
In order to create the Junit Test Class which has the several basic test methods based on the test requirement. JUnit runs the multiple test methods and some annotations at a time the below code demonstrates the creating a Junit Test Class.
[c]import org.junit.Before;
import org.junit.BeforeClass;
import org.junit.Ignore;
import org.junit.Test;
import org.junit.After;
import org.junit.AfterClass;
import com.simpleprogram.proteintracker.TrackingService;
import static org.junit.Assert.*;
public class trackingServiceeTest {
private TrackingService service;
@BeforeClass
public static void before()
{
System.out.println("Before Class");
}
@AfterClass
public static void after()
{
System.out.println("After Class");
}
@Before
public void setUp()
{
System.out.println("Before");
service = new TrackingService();
}
@After
public void tearDown()
{
System.out.println("After");
}
@Test
public void NewTrackingServiceTotalIsZero()
{
assertEquals("Tracking service was not zero", 0, service.getTotal());
}
@Test
@Ignore
public void WhenAddingProteinTotalIncresesByThatAmount()
{
service.addProtein(10);
assertEquals("Protein amount was not correct", 10, service.getTotal());
}
@Test
public void WhenRemovingProteinTotalRemainsZero()
{
service.removeProtein(5);
assertEquals(0, service.getTotal());
}
}
[/c]
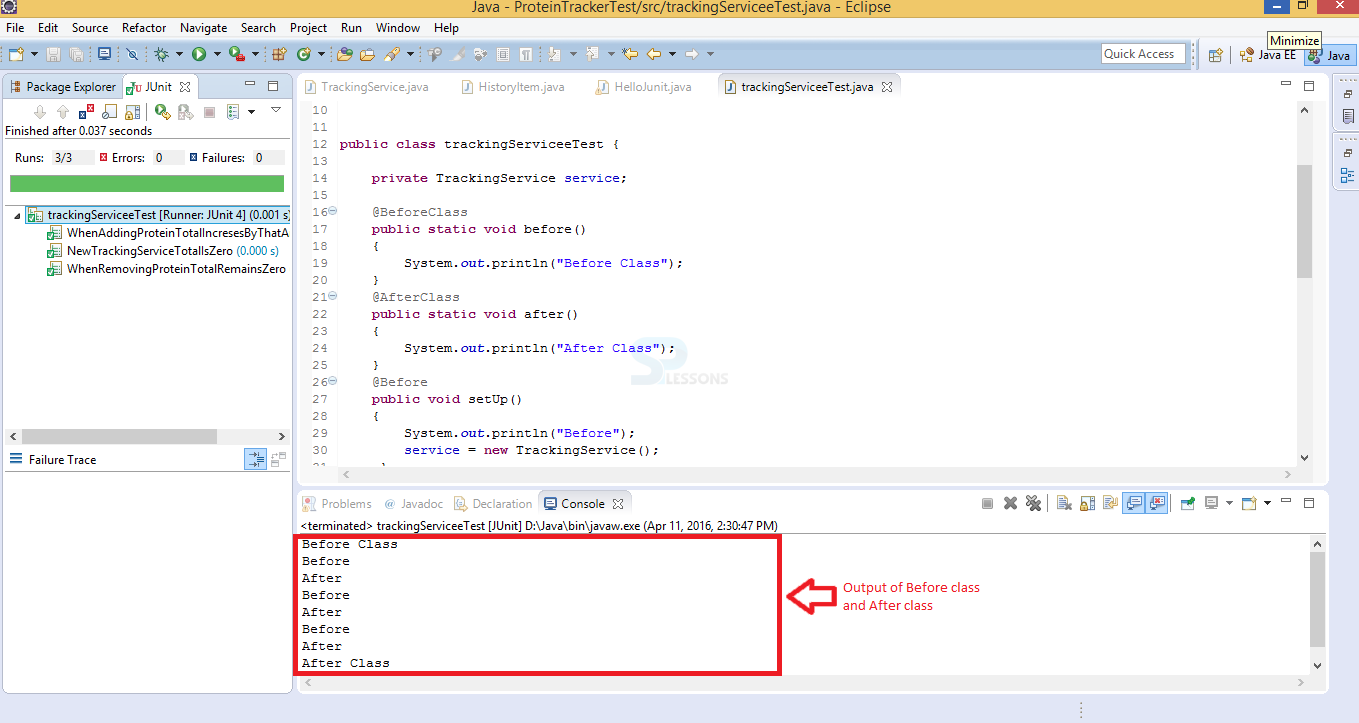
If user run the above generated code it will run all mentioned methods and annotations successfully and which displays the output in green colour as shown in below image.
 Description
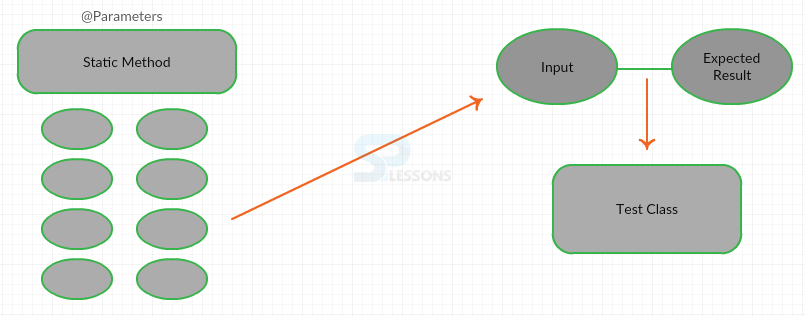
Parameterized Tests used to pass a set of inputs and expected outputs into a test class and runs against those inputs and check to the expected results without creating a test case for each pair. In order to create simple parameterized JUnit test user need to create static method with parameters annotation which returns a collection of arrays that have one item for input and another one is for expected output. Below image demonstrate the Parameterized test.
Creating Parameterized Tests
Following are the steps to create Parameterized Tests.
- In order to create the parameterized test user need to create parameters annotations that return back collection of arrays which have one item for item and the another item for an expected result.
- User can create a class which contain a constructor that takes an input and Expected result, and set of those values into a fields in a class.
- Finally user create tests that rely on the inputs and expected result values stored in the fields of created class.
 Examples
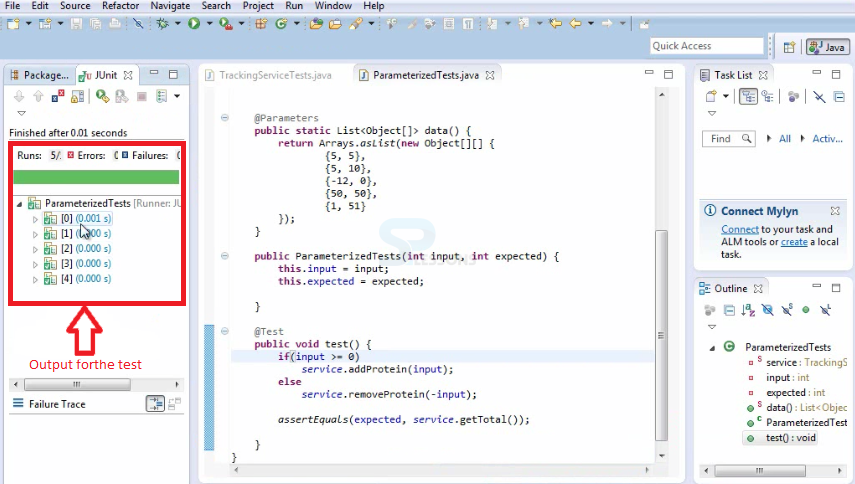
The below code demonstrate to create a test to specify the series of input for Protein that either going to add or remove.
[c]import java.utill.Arrays;
import java.utill.List;
import org.junit.runner.Runwith;
import org.junit.runners.Parameterized;
import org.junit.runners.Parameterized.Parameters;
import com.simpleprogrammer.proteintracker.Trackingservice;
@Runwith(Parametrized.class)
public class PrametrizecTests {
Private static Tracking Service=new TrackingService();
@Parameters
public static List<Object[]> data(){
return Arrays.osList(new Object[][]){
{5, 5},
{5, 10},
{-12, 0},
{50, 50},
{1, 51}
})
}
public ParametrizedTests(int input, int expected){
this.input = input;
this.expected = expected;
}
@Test
public voi tst(){
if(input <=0)
service.addProtein(input);
else
service.removeProtein(-input);
}
}
[/c]
The output for the above program is shown below.
 Key Points
- JUnit mostly used in a test driven development and it is likewise group of a testing structure.
- While creating tests follow the naming conventions.
- JUnit is not necessary to do unit test in Java.
- Output shows the executed procedure by using annotations.
- Parameterized tests will run against the expected outputs.


