 Introduction
This chapter demonstrates about the HTML Head with detailed explanation and structure using all basic tags of the html document. Following are the concepts covered.
- Title Tag
- Meta Tag
- Base Tag
- script Tag
- Link Tag
 Description
In order to give the title to the document user need to use the <title> tag. Title is mandatory for the html document and browser identify the files by searching the titles. The code below demonstrates giving the file name using the title tag.
[html]
<!DOCTYPE html>
<html>
<head>
<title>SPLESSONS</title>
</head>
<body>
<p>Welcome to SPlessons!</p>
</body>
</html>
[/html]
Result
By running the above code in a preferred browser user can get the following output as shown in below image.
 Description
The Meta tags are used to provide the meta data which contains complete information about the document about the author of the page, keywords, complete description of the page and also the expire date of the page. The code below demonstrates the structure of <meta> tags.
[html]
<!DOCTYPE html>
<html>
<meta name="description" content="SPlessons tutorials">
<meta name="keywords" content="HTML,CSS,XML,JavaScript">
<meta name="author" content="Dany">
<meta charset="UTF-8">
<body>
<p>code contains meta information.</p>
</body>
</html>
[/html]
Result
By running the above code in a preferred browser user can get the following output as shown in below image.
 Description
Style tag is useful to give styles to the user web document. User can give some styles to the web page with the help of <style> tag. The style tags are mainly used for designing the web page with some colors and fonts. The code below demonstrates the structure of style tag.
[html]
<!DOCTYPE html>
<html>
<title>Page Title</title>
<style>
body {background-color:orange;}
p {color:blue;}
</style>
<body>
<h1>SPLESSONS</h1>
<p>Simple Programming Lessons.</p>
</body>
</html>
[/html]
Result
By running the above code in a preferred browser user can get the following output as shown in below image.
 Description
<Script> is used to define the behaviour of the elements. User can include the script files either internal or external the code below demonstrates how to embed the script tag into an html document and the use of script tag.
[html]
<!DOCTYPE html>
<html>
<title>Page Title</title>
<script>
function myFunction() {
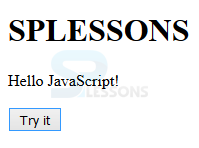
document.getElementById("demo").innerHTML = "Hello JavaScript!";
}
</script>
<body>
<h1>SPLESSONS</h1>
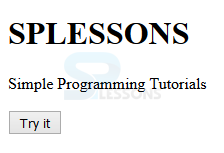
<p id="demo">Simple Programming Tutorials</p>
<button type="button" onclick="myFunction()">Try it</button>
</body>
</html>
[/html]
Result
By running the above code in a preferred browser user can get the following output as shown in below image.
When the user click on the above button, the dialogue box get generated as shown in below image.
 Description
The <link> tag is used to get the link from the external sources. User can get the link in any document by using the URLs The code below demonstrates link tags from the external document.
[html]
<!DOCTYPE html>
<html>
<head>
<title>HTML link Tag </title>
<base href="http://www.splessons.com/" />
<link rel="stylesheet" type="text/css" href="style.css">
</head>
<body>
<h1>SPLESSONS</h1>
</body>
</html>
[/html]
Result
By running the above code in a preferred browser user can get the following output as shown in below image.
 Key Points
- Title is mandatory for the document.
- Meta data will not display on the browsers.
- Style sheets gives good looking to the browsers.


