


 Introduction
This chapter Eclipse Adding Plug-ins demonstrate about adding or installing various plugins. Plug-ins are known as a software component. Eclipse platform allows users to extend Eclipse applications like Eclipse IDE with additional Functionalities via plug-ins. Following are the concepts covered.
- Eclipse Plug-ins
- Installing Plug-ins Using Traditional Methods
- Plug-ins from Eclipse Market Place
Description
Eclipse is a modular expandable development platform. The easiest way to get additional functionality into Eclipse is to install a new plug-in. There are now two ways where user can find and install new plug-ins. The old way, and it's still useful because not all plug-ins are available with the new way and user need to search web for desire functionalities. The default Eclipse Install also has a couple of software sites built-in so user can also explore those, although the amount of information available is somewhat limited.
If user found a plug-in and want from an available software site, installing it is pretty straightforward. Whereas found it on the web, it might not support installing directly from the site. If not, plug-ins can be installed manually. Then there's the new way, the Eclipse marketplace. It is available from the Help menu inside Eclipse. Once if the user open it have many options, including the ability to select among various provided Marketplaces. There are Tabs that allow to filter by the most recent or the most popular and also a built-in search capability.
User can use the drop-down list to filter by plug-ins that are tools or full rich client platform applications and can also filter by a variety of categories. In most cases, plug-ins found via the Marketplace which can be installed by simply pressing the Install button. There's even a Tab that allows to see what plug-ins are already installed.
Description
Plug-ins can be installed using some Traditional methods in Eclipse, in order to install from the available sites follow the procedure mentioned.
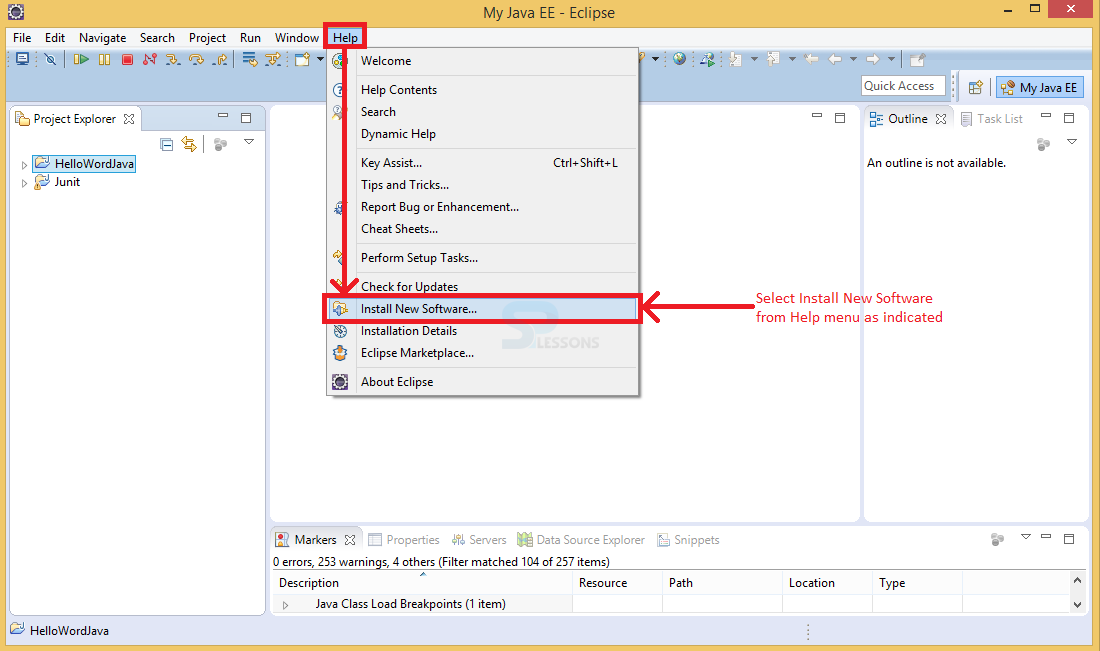
Click Help menu -> Click Install New Software as shown in the image below.
Step 1
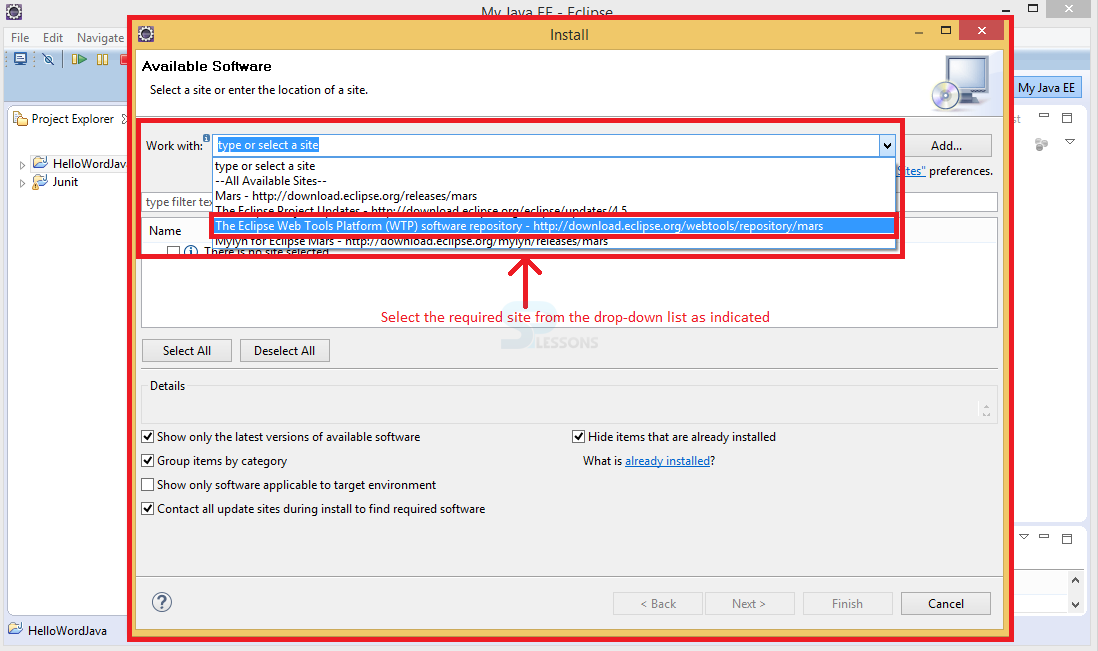
Now, a popup window appears for installing available software by providing options to add or select the available sites, click on the drop-down box in Work with option and select The Eclipse Web Tools Platform (WTP) software repository or select the preferred site as shown in the image below.
Step 2
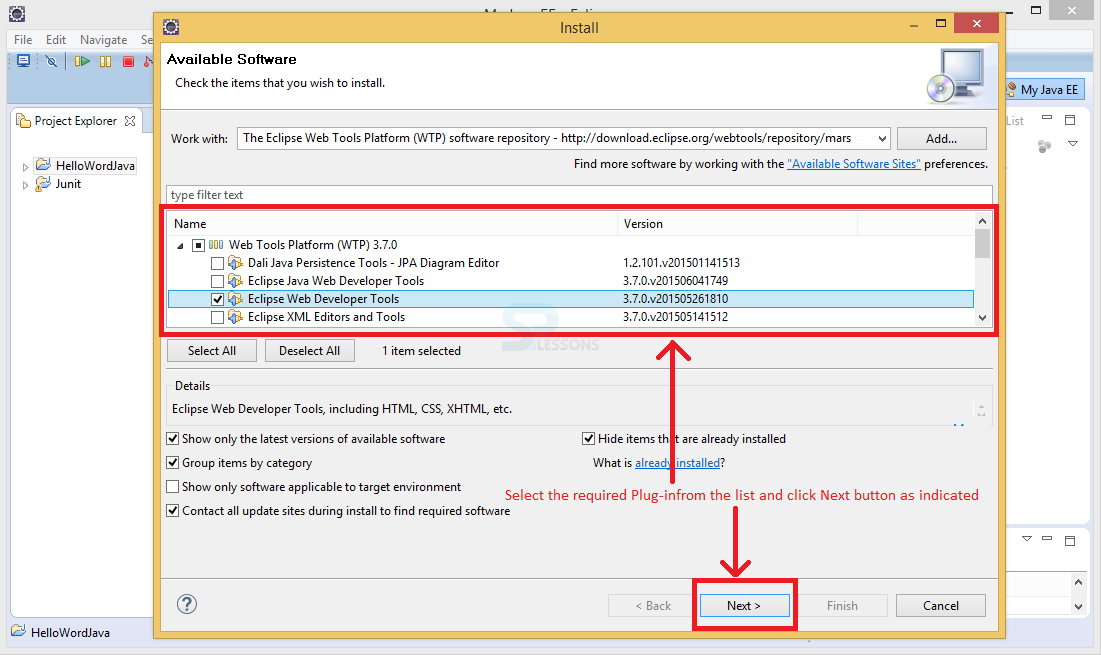
Now, a list of available Plug-ins Names and the Versions get display in a box, select the required Plug-in and click Next button for installing as shown in the image below.
Step 3
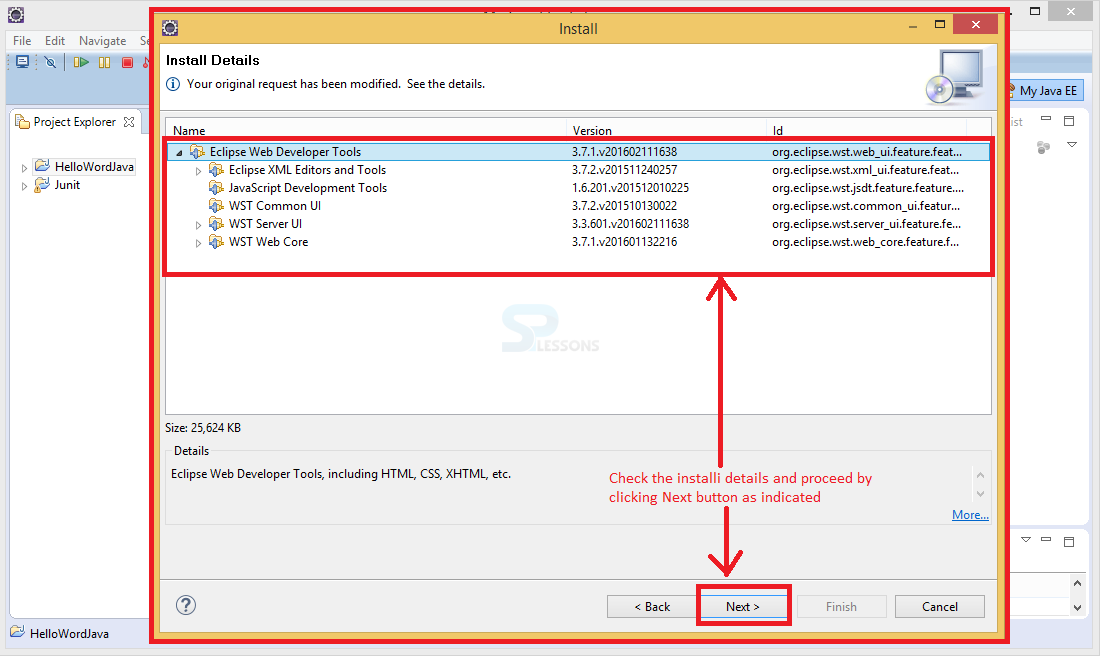
The window now display the install details list, check the list and proceed by clicking Next button as shown in the image below.
Step 4
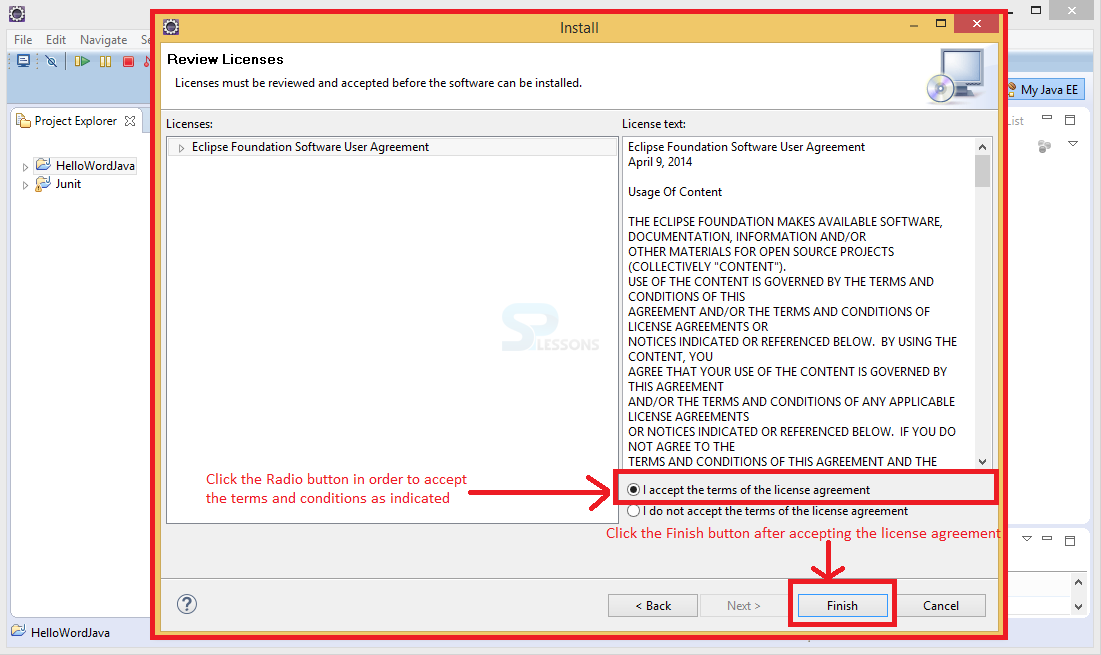
Now, the Licenses information get displayed, click the Radio button for accepting the terms and condition in order to install the software and proceed by clicking Finish button as shown in the image below.
Step 5
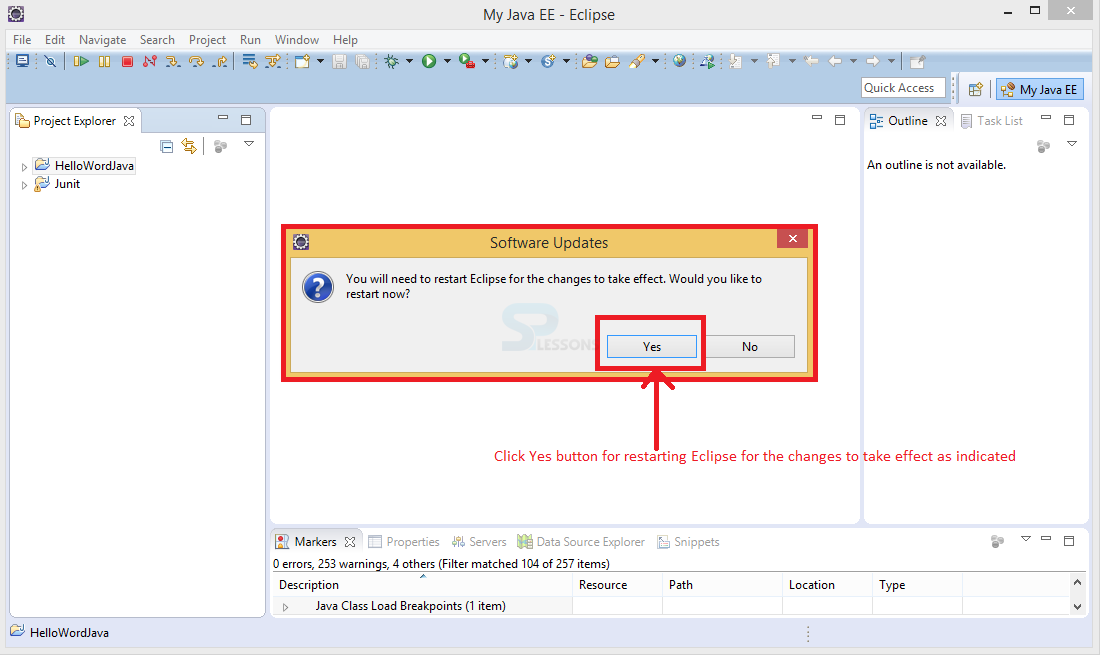
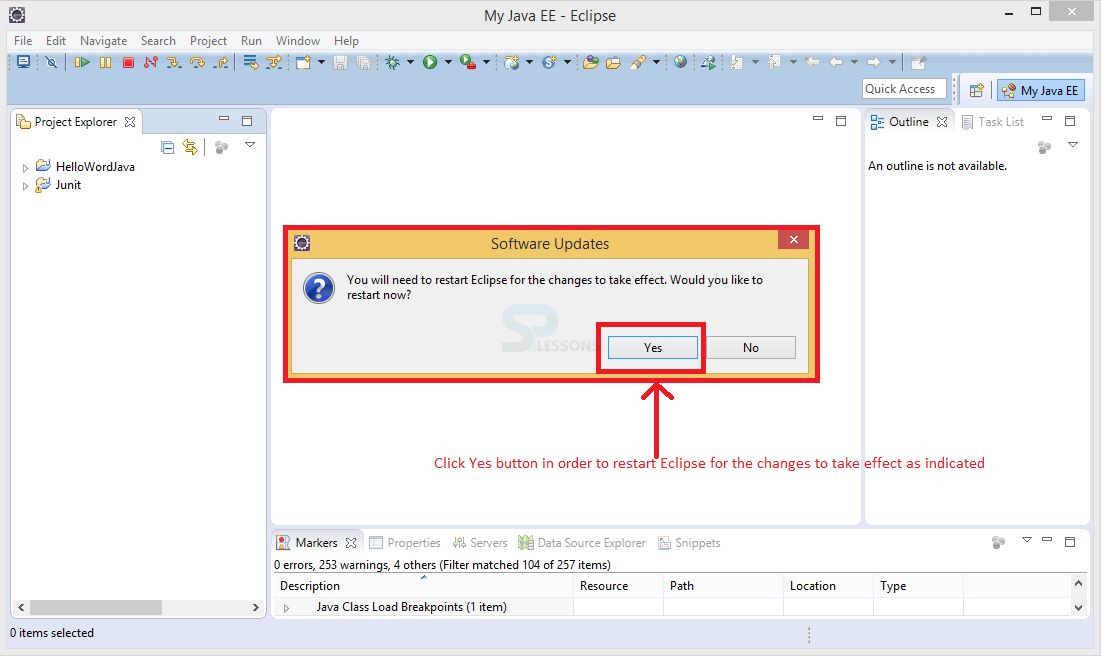
Finally after successful installation, a dialogue box appears asking for user permission to restart Eclipse for the changes to take effect, click Yes button for restarting Eclipse as shown in the image below.
Step 6
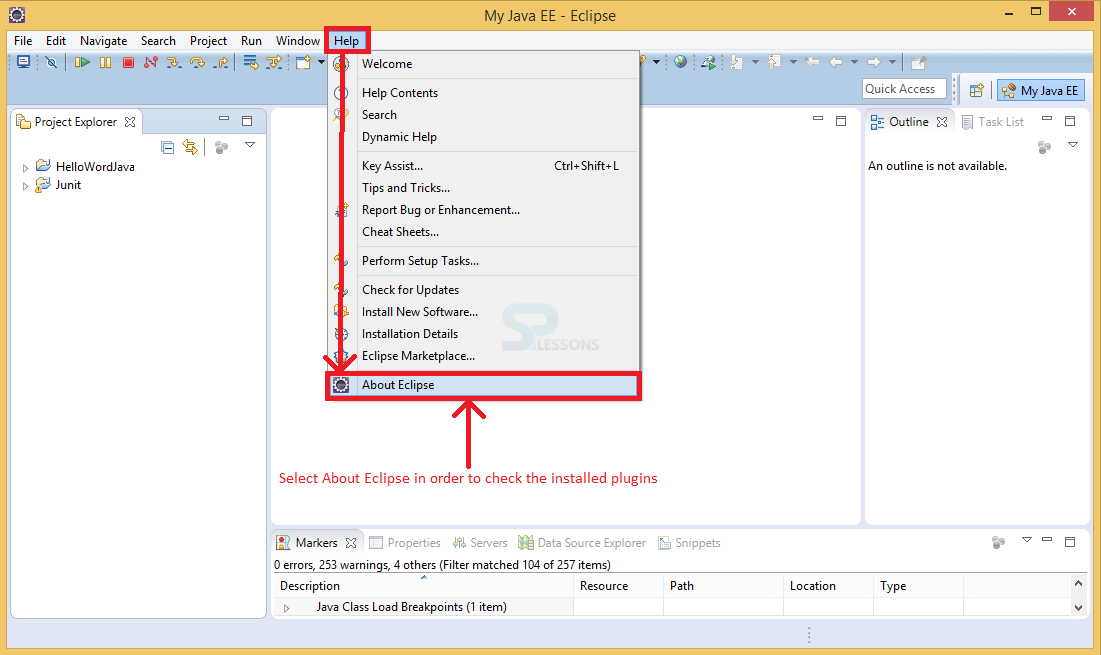
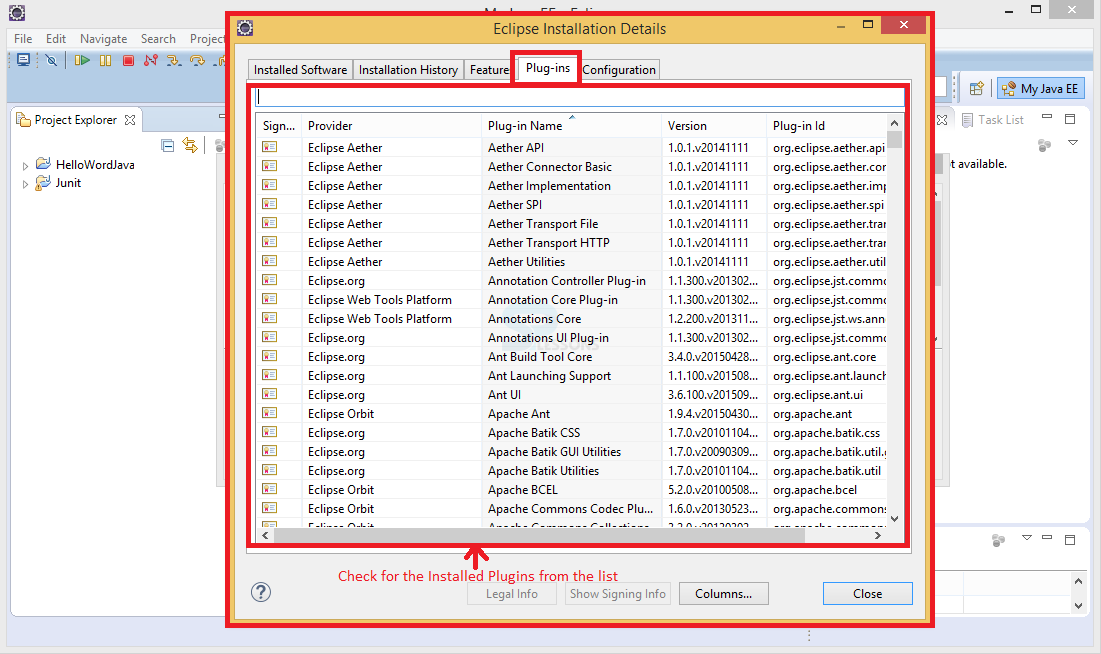
In order to check the installed plugins, Click Help menu -> Select About Eclipse as shown in the image below.
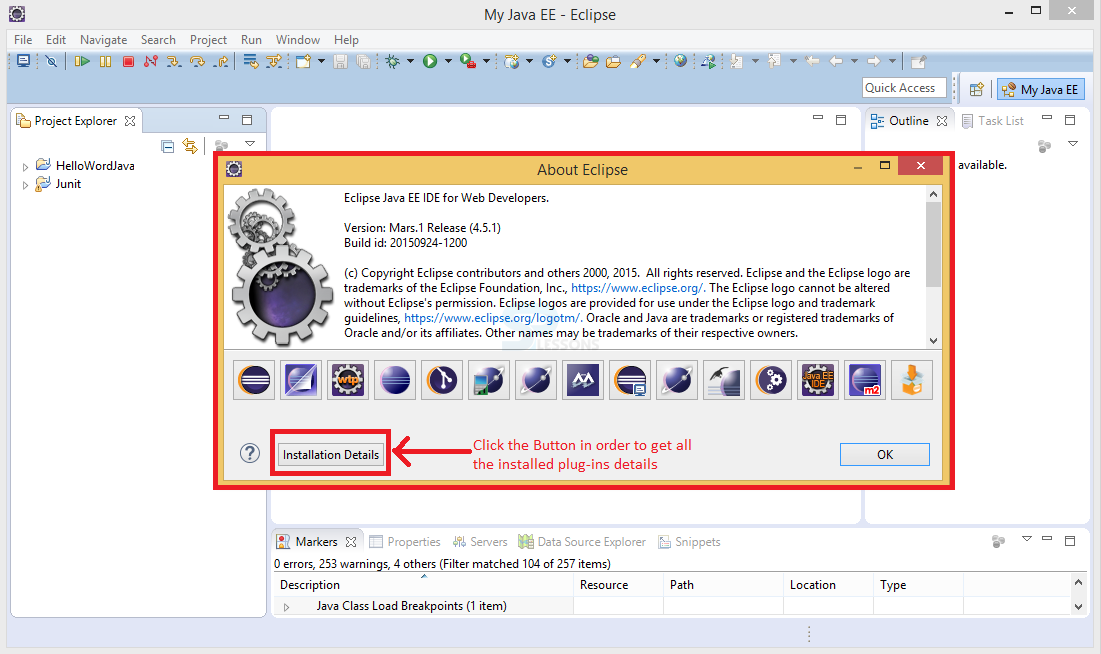
 Now a popup window appears providing information about Eclipse, click on Installation Details button as shown in the image below.
Step 7
Now, a window appears providing some options like Installed Software, Installation History, Features, Plug-ins and Configuration. Select Plug-ins from the options and check for the installed plugins from the list provided as shown in the image below.
Description
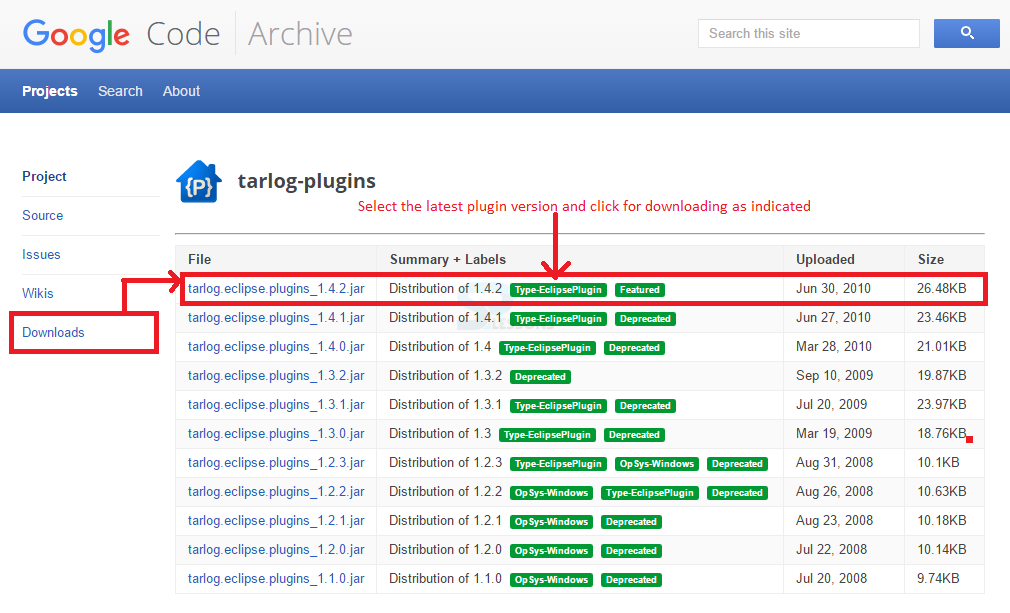
Plug-ins in Eclipse can be installed manually, download a plug-in assume to be like tarlog-plugins. Click the clink below in order to download the tarlog-plugin.
https://code.google.com/archive/p/tarlog-plugins/downloads
By clicking the link a page get appears on the browser, select the latest version of the plug-in and download. The image below show the appearance of the page and downloads locations.
 Now, drag and drop the downloaded file into dropins folder in Eclipse installed folder as shown in the image below.
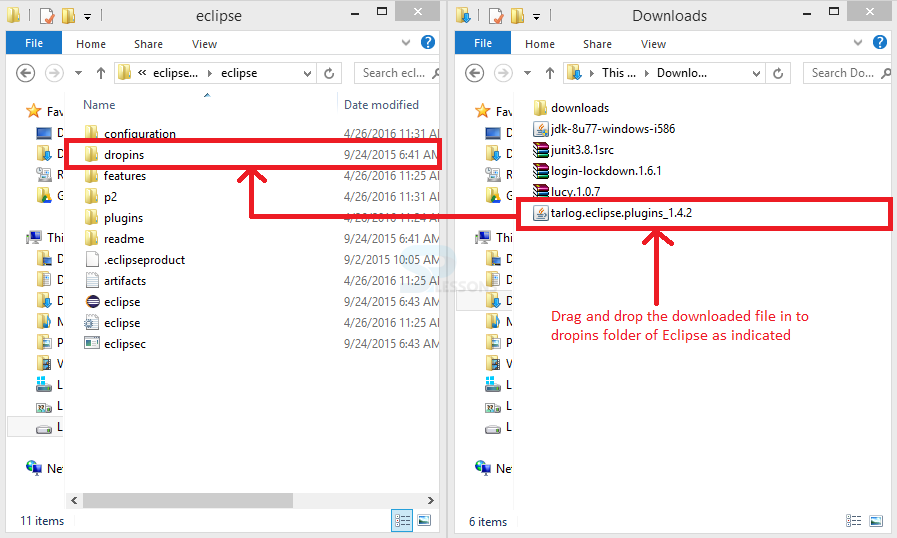 Now, Restart Eclipse in order to make the changes active and this way user can manually install plug-ins in Eclipse.
Description
Eclipse Marketplace is a place where user can find all the latest available plug-ins and can install the required plug-in, in order to deal with the Eclipse Marketplace follow the procedure mentioned.
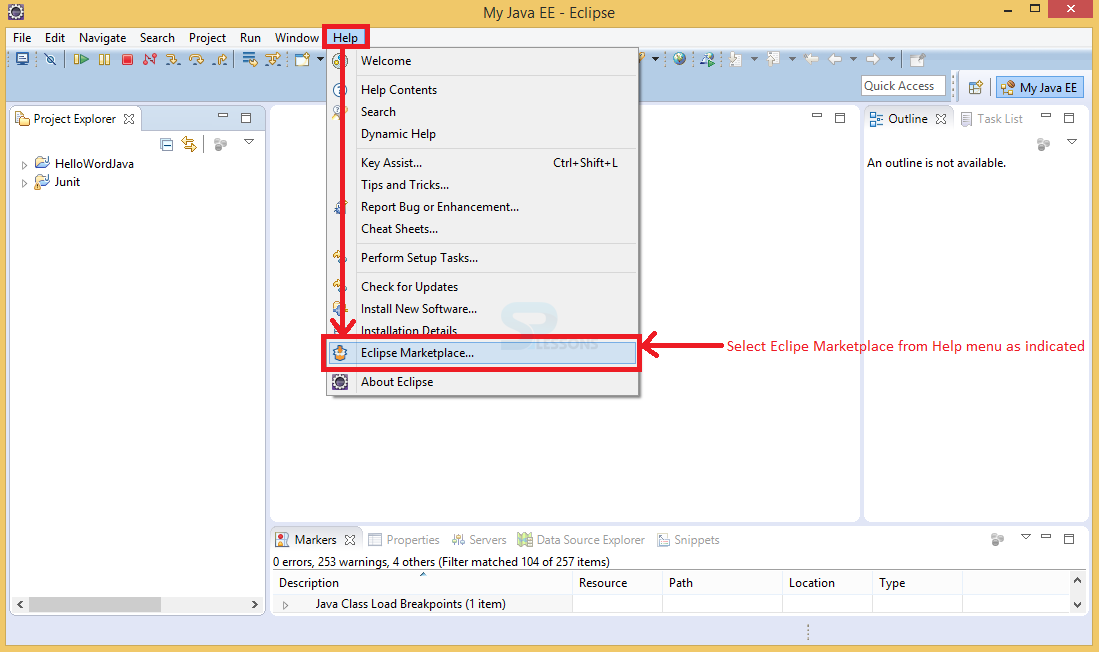
Click on Help menu -> Click Eclipse Marketplace as shown in the image below.
Step 1
Now, a window appears providing some options like Search, Recent, Popular, Installed, April Newsletter as shown in the image below.
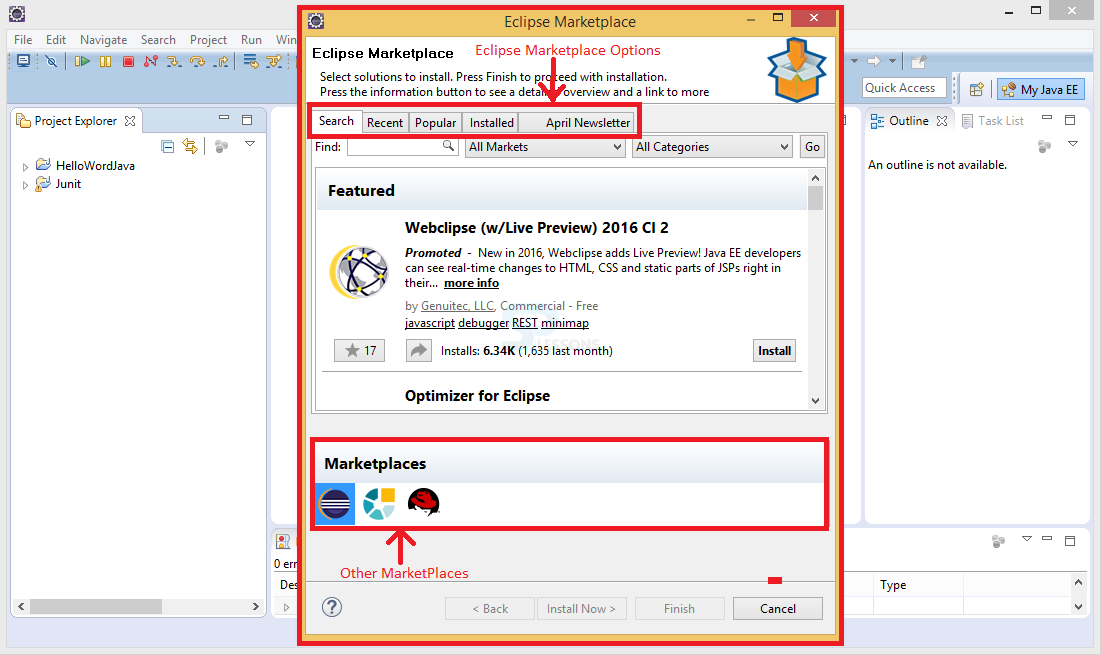 Down below the window there are other market place namely Obeo Marketplace and Red Hat.
Step 2
In order to install a plugin from market place search for the preferred plugin in search option, assume the plugin to be searched as Mercurial as shown in the image below.
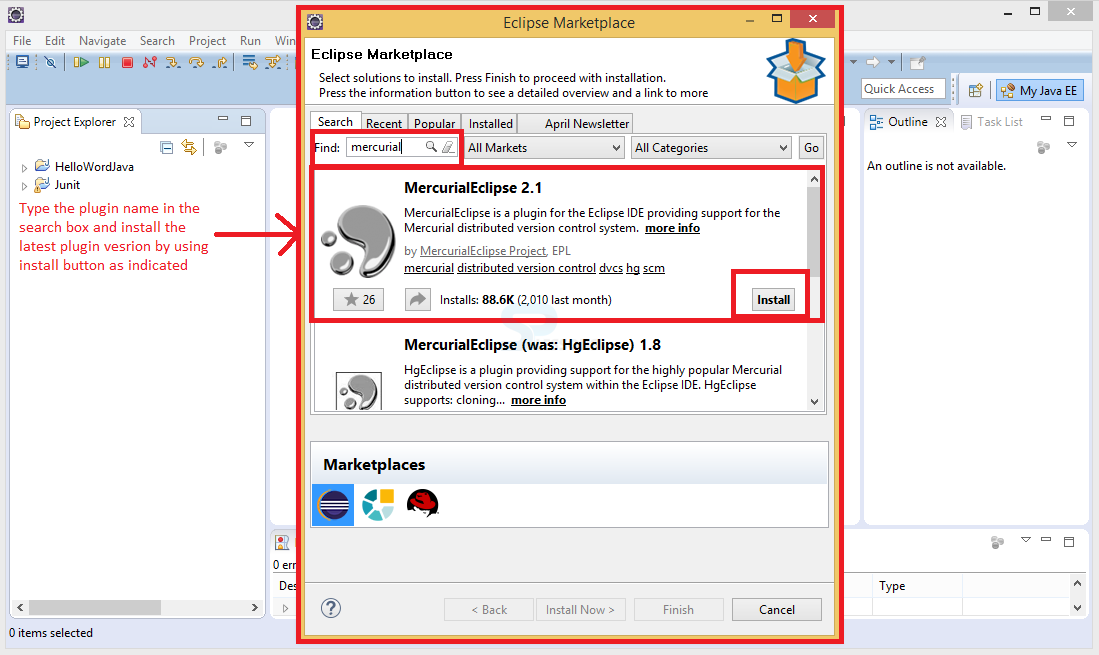 Select the latest version from the obtained list as click Install button as indicated in the image.
Step 3
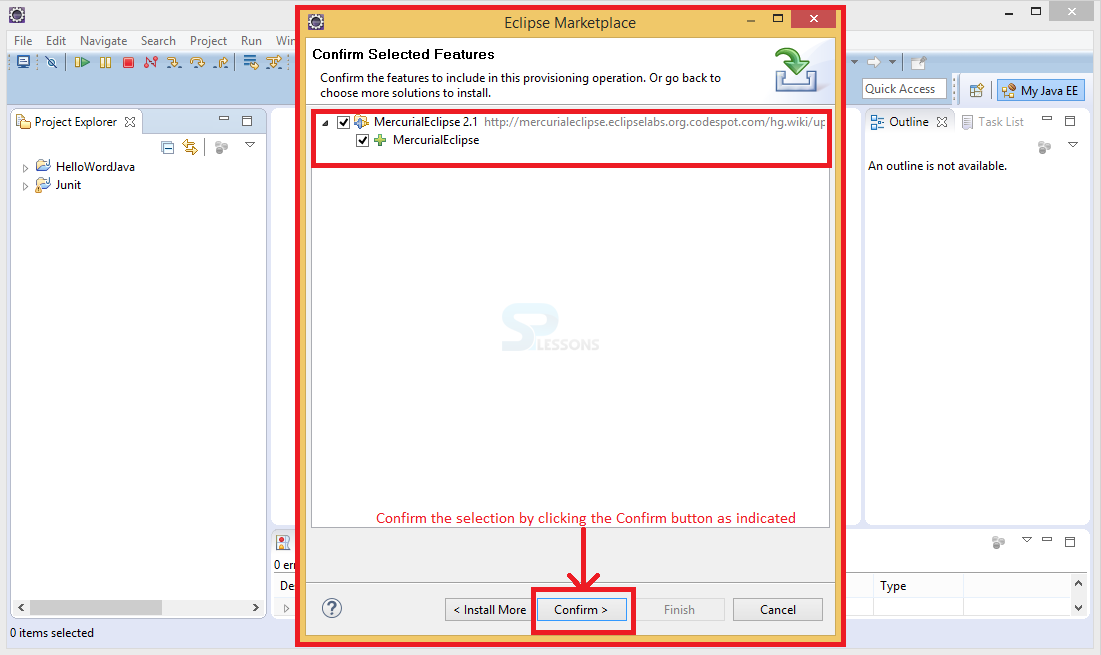
Now, a window appears to confirm the selected features, in order to conform click the Confirm button as shown in the image below.
Step 4
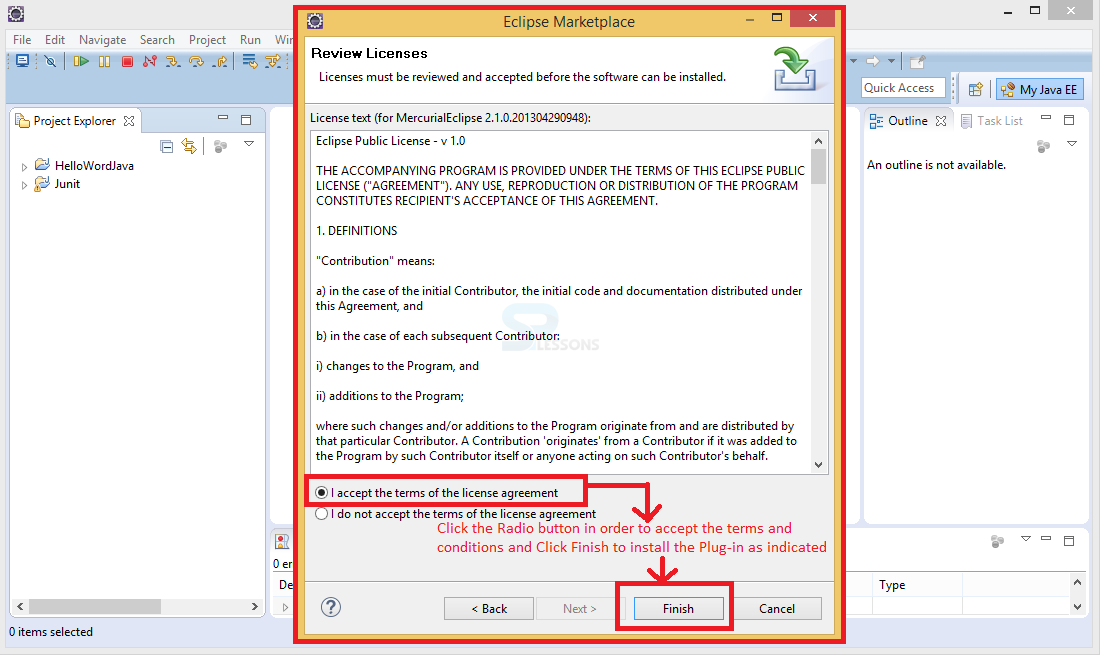
Now, the Licenses information get displayed, click the Radio button for accepting the terms and condition in order to install the software and proceed by clicking Finish button as shown in the image below.
Step 5
Finally after successful installation, a dialogue box appears asking for user permission to restart Eclipse for the changes to take effect, click Yes button for restarting Eclipse as shown in the image below.
 In this way user can install plug-ins from Eclipse Markeplace.
Key Points
- Plug-ins are used to extend the application functionalities.
- User can also manually install the plugins in Eclipse.
- The Obeo and Red Hat Marketplace representation differ from the Eclipse Marketplace.
- All the list of installed plug-ins can be seen through the Install New Software option in Help menu.