


 Introduction
This chapter demonstrates about the CSS Image sprites which is used to put the collection of images into an single image and following are the concepts are covered in this chapter.
- Image Sprites
- Image Sprites Hover Effect
- Creating navigation List
Description
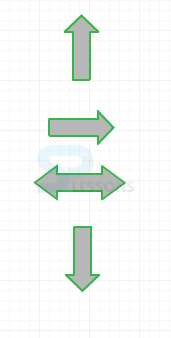
Image Sprites are known as the collection of images put into a single image now a days a web page contain several images which can take long time to load and generate multiple server requests. Image sprites will reduce the server request and bandwidth. The image below demonstrates the image sprites as shown below.
 The code below demonstrates the basic examle of the image sprites as shown below.
[html]
<!DOCTYPE html>
<html>
<head>
<style>
#home {
width: 46px;
height: 44px;
background: url(img_navsprites.gif) 0 0;
}
#next {
width: 43px;
height: 44px;
background: url(img_navsprites.gif) -91px 0;
}
</style>
</head>
<body>
<img id="cursor" src="cursor.png"><br><br>
<img id="book" src="splesson-logo.png">
</body>
</html>
[/html]
Result
By running the above code in a preferred browser user can get the following output as shown in below image.
The code below demonstrates the basic examle of the image sprites as shown below.
[html]
<!DOCTYPE html>
<html>
<head>
<style>
#home {
width: 46px;
height: 44px;
background: url(img_navsprites.gif) 0 0;
}
#next {
width: 43px;
height: 44px;
background: url(img_navsprites.gif) -91px 0;
}
</style>
</head>
<body>
<img id="cursor" src="cursor.png"><br><br>
<img id="book" src="splesson-logo.png">
</body>
</html>
[/html]
Result
By running the above code in a preferred browser user can get the following output as shown in below image.

- <img id="cursor" src="cursor.png"> Which defines the small transparent image cause source attribute need not to be empty an the displayed image should be background image.
- width 46px; height 44px; Which defines the required portion of the image.
- background: url(img_navsprites.gif) 0 0 Which defines the background images and its position.
Description
User can hover effects to the image sprites in which is used on all elements not only on links which gives more effective the code below demonstrates image sprites hover effects as shown.
[html]
<!DOCTYPE html>
<html>
<head>
<style>
#navlist {
position: relative;
}
#navlist li {
margin: 0;
padding: 0;
list-style: none;
position: absolute;
top: 0;
}
#navlist li, #navlist a {
height: 44px;
display: block;
}
#home {
left: 0px;
width: 46px;
background: url('img_navsprites_hover.gif') 0 0;
}
#prev {
left: 63px;
width: 43px;
background: url('img_navsprites_hover.gif') -47px 0;
}
#next {
left: 129px;
width: 43px;
background: url('img_navsprites_hover.gif') -91px 0;
}
#home a:hover {
background: url('img_navsprites_hover.gif') 0 -45px;
}
#prev a:hover {
background: url('img_navsprites_hover.gif') -47px -45px;
}
#next a:hover {
background: url('img_navsprites_hover.gif') -91px -45px;
}
</style>
</head>
<body>
<ul id="navlist">
<li id="cursor"><a href="cursor.png"></a></li>
<li id="home"><a href="splesson-logo.png"></a></li>
<li id="next"><a href="cursor.png"></a></li>
</ul>
</body>
</html>
[/html]
Result
By running the above code in a preferred browser user can get the following output as shown in below image.
Description
By using image sprites user can also create the navigation list in which user using the HTML List because which can link and which supports the background image. The code below demonstrates the creation of navigation list as shown below.
[html]
<!DOCTYPE html>
<html>
<head>
<style>
#navlist {
position: relative;
}
#navlist li {
margin: 0;
padding: 0;
list-style: none;
position: absolute;
top: 0;
}
#navlist li, #navlist a {
height: 44px;
display: block;
}
#cursor {
left: 0px;
width: 46px;
background: url('img_navsprites.gif') 0 0;
}
#book {
left: 63px;
width: 43px;
background: url('img_navsprites.gif') -47px 0;
}
#next {
left: 129px;
width: 43px;
background: url('img_navsprites.gif') -91px 0;
}
</style>
</head>
<body>
<ul id="navlist">
<li id="cursor"><a href="cursor.png"></a></li>
<li id="book"><a href="splesson-logo.png"></a></li>
<li id="next"><a href="right.jpg"></a></li>
</ul>
</body>
</html>
[/html]
Result
By running the above code in a preferred browser user can get the following output as shown in below image.
 The above example is demonstrated below.
- #navlist {position:relative;} Which is used to allow absolute positioning inside.
- #navlist li {margin:0;padding:0;list-style:none;position:absolute;top:0;} Which is margin and padding is set to 0 list style remove.
- #navlist li, #navlist a {height:44px;display:block;} In which the height of the all images 44 px.
Key Points
- Which put all images into single image.
- Which reduce the number of requests.