 Description
Like other framewrks, CodeIgniter also has the functionality and capability of interacting with the databases.
The present chapter "CodeIgniter Database" gives the clear information about CRUD (Create, Read, Update, Delete) functions work with CodeIgniter.
 Description
CodeIgniter Database connection can be done in two ways.
In order to load the database for every page, automatic connection will be used. This can be done by using the file
autoload.php located in application/config folder. Open that file and add the database library as given below:
$autoload['libraries'] = array(‘library’);
In order to connect only few pages to the CodeIgniter Database, then manual connection can be used. This can be done by adding the below code in controller file.
$this->load->database();
No argument is passed in any of the function because everything is set in config file of database (application/config/database.php).  Description
Step-1: Initially, a PHP page
insert_view.php is created in application/views where the form is created.
[php]
<html>
<head>
<title>Insert Data Into Database Using CodeIgniter Form</title>
<link href='http://fonts.googleapis.com/css?family=Marcellus' rel='stylesheet' type='text/css'/>
<link rel="stylesheet" type="text/css" href="<?php echo base_url(); ?>css/style.css" />
</head>
<body>
<div id="container">
<?php echo form_open('insert_ctrl'); ?>
<h1>Insert Data Into Database Using CodeIgniter</h1><hr/>
<?php if (isset($message)) { ?>
<CENTER><h3 style="color:green;">Data inserted successfully</h3></CENTER><br>
<?php } ?>
<?php echo form_label('Student Name :'); ?> <?php echo form_error('dname'); ?><br />
<?php echo form_input(array('id' => 'dname', 'name' => 'dname')); ?><br />
<?php echo form_label('Student Email :'); ?> <?php echo form_error('demail'); ?><br />
<?php echo form_input(array('id' => 'demail', 'name' => 'demail')); ?><br />
<?php echo form_label('Student Mobile No. :'); ?> <?php echo form_error('dmobile'); ?><br />
<?php echo form_input(array('id' => 'dmobile', 'name' => 'dmobile', 'placeholder' => '10 Digit Mobile No.')); ?><br />
<?php echo form_label('Student Address :'); ?> <?php echo form_error('daddress'); ?><br />
<?php echo form_input(array('id' => 'daddress', 'name' => 'daddress')); ?><br />
<?php echo form_submit(array('id' => 'submit', 'value' => 'Submit')); ?>
<?php echo form_close(); ?><br/>
<div id="fugo">
</div>
</div>
</body>
</html>
[/php]
Step-2: Next create class insert_ctrl.php in Controller directory, in which the above created PHP page(view) will be loaded. This file helps to validate the fields given in the form.
[php]
<?php
class insert_ctrl extends CI_Controller
{
function __construct()
{
parent::__construct();
$this->load->model('insert_model');
}
function index()
{
//Including validation library
$this->load->library('form_validation');
$this->form_validation->set_error_delimiters('<div class="error">', '</div>');
//Validating Name Field
$this->form_validation->set_rules('dname', 'Username', 'required|min_length[5]|max_length[15]');
//Validating Email Field
$this->form_validation->set_rules('demail', 'Email', 'required|valid_email');
//Validating Mobile no. Field
$this->form_validation->set_rules('dmobile', 'Mobile No.', 'required|regex_match[/^[0-9]{10}$/]');
//Validating Address Field
$this->form_validation->set_rules('daddress', 'Address', 'required|min_length[10]|max_length[50]');
if ($this->form_validation->run() == FALSE)
{
$this->load->view('insert_view');
}
else
{
//Setting values for tabel columns
$data = array
(
'Student_Name' => $this->input->post('dname'),
'Student_Email' => $this->input->post('demail'),
'Student_Mobile' => $this->input->post('dmobile'),
'Student_Address' => $this->input->post('daddress')
);
//Transfering data to Model
$this->insert_model->form_insert($data);
$data['message'] = 'Data Inserted Successfully';
//Loading View
$this->load->view('insert_view', $data);
}
}
}
?>
[/php]
Step-3: Then connect the database using a class insert_model.php, created in Model directory with database insert function.
[php]
<?php
class insert_model extends CI_Model
{
function __construct()
{
parent::__construct();
}
function form_insert($data)
{
// Inserting in Table(students) of Database(college)
$this->db->insert('students', $data);
}
}
?>
[/php]
Step-4: To create database and table, execute following codes in SQL of phpMyAdmin.
[sql]
CREATE DATABASE college;
CREATE TABLE students
(
Student_id int(10) NOT NULL AUTO_INCREMENT,
Student_Name varchar(255) NOT NULL,
Student_Email varchar(255) NOT NULL,
Student_Mobile varchar(255) NOT NULL,
Student_Address varchar(255) NOT NULL,
PRIMARY KEY (Student_id)
)
[/sql]
The structure of database looks like below.
Step-5 : Then apply effects to the form using CSS.
[html]
#container{
width:960px;
height:610px;
margin: 50px auto;
}
.error{
color: red;
font-size: 13px;
margin-bottom: -15px;
}
form{
width: 345px;
padding: 0px 50px 20px;
background: linear-gradient(#fff,#528881);
border: 1px solid #ccc;
box-shadow: 0 0 5px;
font-family: 'Arial', serif;
float:left;
margin-top: 10px;
}
h1{
text-align: center;
font-size: 28px;
}
hr{
border: 0;
border-bottom: 1.5px solid #ccc;
margin-top: -10px;
margin-bottom: 30px;
}
label{
font-size: 17px;
}
input{
width: 100%;
padding: 10px;
margin: 6px 0 20px;
border: none;
box-shadow: 0 0 5px;
}
input#submit{
margin-top: 20px;
font-size: 18px;
background: linear-gradient(#22abe9 5%, #36caf0 100%);
border: 1px solid #0F799E;
color: #ffffff;
font-weight: bold;
cursor: pointer;
text-shadow: 0px 1px 0px #13506D;
}
input#submit:hover{
background: linear-gradient(#36caf0 5%, #22abe9 100%);
}
[/html]
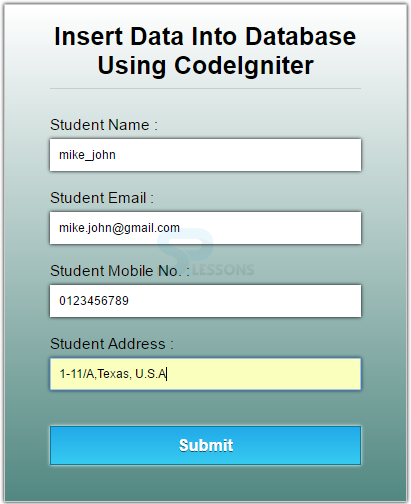
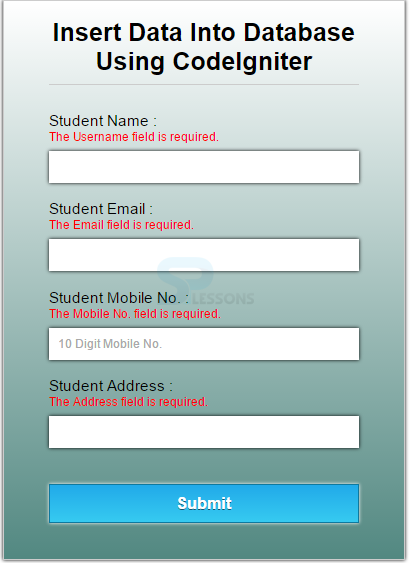
Output: The output of the present application will be as follows.
If any entered field is wrong, the error will be shown like below.
If no error occurs, the data is successfully inserted into the database as shown below.
 Description
Step-1: Create a file
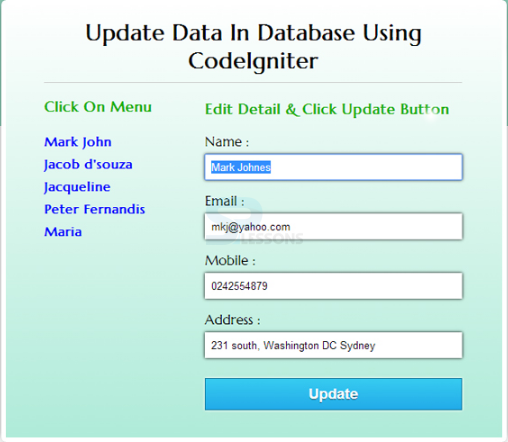
update_view.php in application/views folder where all the names are fetched from the database and are shown in form of links. When a user clicks on any name, all the details about that particular are displayed in the form on right side with update button. If needed, Update button can be clicked to update the record in the table.
[php]
<html>
<head>
<title>Update Data In Database Using CodeIgniter</title>
<link href='http://fonts.googleapis.com/css?family=Marcellus' rel='stylesheet' type='text/css'>
<link rel="stylesheet" type="text/css" href="<?php echo base_url(). "css/update.css" ?>">
</head>
<body>
<div id="container">
<div id="wrapper">
<h1>Update Data In Database Using CodeIgniter </h1><hr/>
<div id="menu">
<p>Click On Menu</p>
<!-- Fetching Names Of All Students From Database -->
<ol>
<?php foreach ($students as $student): ?>
<li><a href="<?php echo base_url() . "index.php/update_ctrl/show_student_id/" . $student->student_id; ?>"><?php echo $student->student_name; ?></a></li>
<?php endforeach; ?>
</ol>
</div>
<div id="detail">
<!-- Fetching All Details of Selected Student From Database And Showing In a Form -->
<?php foreach ($single_student as $student): ?>
<p>Edit Detail & Click Update Button</p>
<form method="post" action="<?php echo base_url() . "index.php/update_ctrl/update_student_id1"?>">
<label id="hide">Id :</label>
<input type="text" id="hide" name="did" value="<?php echo $student->student_id; ?>">
<label>Name :</label>
<input type="text" name="dname" value="<?php echo $student->student_name; ?>">
<label>Email :</label>
<input type="text" name="demail" value="<?php echo $student->student_email; ?>">
<label>Mobile :</label>
<input type="text" name="dmobile" value="<?php echo $student->student_mobile; ?>">
<label>Address :</label>
<input type="text" name="daddress" value="<?php echo $student->student_address; ?>">
<input type="submit" id="submit" name="dsubmit" value="Update">
</form>
<?php endforeach; ?>
</div>
</div>
</div>
</body>
</html>
[/php]
Step-2 : Create a file update_ctrl and write the following code.
[php]
<?php
class update_ctrl extends CI_Controller{
function __construct(){
parent::__construct();
$this->load->model('update_model');
}
function show_student_id() {
$id = $this->uri->segment(3);
$data['students'] = $this->update_model->show_students();
$data['single_student'] = $this->update_model->show_student_id($id);
$this->load->view('update_view', $data);
}
function update_student_id1() {
$id= $this->input->post('did');
$data = array(
'Student_Name' => $this->input->post('dname'),
'Student_Email' => $this->input->post('demail'),
'Student_Mobile' => $this->input->post('dmobile'),
'Student_Address' => $this->input->post('daddress')
);
$this->update_model->update_student_id1($id,$data);
$this->show_student_id();
}
}
?>
[/php]
Step-3 : Create a file update_model and write the following code.
[php]
<?php
class update_model extends CI_Model{
// Function To Fetch All Students Record
function show_students(){
$query = $this->db->get('students');
$query_result = $query->result();
return $query_result;
}
// Function To Fetch Selected Student Record
function show_student_id($data){
$this->db->select('*');
$this->db->from('students');
$this->db->where('student_id', $data);
$query = $this->db->get();
$result = $query->result();
return $result;
}
// Update Query For Selected Student
function update_student_id1($id,$data){
$this->db->where('student_id', $id);
$this->db->update('students', $data);
}
}
?>
[/php]
Output : The output with update option will be as follows.
 Description
Step-1: Create the file
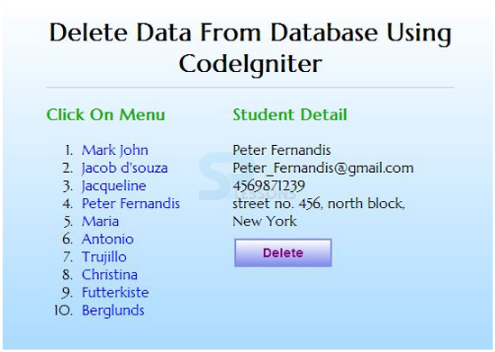
delete_view.php in application/views folder. The data is fetched from the database and are shown in the form of links. When clicked on any name, the details related to that particular name on right side with a delete button. When clicked on Delete, record will be deleted from table.
[php]
<!DOCTYPE html>
<html>
<head>
<title>Delete Data From Database Using CodeIgniter</title>
<!--=========== Importing Google fonts ===========-->
<link href='http://fonts.googleapis.com/css?family=Marcellus' rel='stylesheet' type='text/css'>
<link href="<?php echo base_url()?>./css/delete.css" rel="stylesheet" type="text/css">
</head>
<body>
<div id="container">
<div id="wrapper">
<h1>Delete Data From Database Using CodeIgniter</h1>
<div id="menu">
<p>Click On Menu</p>
<!--====== Displaying Fetched Names from Database in Links ========-->
<ol>
<?php foreach ($students as $student): ?>
<li><a href="<?php echo base_url() . "index.php/delete_ctrl/show_student_id/" . $student->student_id; ?>"><?php echo $student->student_name; ?></a></li>
<?php endforeach; ?>
</ol>
</div>
<div id="detail">
<!--====== Displaying Fetched Details from Database ========-->
<?php foreach ($single_student as $student): ?>
<p>Student Detail</p>
<?php echo $student->student_name; ?>
<?php echo $student->student_email; ?>
<?php echo $student->student_mobile; ?>
<?php echo $student->student_address; ?>
<!--====== Delete Button ========-->
<a href="<?php echo base_url() . "index.php/delete_ctrl/delete_student_id/" . $student->student_id; ?>">
<button>Delete</button></a>
<?php endforeach; ?>
</div>
</div>
</div>
</body>
</html>
[/php]
Step-2: Create a file delete_ctrl and write the following code.
[php]
<?php
class delete_ctrl extends CI_Controller
{
function __construct()
{
parent::__construct();
$this->load->model('delete_model');
}
// Function to Fetch selected record from CodeIgniter Database.
function show_student_id()
{
$id = $this->uri->segment(3);
$data['students'] = $this->delete_model->show_students();
$data['single_student'] = $this->delete_model->show_student_id($id);
$this->load->view('delete_view', $data);
}
// Function to Delete selected record from database.
function delete_student_id()
{
$id = $this->uri->segment(3);
$this->delete_model->delete_student_id($id);
$this->show_student_id();
}
}
?>
[/php]
Step-3: Create a file delete_model.php and write the following code.
[php]
<?php
class delete_model extends CI_Model
{
// Function to select all from table name students.
function show_students()
{
$query = $this->db->get('students');
$query_result = $query->result();
return $query_result;
}
// Function to select particular record from table name students.
function show_student_id($data)
{
$this->db->select('*');
$this->db->from('students');
$this->db->where('student_id', $data);
$query = $this->db->get();
$result = $query->result();
return $result;
}
// Function to Delete selected record from table name students.
function delete_student_id($id)
{
$this->db->where('student_id', $id);
$this->db->delete('students');
}
}
?>
[/php]
Step-4: Create the database company and create the table employee with the following values.
[sql]
CREATE DATABASE company;
CREATE TABLE employee
(
employee_id int(10) NOT NULL AUTO_INCREMENT,
employee_name varchar(255) NOT NULL,
employee_email varchar(255) NOT NULL,
employee_contact varchar(255) NOT NULL,
employee_address varchar(255) NOT NULL,
PRIMARY KEY (employee_id)
)
[/sql]
Output : The output with the option delete will be as follows.
 Description
CodeIgniter Database connection can be closed with the below code written in controller.
$this->db->close();
 Key Points
"CodeIgniter Database" chapter draws out following main points.
- Create, Read, Update and Delete Operations in Database can be done using CodeIgniter.
- Autoload.php should be updated with library array, Config.php must be updated with base_url and index_page and database.php should be updated with the database name before performing CRUD operations using CodeIgniter.


