 Introduction
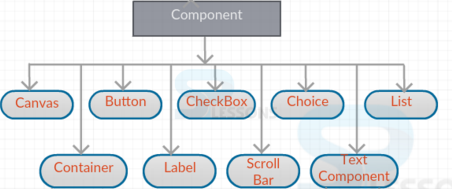
The present chapter explains about AWT Components. The following concepts are covered in AWT Components chapter:
- Label
- Button
- Choice
- Checkbox
- List
- Canvas
- ScrollBar
 Description
A Graphical User Interface Application consists a set of elements called as Components. A Component is an abstract class, which produces an object of some features like size, position and projects them to the screen by taking the events.
AWT Components are placed in containers and are controlled by it.
 Description
Label is the user-defined text, which cannot be modified by the end-user. To modify a label, one can use text field, and text areas.
 Declaration
java.awt.Label can be declared as follows:
public class Label extends Component implements Accessible  Examples
[java]
import java.awt.*;
public class SPlesson extends Frame
{
Label lab1, lab2, lab3;
public SPlesson()
{
setLayout(new GridLayout(3,1));
lab1 = new Label("Center aligned text", Label.CENTER);
lab2 = new Label("Left aligned text", Label.LEFT);
lab3 = new Label();
lab3.setText("Right aligned text");
lab3.setAlignment(Label.RIGHT);
add(lab1);
add(lab2);
add(lab3);
lab1.setBackground(Color.yellow);
lab1.setForeground(Color.blue);
lab1.setFont(new Font("SansSerif", Font.BOLD+Font.ITALIC, 18));
System.out.println("lab1 text: " + lab1.getText());
System.out.println("lab1 alignment: " + lab1.getAlignment());
setTitle("Labels Do not Have Any Action");
setSize(450, 200);
setVisible(true);
}
public static void main(String args[ ])
{
new SPlesson();
}
}[/java]
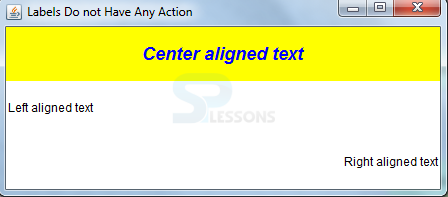
Output
 Description
Button contains a Label and creates an event when clicked on it. Whenever a button is clicked, ActionListener gets implemented thereby creating a new listener to note the actions that are to be performed by this button using addActionListener().
 Declaration
java.awt.Button class can be declared as follows:
public class Button extends Component implements Accessible  Examples
[java]import java.awt.*;
import java.awt.event.*;
public class Splesson {
private Frame mainFrame;
private Label headerLabel;
private Label statusLabel;
private Panel controlPanel;
public Splesson(){
prepareGUI();
}
public static void main(String[] args){
Splesson Splesson = new Splesson();
Splesson.showButtonDemo();
}
private void prepareGUI(){
mainFrame = new Frame("Java AWT Examples");
mainFrame.setSize(400,400);
mainFrame.setLayout(new GridLayout(3, 1));
mainFrame.addWindowListener(new WindowAdapter() {
public void windowClosing(WindowEvent windowEvent){
System.exit(0);
}
});
headerLabel = new Label();
headerLabel.setAlignment(Label.CENTER);
statusLabel = new Label();
statusLabel.setAlignment(Label.CENTER);
statusLabel.setSize(350,100);
controlPanel = new Panel();
controlPanel.setLayout(new FlowLayout());
mainFrame.add(headerLabel);
mainFrame.add(controlPanel);
mainFrame.add(statusLabel);
mainFrame.setVisible(true);
}
private void showButtonDemo(){
headerLabel.setText("Component : Button");
Button okButton = new Button("OK");
Button submitButton = new Button("Submit");
Button cancelButton = new Button("Cancel");
okButton.addActionListener(new ActionListener() {
public void actionPerformed(ActionEvent e) {
statusLabel.setText("OK Button clicked.");
}
});
submitButton.addActionListener(new ActionListener() {
public void actionPerformed(ActionEvent e) {
statusLabel.setText("Submit Button clicked.");
}
});
cancelButton.addActionListener(new ActionListener() {
public void actionPerformed(ActionEvent e) {
statusLabel.setText("Cancel Button clicked.");
}
});
controlPanel.add(okButton);
controlPanel.add(submitButton);
controlPanel.add(cancelButton);
mainFrame.setVisible(true);
}
}[/java]
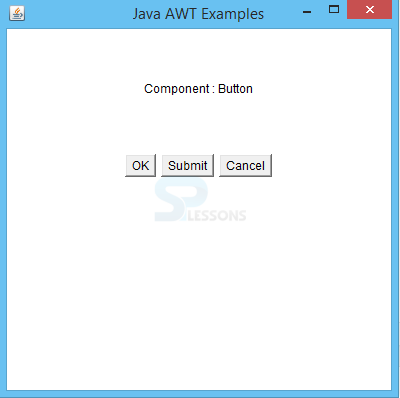
Output
 Description
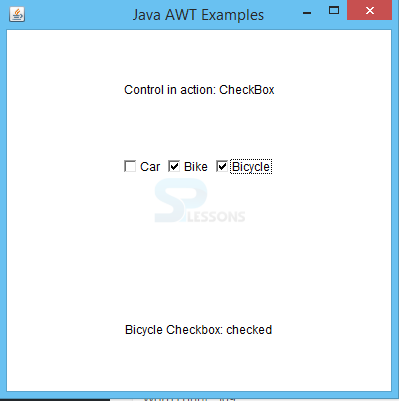
CheckBox acts as a boolean function by changing the state from true to false and false to true. This is used for multiple selections.
 Declaration
java.awt.Checkbox class can be declared as follows:
public class Checkbox extends Component implements ItemSelectable,Accessible  Example
[java]import java.awt.*;
import java.awt.event.*;
public class Splesson {
private Frame mainFrame;
private Label headerLabel;
private Label statusLabel;
private Panel controlPanel;
public Splesson(){
prepareGUI();
}
public static void main(String[] args){
Splesson Splesson = new Splesson();
Splesson.showCheckBoxDemo();
}
private void prepareGUI(){
mainFrame = new Frame("Java AWT Examples");
mainFrame.setSize(400,400);
mainFrame.setLayout(new GridLayout(3, 1));
mainFrame.addWindowListener(new WindowAdapter() {
public void windowClosing(WindowEvent windowEvent){
System.exit(0);
}
});
headerLabel = new Label();
headerLabel.setAlignment(Label.CENTER);
statusLabel = new Label();
statusLabel.setAlignment(Label.CENTER);
statusLabel.setSize(350,100);
controlPanel = new Panel();
controlPanel.setLayout(new FlowLayout());
mainFrame.add(headerLabel);
mainFrame.add(controlPanel);
mainFrame.add(statusLabel);
mainFrame.setVisible(true);
}
private void showCheckBoxDemo(){
headerLabel.setText("Control in action: CheckBox");
Checkbox chkCar = new Checkbox("Car");
Checkbox chkBike = new Checkbox("Bike");
Checkbox chkBicycle = new Checkbox("Bicycle");
chkCar.addItemListener(new ItemListener() {
public void itemStateChanged(ItemEvent e) {
statusLabel.setText("Car Checkbox: "
+ (e.getStateChange()==1?"checked":"unchecked"));
}
});
chkBike.addItemListener(new ItemListener() {
public void itemStateChanged(ItemEvent e) {
statusLabel.setText("Bike Checkbox: "
+ (e.getStateChange()==1?"checked":"unchecked"));
}
});
chkBicycle.addItemListener(new ItemListener() {
public void itemStateChanged(ItemEvent e) {
statusLabel.setText("Bicycle Checkbox: "
+ (e.getStateChange()==1?"checked":"unchecked"));
}
});
controlPanel.add(chkCar);
controlPanel.add(chkBike);
controlPanel.add(chkBicycle);
mainFrame.setVisible(true);
}
}[/java]
Output
 Description
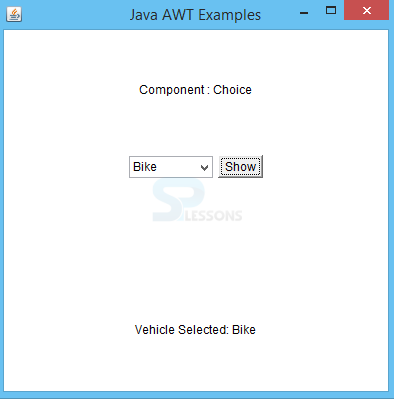
Choice component gives the list of choices from which one can be selected to be appeared in the box.
 Declaration
java.awt.Choice class can be declared as follows:
public class Choice extends Component implements ItemSelectable, Accessible
 Examples
[java]
import java.awt.*;
import java.awt.event.*;
public class Splesson {
private Frame mainFrame;
private Label headerLabel;
private Label statusLabel;
private Panel controlPanel;
public Splesson(){
prepareGUI();
}
public static void main(String[] args){
Splesson Splesson = new Splesson();
Splesson.showChoiceDemo();
}
private void prepareGUI(){
mainFrame = new Frame("Java AWT Examples");
mainFrame.setSize(400,400);
mainFrame.setLayout(new GridLayout(3, 1));
mainFrame.addWindowListener(new WindowAdapter() {
public void windowClosing(WindowEvent windowEvent){
System.exit(0);
}
});
headerLabel = new Label();
headerLabel.setAlignment(Label.CENTER);
statusLabel = new Label();
statusLabel.setAlignment(Label.CENTER);
statusLabel.setSize(350,100);
controlPanel = new Panel();
controlPanel.setLayout(new FlowLayout());
mainFrame.add(headerLabel);
mainFrame.add(controlPanel);
mainFrame.add(statusLabel);
mainFrame.setVisible(true);
}
private void showChoiceDemo(){
headerLabel.setText("Component : Choice");
final Choice vehicleChoice = new Choice();
vehicleChoice.add("Car");
vehicleChoice.add("Bike");
vehicleChoice.add("Bicycle");
vehicleChoice.add("Aeroplane");
Button showButton = new Button("Show");
showButton.addActionListener(new ActionListener() {
public void actionPerformed(ActionEvent e) {
String data = "Vehicle Selected: "
+ vehicleChoice.getItem(vehicleChoice.getSelectedIndex());
statusLabel.setText(data);
}
});
controlPanel.add(vehicleChoice);
controlPanel.add(showButton);
mainFrame.setVisible(true);
}
}[/java]
Output
 Description
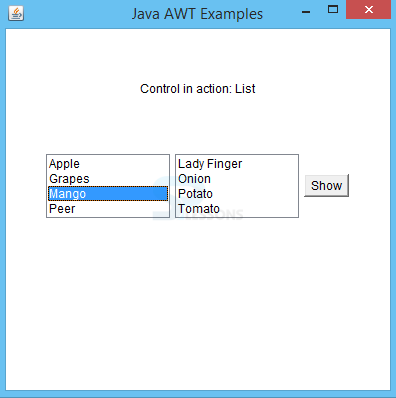
Advanced to AWT Components Choice control, List helps in selecting multiple options. It takes more space.
 Declaration
java.awt.List class can be declared as follows:
public class List extends Component implements ItemSelectable, Accessible  Example
[java]
import java.awt.*;
import java.awt.event.*;
public class Splesson {
private Frame mainFrame;
private Label headerLabel;
private Label statusLabel;
private Panel controlPanel;
public Splesson(){
prepareGUI();
}
public static void main(String[] args){
Splesson Splesson = new Splesson();
Splesson.showListDemo();
}
private void prepareGUI(){
mainFrame = new Frame("Java AWT Examples");
mainFrame.setSize(400,400);
mainFrame.setLayout(new GridLayout(3, 1));
mainFrame.addWindowListener(new WindowAdapter() {
public void windowClosing(WindowEvent windowEvent){
System.exit(0);
}
});
headerLabel = new Label();
headerLabel.setAlignment(Label.CENTER);
statusLabel = new Label();
statusLabel.setAlignment(Label.CENTER);
statusLabel.setSize(350,100);
controlPanel = new Panel();
controlPanel.setLayout(new FlowLayout());
mainFrame.add(headerLabel);
mainFrame.add(controlPanel);
mainFrame.add(statusLabel);
mainFrame.setVisible(true);
}
private void showListDemo(){
headerLabel.setText("Control in action: List");
final List fruitList = new List(4,false);
fruitList.add("Apple");
fruitList.add("Grapes");
fruitList.add("Mango");
fruitList.add("Peer");
final List vegetableList = new List(4,true);
vegetableList.add("Lady Finger");
vegetableList.add("Onion");
vegetableList.add("Potato");
vegetableList.add("Tomato");
Button showButton = new Button("Show");
showButton.addActionListener(new ActionListener() {
public void actionPerformed(ActionEvent e) {
String data = "Fruits Selected: "
+ fruitList.getItem(fruitList.getSelectedIndex());
data += ", Vegetables selected: ";
for(String vegetable:vegetableList.getSelectedItems()){
data += vegetable + " ";
}
statusLabel.setText(data);
}
});
controlPanel.add(fruitList);
controlPanel.add(vegetableList);
controlPanel.add(showButton);
mainFrame.setVisible(true);
}
}[/java]
Output
 Description
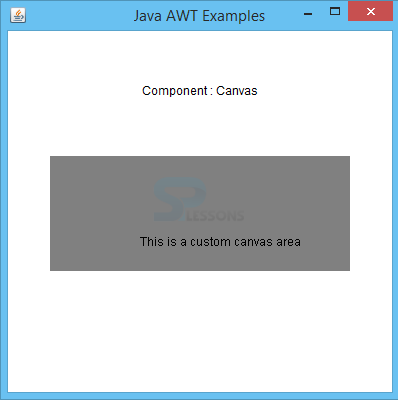
Canvas, one of the AWT Components, is a rectangular area used to take inputs given by the user.
 Declaration
java.awt.Canvas class can be declared as follows:
public class Canvas extends Component implements Accessible  Examples
[java]import java.awt.*;
import java.awt.event.*;
public class Splesson {
private Frame mainFrame;
private Label headerLabel;
private Label statusLabel;
private Panel controlPanel;
public Splesson(){
prepareGUI();
}
public static void main(String[] args){
Splesson Splesson = new Splesson();
Splesson.showCanvasDemo();
}
private void prepareGUI(){
mainFrame = new Frame("Java AWT Examples");
mainFrame.setSize(400,400);
mainFrame.setLayout(new GridLayout(3, 1));
mainFrame.addWindowListener(new WindowAdapter() {
public void windowClosing(WindowEvent windowEvent){
System.exit(0);
}
});
headerLabel = new Label();
headerLabel.setAlignment(Label.CENTER);
statusLabel = new Label();
statusLabel.setAlignment(Label.CENTER);
statusLabel.setSize(350,100);
controlPanel = new Panel();
controlPanel.setLayout(new FlowLayout());
mainFrame.add(headerLabel);
mainFrame.add(controlPanel);
mainFrame.add(statusLabel);
mainFrame.setVisible(true);
}
private void showCanvasDemo(){
headerLabel.setText("Component : Canvas");
controlPanel.add(new MyCanvas());
mainFrame.setVisible(true);
}
class MyCanvas extends Canvas {
public MyCanvas () {
setBackground (Color.GRAY);
setSize(300, 300);
}
public void paint (Graphics g) {
Graphics2D g2;
g2 = (Graphics2D) g;
g2.drawString ("This is a custom canvas area", 90, 90);
}
}
}[/java]
Output
 Description
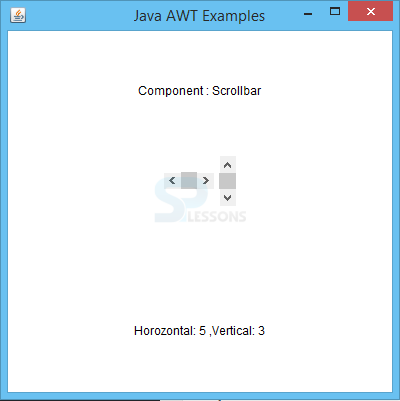
AWT Components, ScrollBar allows the end-user to navigate up and down when there are multiple options in a field.
 Declaration
java.awt.Scrollbar class is declared as follows:
public class Scrollbar extends Component implements Adjustable, Accessible  Examples
[java]
import java.awt.*;
import java.awt.event.*;
public class Splesson {
private Frame mainFrame;
private Label headerLabel;
private Label statusLabel;
private Panel controlPanel;
public Splesson(){
prepareGUI();
}
public static void main(String[] args){
Splesson Splesson = new Splesson();
Splesson.showScrollbarDemo();
}
private void prepareGUI(){
mainFrame = new Frame("Java AWT Examples");
mainFrame.setSize(400,400);
mainFrame.setLayout(new GridLayout(3, 1));
mainFrame.addWindowListener(new WindowAdapter() {
public void windowClosing(WindowEvent windowEvent){
System.exit(0);
}
});
headerLabel = new Label();
headerLabel.setAlignment(Label.CENTER);
statusLabel = new Label();
statusLabel.setAlignment(Label.CENTER);
statusLabel.setSize(350,100);
controlPanel = new Panel();
controlPanel.setLayout(new FlowLayout());
mainFrame.add(headerLabel);
mainFrame.add(controlPanel);
mainFrame.add(statusLabel);
mainFrame.setVisible(true);
}
private void showScrollbarDemo(){
headerLabel.setText("Component : Scrollbar");
final Scrollbar horizontalScroller = new Scrollbar(Scrollbar.HORIZONTAL);
final Scrollbar verticalScroller = new Scrollbar();
verticalScroller.setOrientation(Scrollbar.VERTICAL);
horizontalScroller.setMaximum (100);
horizontalScroller.setMinimum (1);
verticalScroller.setMaximum (100);
verticalScroller.setMinimum (1);
horizontalScroller.addAdjustmentListener(new AdjustmentListener() {
@Override
public void adjustmentValueChanged(AdjustmentEvent e) {
statusLabel.setText("Horozontal: "
+horizontalScroller.getValue()
+" ,Vertical: "
+ verticalScroller.getValue());
}
});
verticalScroller.addAdjustmentListener(new AdjustmentListener() {
@Override
public void adjustmentValueChanged(AdjustmentEvent e) {
statusLabel.setText("Horozontal: "
+horizontalScroller.getValue()
+" ,Vertical: "+ verticalScroller.getValue());
}
});
controlPanel.add(horizontalScroller);
controlPanel.add(verticalScroller);
mainFrame.setVisible(true);
}
}[/java]
Output
 Key Points
- Label is the user defined text.
- When clicked on a button, an event will be generated.
- Checkbox decides the state of an event by true/false.
- Choice allows a single selection and List allows multiple selection of choices.
- ScrollBar is used to navigate in the given space.
