This chapter gives you an overview on how to set up the initial development environment for developing Android applications. The guide will explain you the installation procedures of JDK and ADT Bundle. Java is an officially supported language for Android. Google has announced Android Studio as an official IDE, but now it is not as stable as Eclipse IDE. All the Android examples are developed in Java language and Eclipse IDE.
Hope, we have given detailed information about Android Development Environment and provided step-by-step guide about the installation procedure of JDK and ADK Bundle.
- Microsoft Windows XP or later version
- Mac OS X 10.5.8 or later version with Intel chip
- Linux including GNU C Library 2.7 or later.
Required Tools for Android development
- JDK(Java Development Kit)
- JRE(Java Runtime Environment)
- Android SDK(Software Development Kit)
- Eclipse IDE(Integrated Development Environment)
- ADT(Android Developer Tool) Plugin for Eclipse
Installation Guide for Android
- Install JDK5 or later version: Download the latest version of Java JDK from Oracle’s Java website and install it
- After Installation:
- Go to the installed path, open JDK->open bin and copy the path shown in the address bar (C:\programfiles\java\jdk\bin)
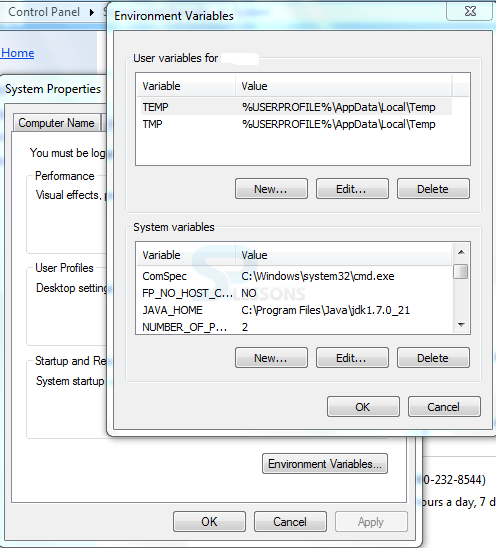
- Open system properties->advanced system properties-advanced tab
- Click on Environmental variables->search PATH->edit->paste the copied path and put “;” at the end
- Search for JAVA_HOME->edit->type JDK path (C:\ programfiles\java\jdk)
Installing ADT Bundle:
- Download the ADT Bundle from the Android website. Eclipse IDE, Android SDK and ADT Plug-in are not required because they are already included in the ADT Bundle.
- After downloading the ADT Bundle:
- Extract the file


