


 Description
Spring Environment Setup, Splessons will teach developers about setting environment to start with Spring framework and provide awareness to developers about to set up Eclipse,Tomcat server, MySQL and JDK on users system. The required tools For Spring Environment Setup as shown follows.
Introduction
JAVA which is a combination of JDK and JRE.
Step-1
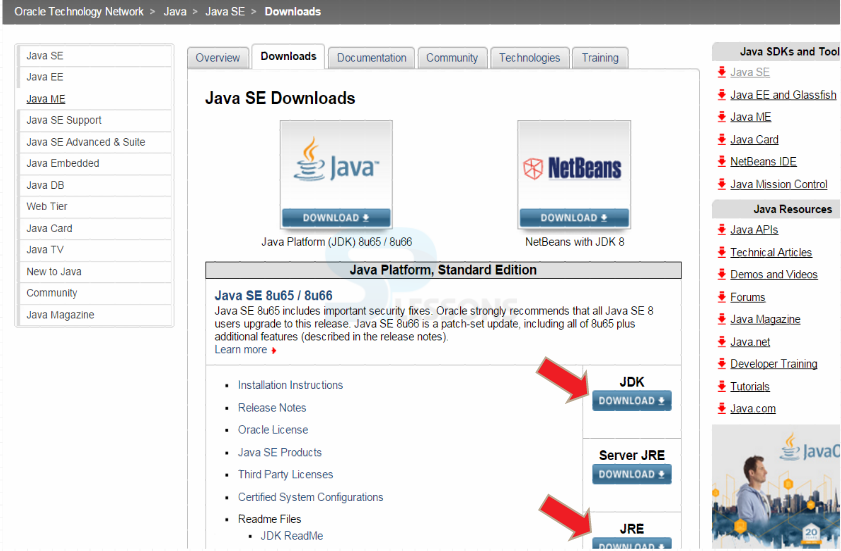
Initially, download JAVA by clicking the url -> JAVA URL
Step-2
Click on "JDK and JRE Download buttons" as shown in the figure.
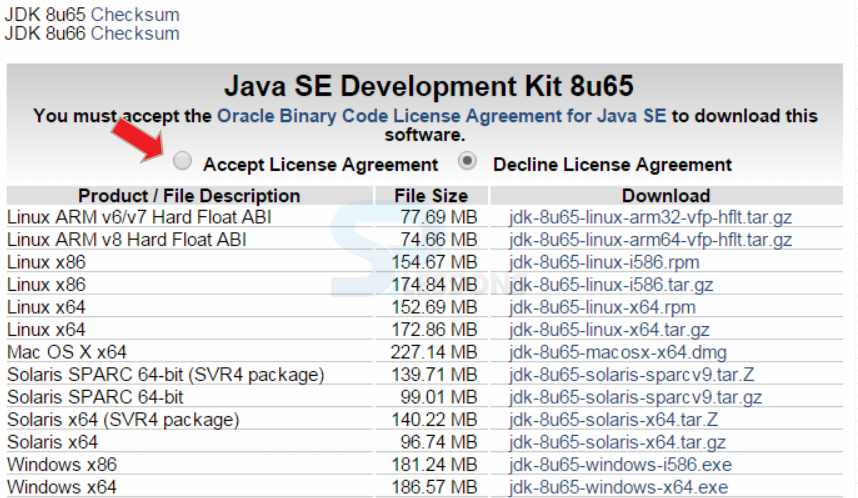
Step-3
Now click on the checkbox "Accept the licence agreement" as shown below.
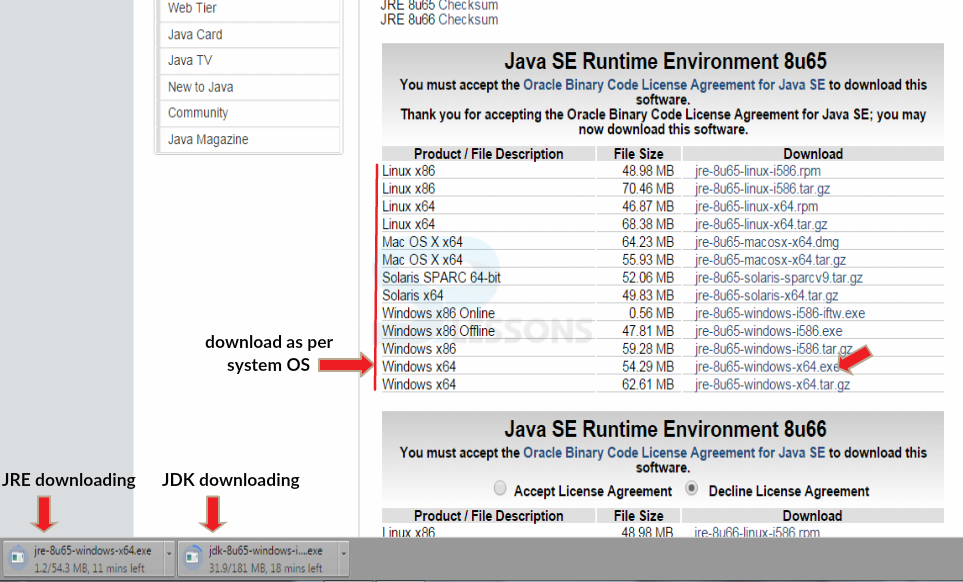
Step-4
Download the links as per the operating system in the computer.The process of downloading for Windows OS is shown below.
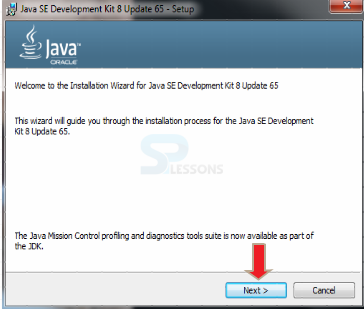
Step-5
Now open the downloaded link and click on Next as shown below.
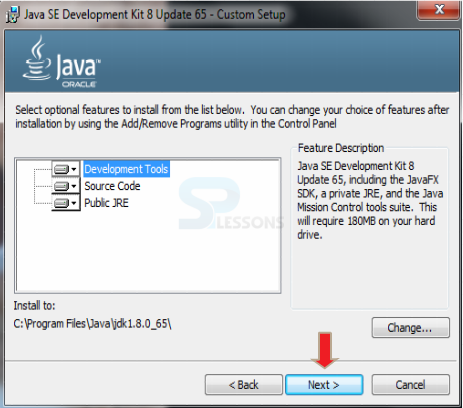 If needed one can change the destination folder and click on Next.
Step-6
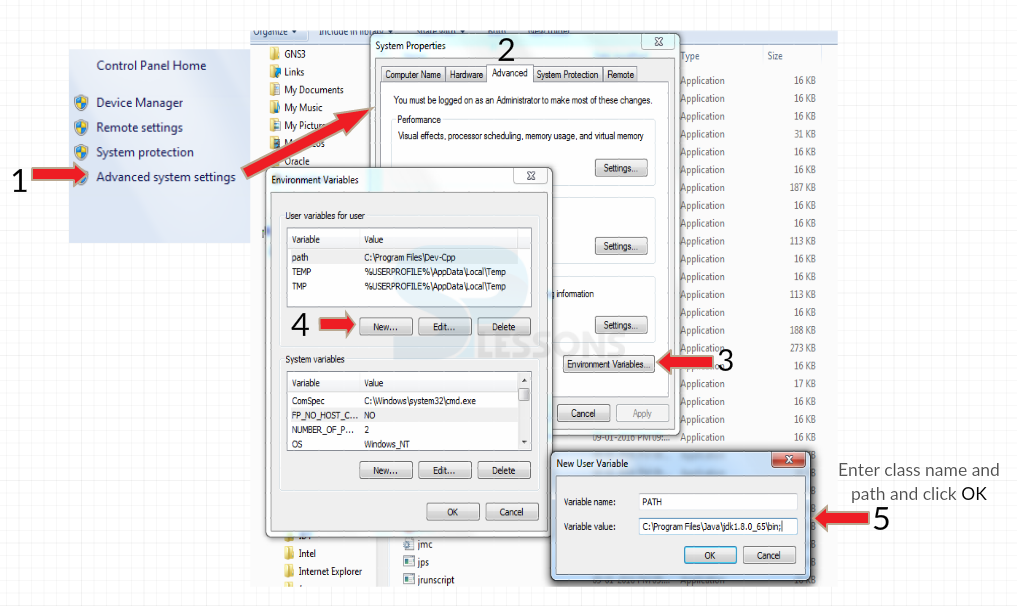
Java is now installed and one need to set the classpath.To set the path,go to
My Computer->Advanced system settings->Environment Variables->New
Follow the below figure which shows step-by-step procedure.
Name the variable as "PATH"
Variable value as "C:\Program Files\Java\jdk1.8.0_65\bin" (destination folder of java)
Step-7
To develop any Java program, any of the text editor is needed.Any text editor like Notepad,Eclipse,NetBeans etc can be used.Eclipse IDE can be downloaded from Eclipse Link
Introduction
This chapter Eclipse Installation for Java Development demonstrates in detail about downloading and installing Eclipse for Java. There are many ways and steps to get Eclipse up and running and would be better if there was a single comprehensive installer. Following are the concepts covered.
- Downloading Eclipse
- Installing Eclipse
- Workspace - Launching Eclipse
Description
Before downloading the Eclipse, pick up the target platform Linux/Mac/ Windows and make sure that the machine has a Java run time environment already installed, use either a 32-bit or a 64-bit versions of Eclipse and must have a JRE/JDK source that matches i.e.
Select the Preferred Eclipse version.
- 32 bit JRE needs the 32 bit version of Eclipse
- 64 bit JRE needs the 64 bit version of Eclipse
- Java
- C++
- Others
- Make your own
- For Java, Download JDK for the selected platform
Description
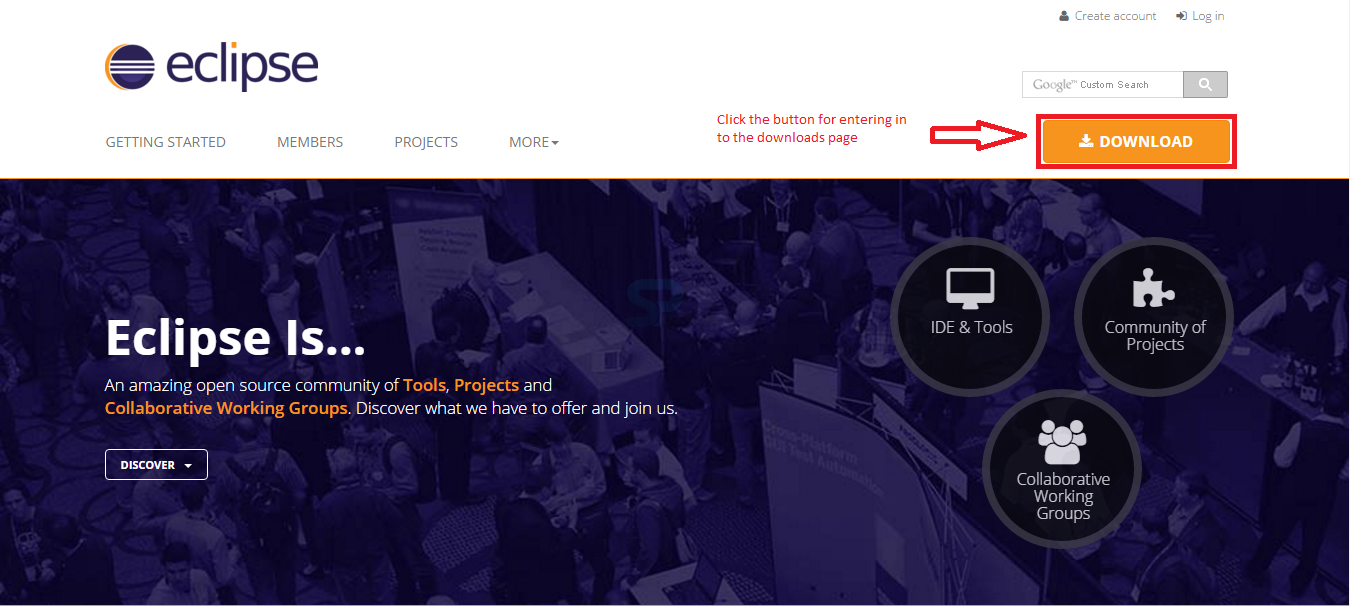
In order to use the Eclipse for Java Development download the Eclipse from the official website link given below.
http://www.eclipse.org/
By clicking the link, a page appears with a download link for Eclipse as below, now click the Download button on the page in order to download the Eclipse for Java development.
 A page appears providing a list of Eclipse versions by clicking the download link button, select the preferred version and download the Eclipse by clicking on it as shown in the image below.
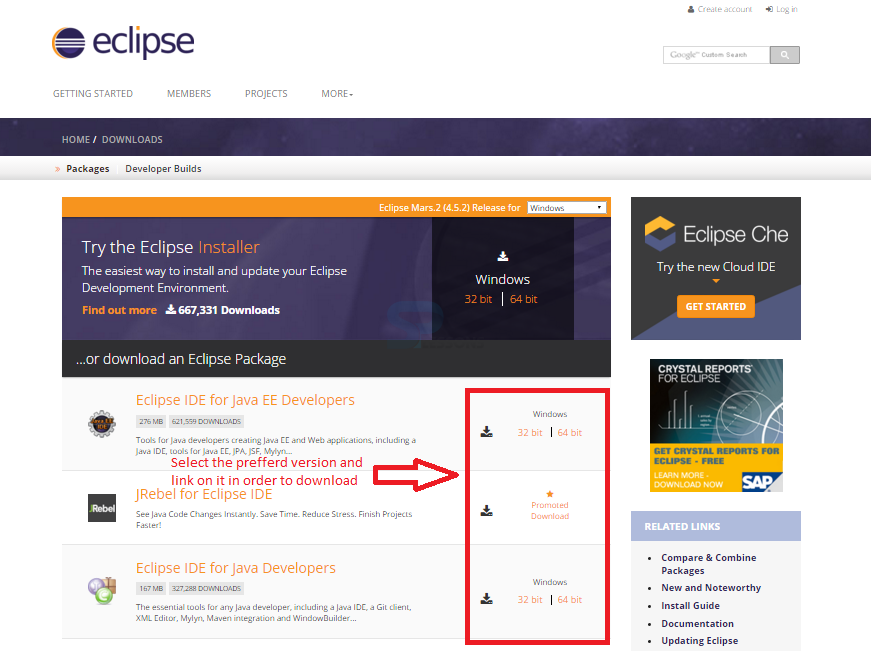 It shows drop down box in the right corner of the download page to set the operating system on which eclipse is to be installed.choose from drop down box Windows, Linux and Mac. Eclipse is packaged as a zip file, so extract the zip file into preferred drive.
Description
If the directory have a fairly long path, when the user unzip the downloaded files under Windows can get errors about path names being too long. In order to avoid such errors make sure that the default download directory is fairly deep on the hard drive that and first move this up fairly high on the hard drive before unzipping, and thereafter no errors about path names being exceeded.
In order to install Eclipse, required a tool which can extract the contents of a zip file. The tools like PeaZip, IZArc, 7-zip etc. Now, Right click on the downloaded Zip file and extract all the files to the preferred directory to be installed by clicking Extract. The image below display the Eclipse files folder extracted to the particular directory given.

Description
Immediately after lunching Eclipse, a window appears asking the drive to store the Workspace. A workspace is a collection of projects that are to be work with when launching Eclipse. A project can take any number of forms from a desktop executable, a library, a set of web pages, and more. If the client used to working with a product like Visual Studio, a workspace can be a little bit of an adjustment. Not all projects in a workspace have to be related and can take any approach that are like to creating a workspace.
User can create a single workspace and create every programming project under that workspace. Eclipse is actually geared towards this approach. It has some additional tools like working sets, but working sets allow for convenient grouping to make it easy to work with a subset of the projects and can also create any number of workspaces. The work space can be set to default or changed to new folder location using the Workspaces Preference window as shown in the image below.

Description
MySQL is the open source database and it provides cost effective,high performance. The installation process of MySQL shown as follows.
Step - 1
Initially,click on the below url, and follow the Next steps.
MySQL Download
Step - 2
Go to the end of the page and one can find options as shown below.
Step - 3
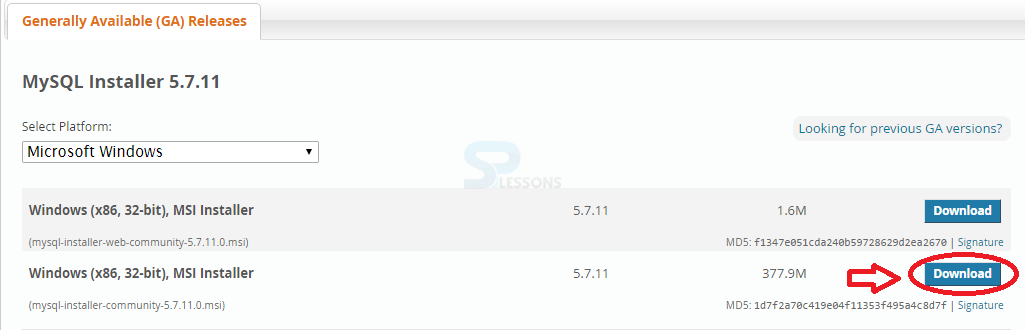
And it will redirected to another page, where following action to be done.Click on No thanks,Just start my Download.

STEP - 4
Click on MySQL Installer Community.

Step - 5
It show a welcome box, Just click on Next button.
step - 6
Check the box and click Next button,to accept the terms and conditions.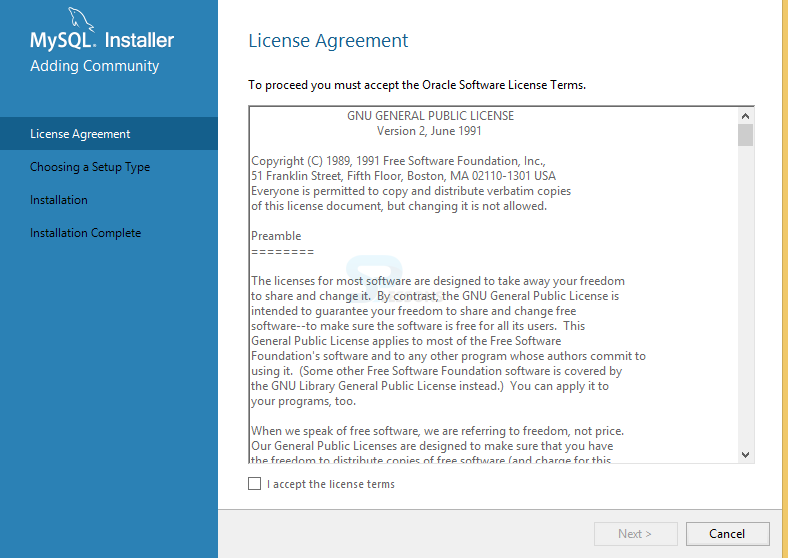
step - 7
Choose the setup type and click Next button.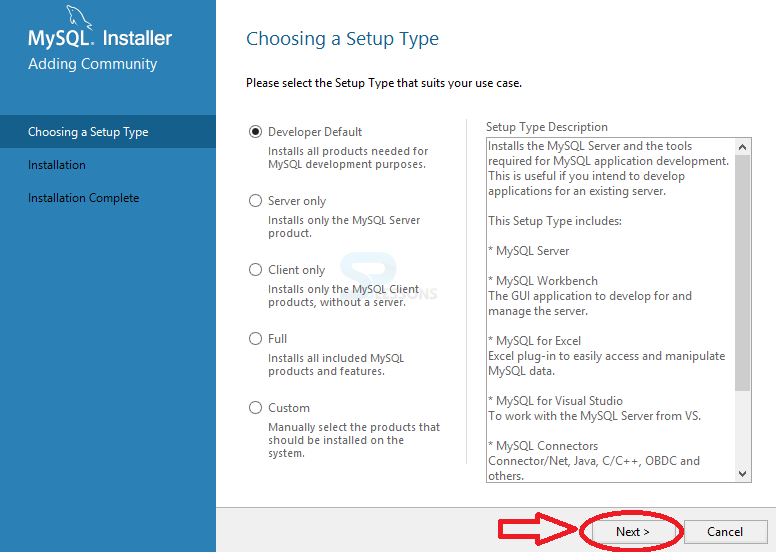
Step - 8
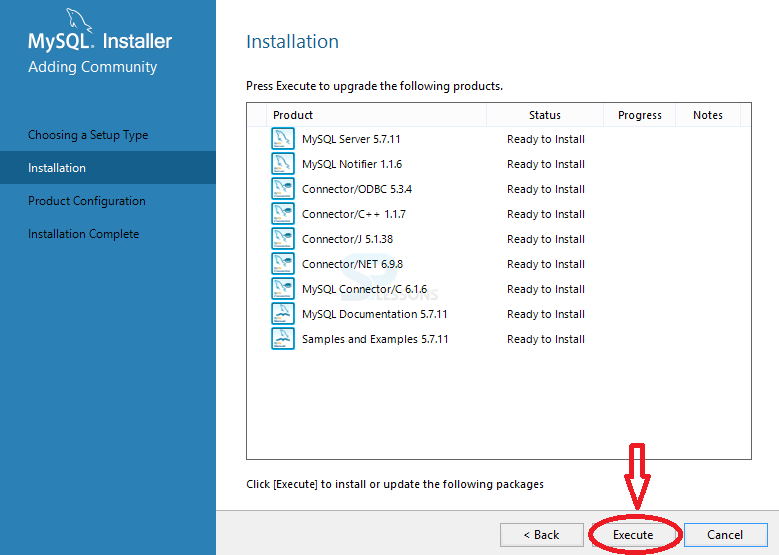
Click on Execute button, to run the installation setup.
Step -9
Click on Next button for product configuration.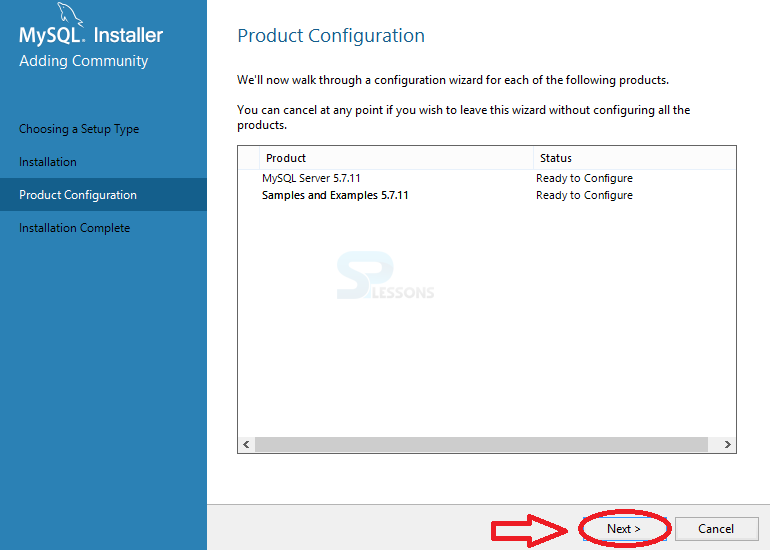
Step - 10
Select the type of network and click Next button.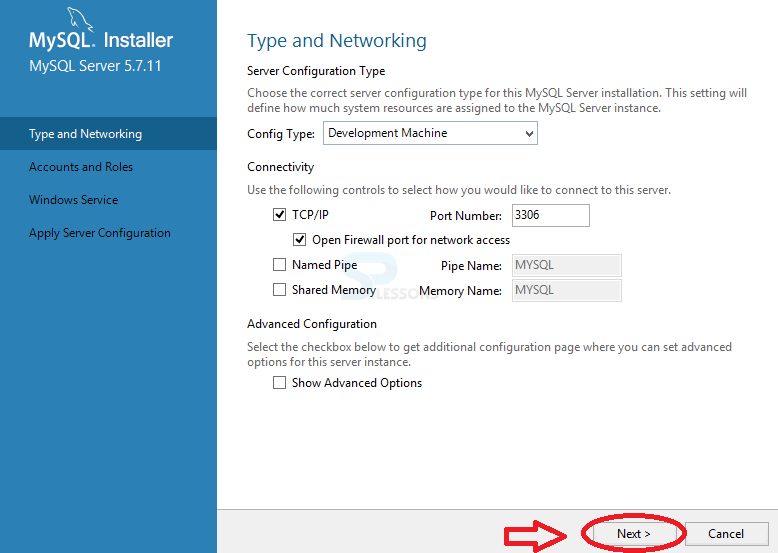
Step - 11
Enter MySQL Root password of strong entity type and repeat the same password, And click Next button.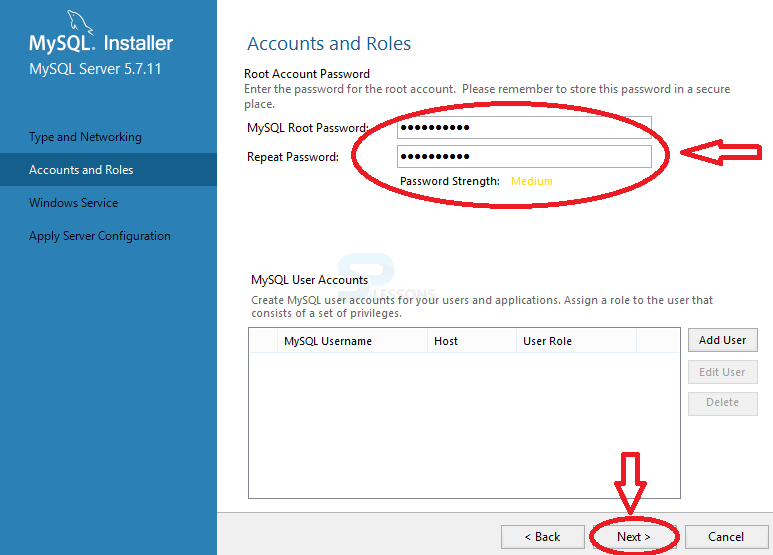
Step -12
Check all window service configurations and click Next button.
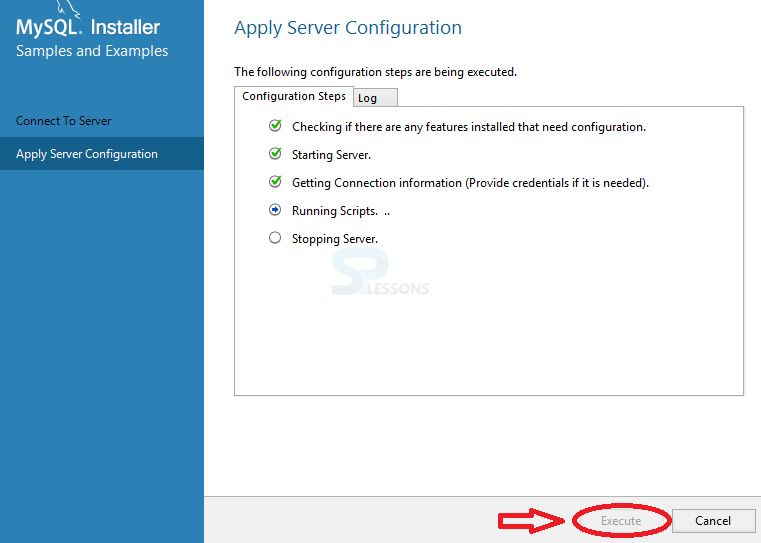
Step -13
Check all the server configurations and click on Execute button.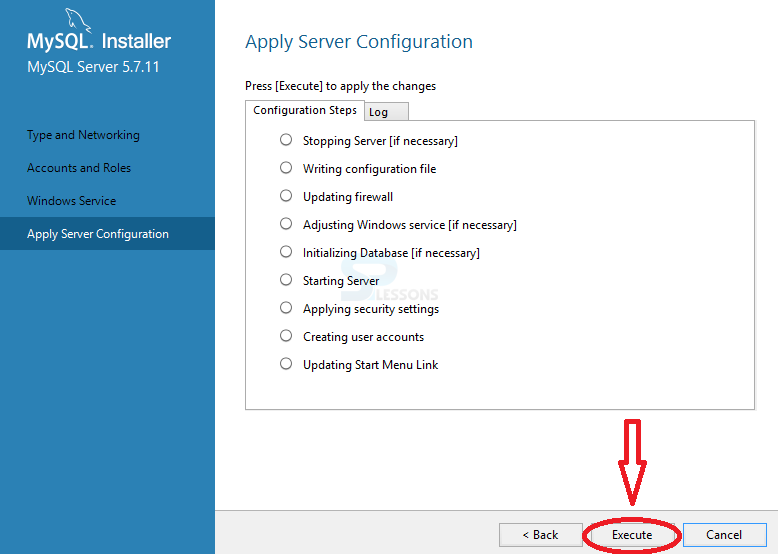
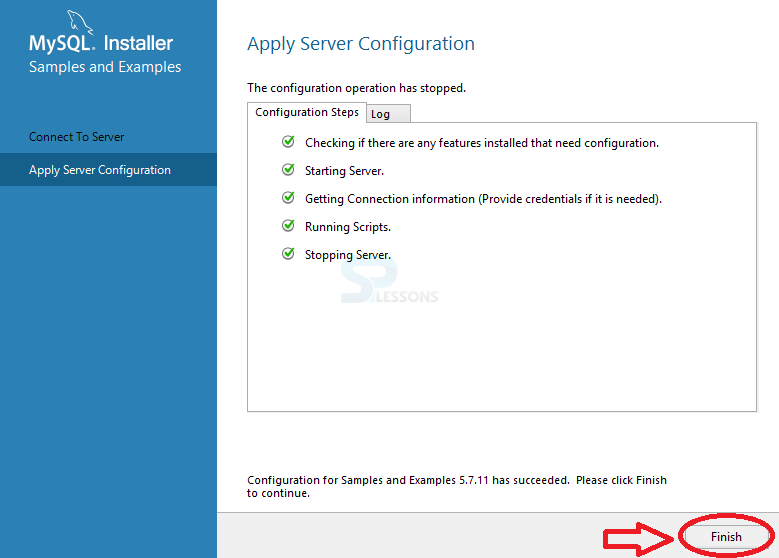
Step -14
After checking all server configurations, Click on the button to Finish .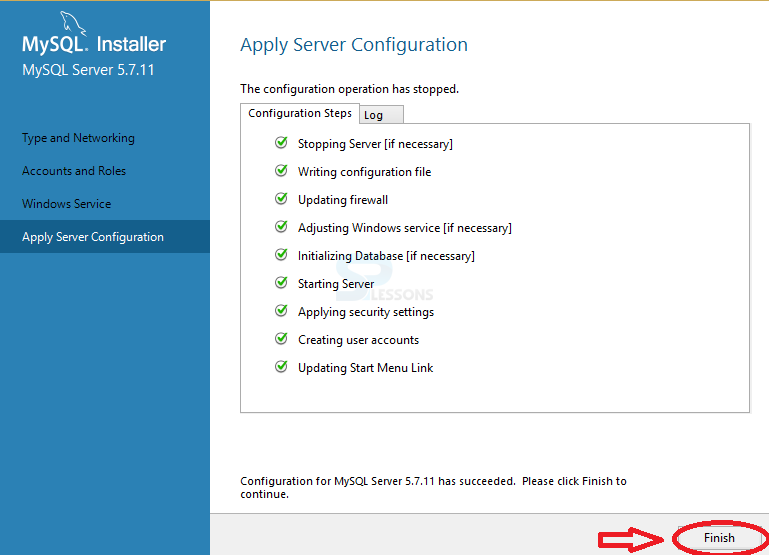
Step - 15
Click the button to proceed for the Next step.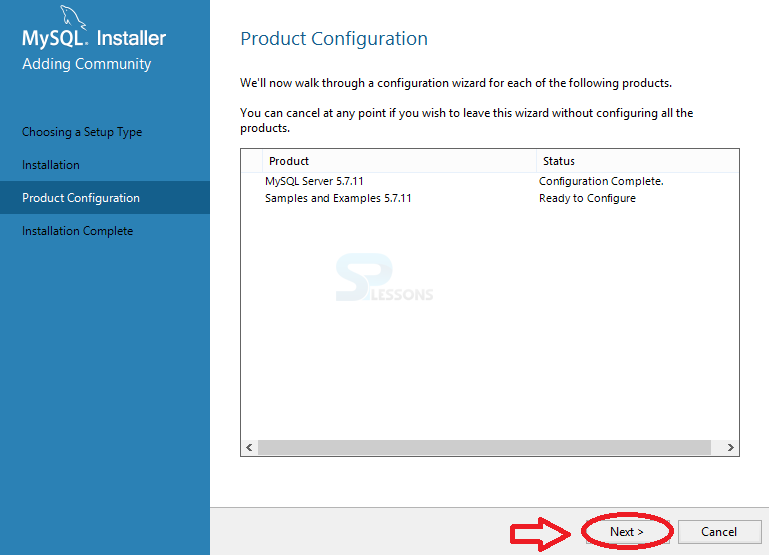
Step - 16
Click on Check box and click Next button.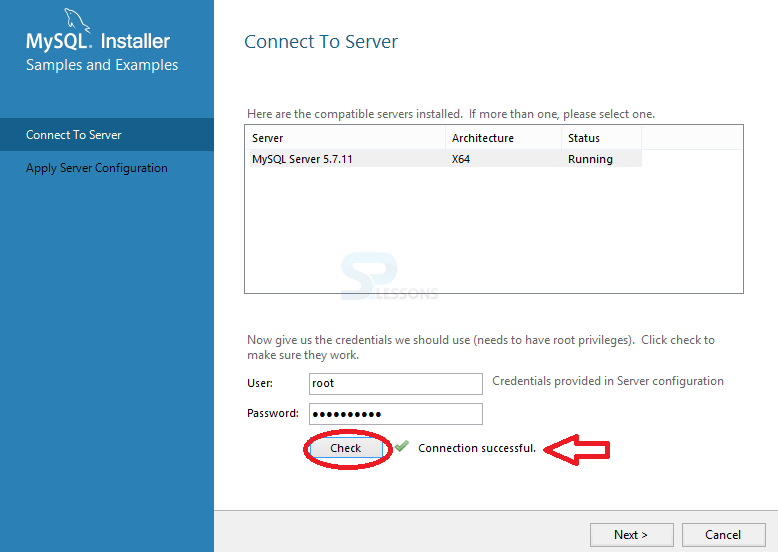
Step -17
Click on Execute button.
Step -18
Click on Finish button.
Step -19
Product configuration will be shown.Click Next button.
Step - 20
Click on Finish button. which completes installation. 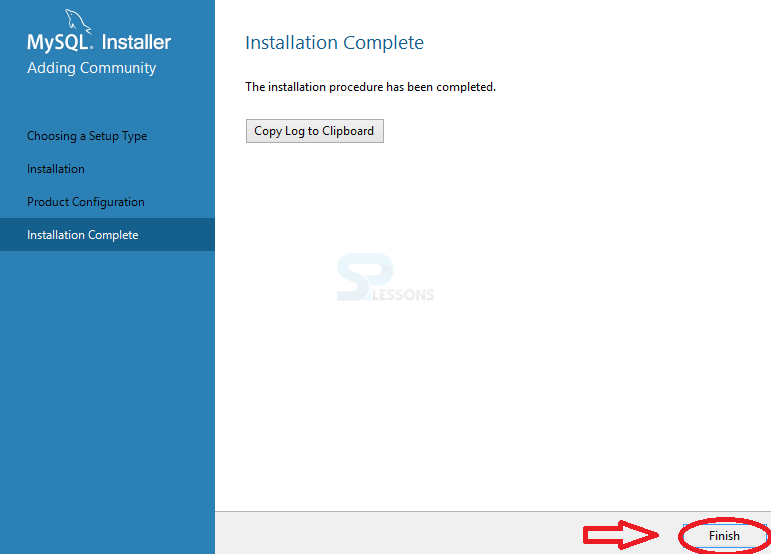
Description
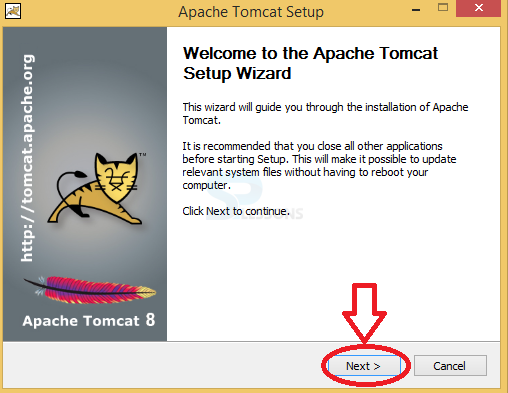
Tomacat is an open source environment ,it was developed by apache software foundation (ASF) used to implement java server page specifications and Tomcat will be used as a server while doing the projects with servlets and JSP .The installation Apache Tomcat shown as follows
Step - 1
Enter the Next button.
Step - 2
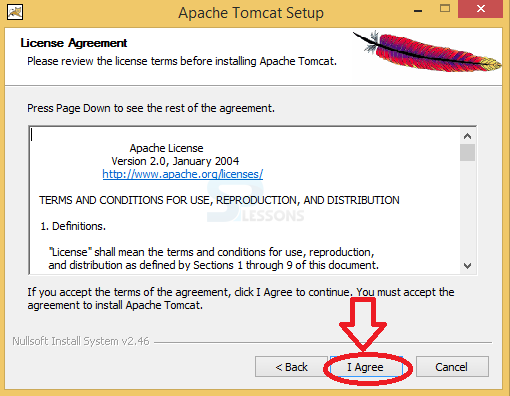
Enter the Agree button.
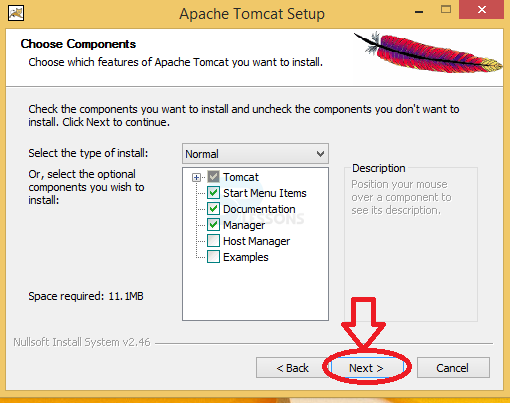
Step - 3
Check the components and click the Next button.
Step -4
Enter user name and password.
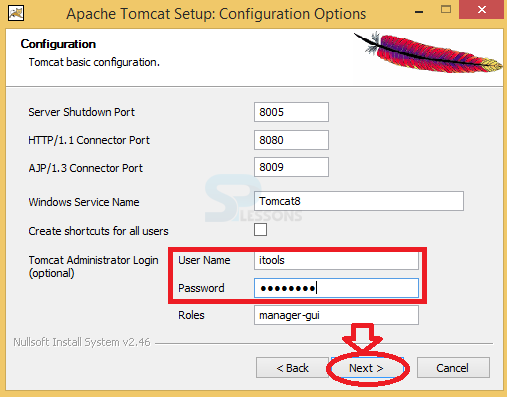
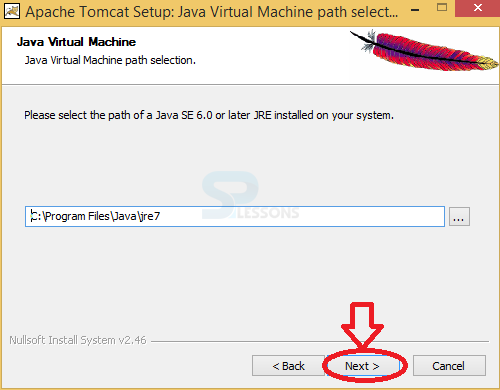
Step - 5
Enter the Next button.
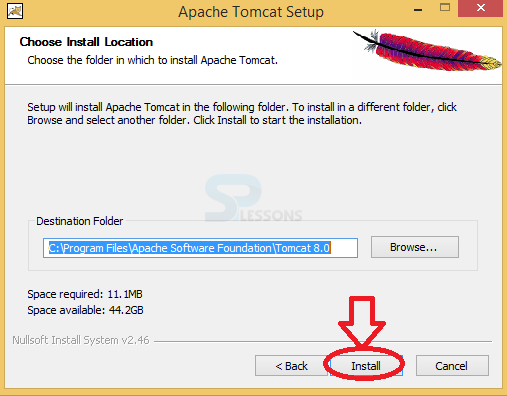
Step - 6
Click Install to complete the installation.
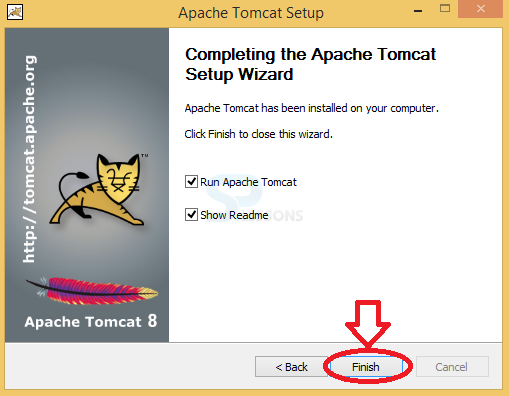
Step - 7
Click the Finish button.
Description
Now proceed to installation of Spring framework and libraries. Steps to set up the installation as follows.
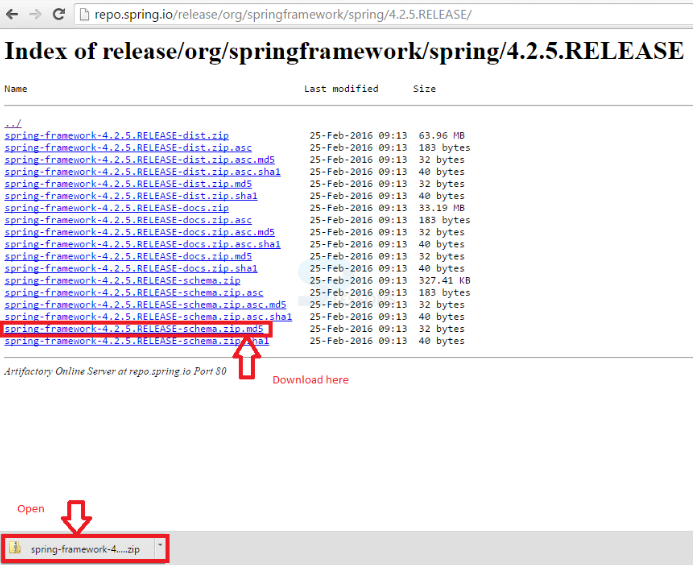
- Download Spring framework binaries from Spring frame work download link.
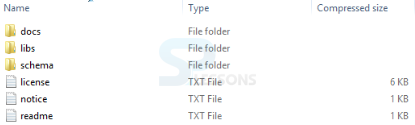
- Now unzip the downloaded file. Then it gives a directory structure as follows .
- Developer will keep libraries under the directory. Make sure to set the class path variables on this directory correctly. Otherwise programmer might have problems while running the application.
- If developer is using eclipse tool then no need to set the class path because all the settings will be done through eclipse.
Key Points
- Spring Environment Setup - Latest version Spring Framework available in Spring framework download link
- Spring Environment Setup - Spring jar files should be added to the eclipse tool for the debugging.
- Spring Environment Setup - Apache Tomcat is used to deploy Servelet and JSP'S.